JET 10-20 Drum Sander Strip Installation
This documents successful set up of the Jet 10-20 drum sander. The 10-20 is a useful machine. It is great for smoothing and minimally dimensioning top, bottom, and side planks used in acoustic guitar construction. But grit strip installation is just about impossible if you follow the owners-manual and the JET instruction video.
When I was in college I flunked out of mechanical engineering. Required course chemistry made no sense at all to me, though I had an A in second semester calculus and B+ in engineering physics courses. (Not to worry, I was a wizard computer programmer.) Since that time I have repaired and upgraded countless badly designed wood and metal working machines. These machines were designed by the guys who did pass chemistry and therefore were hired as engineers in industry. So, once again as a non-engineer, I figured out how to make a badly designed machine work properly. I am finishing the work the other engineers failed to. Those guys could not even write instructions correctly.
The 10-20 has very hard to use sanding strip clamps. Crap is the word which comes to mind. You have to clamp one end, roll the strip on the drum and clamp the other end. Now, I have fairly strong and very coordinated hands. But unlike the guy in the Jet instruction video, I am unable to squeeze those clamps by hand, especially the right-hand clamp. And, most important, the instruction manual leaves out a critical detail making the whole thing work. Amazingly, the original sanding strip was incorrectly installed at the factory.
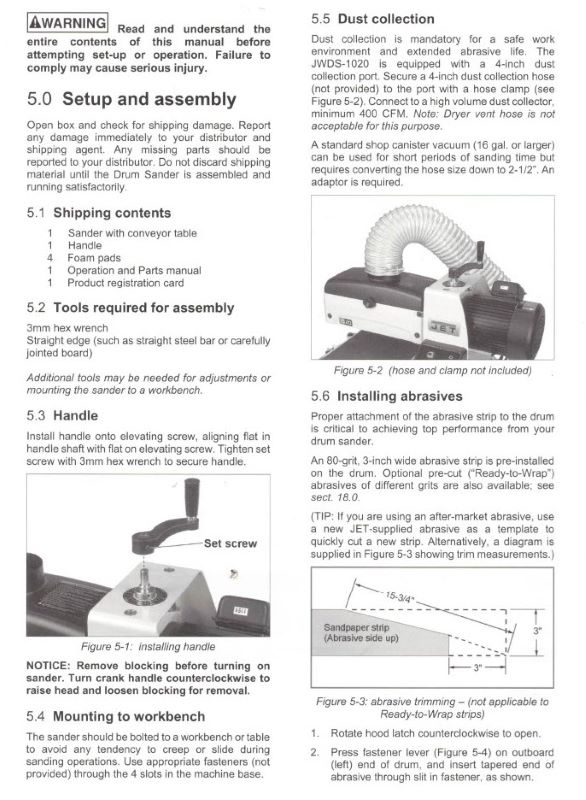
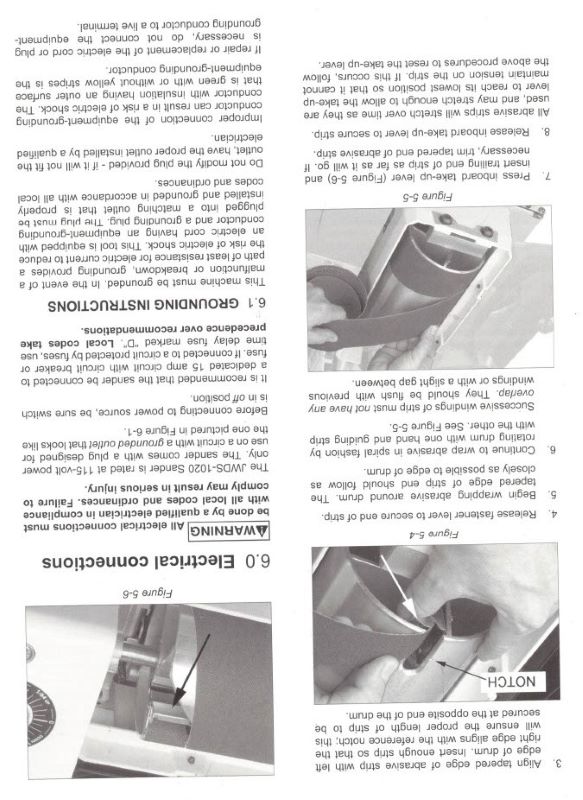
Below is an image of the relevant pages from the instruction manual. This attempts to explain the clamping system.
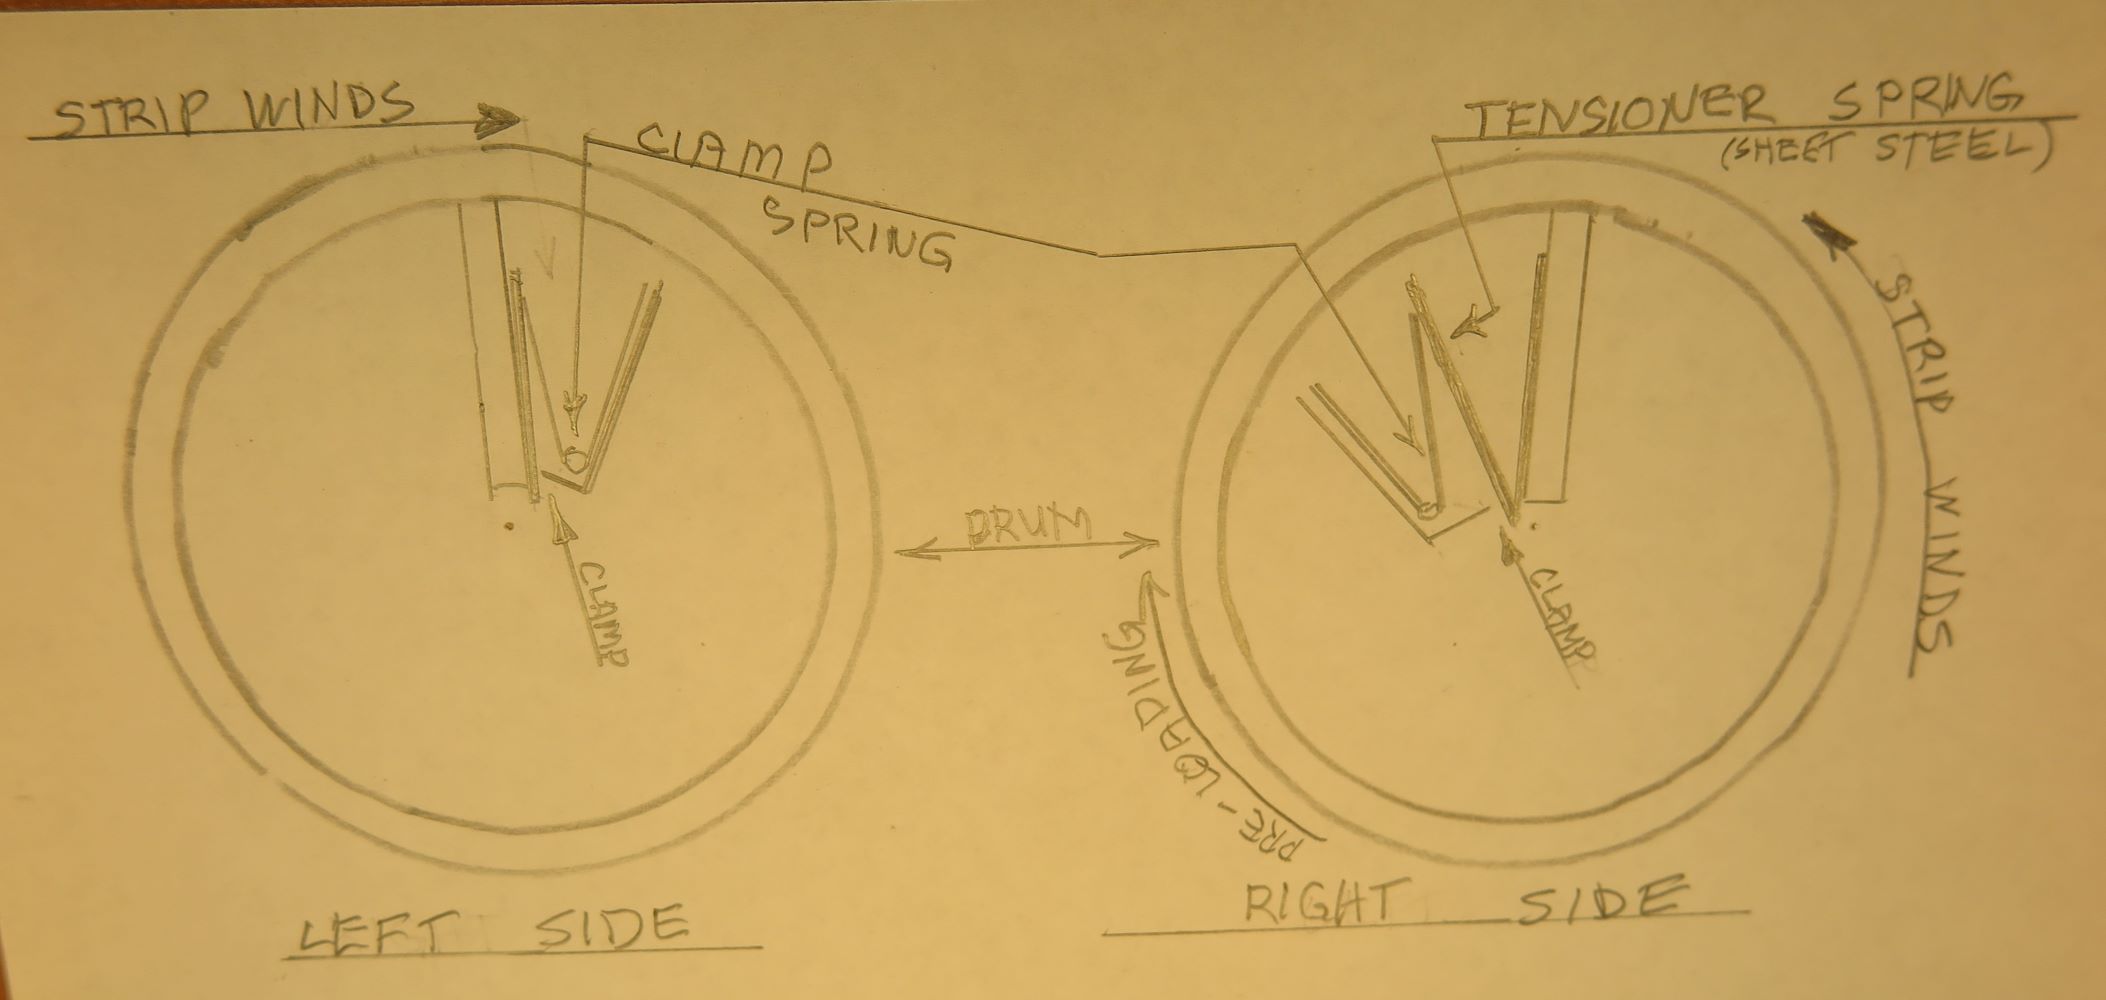
Next, a diagram. This shows both ends of the drum and the clamps. Drawing only shows relevant parts and is not to scale.
Installation
To install and tension the sanding strip, cut off 3/8-inch from the left end of the strip. Install left end in the left side clamp. You have to squeeze the clamp completely closed to accomplish this. See below for the recommended tool for this. Roll the strip onto the drum keeping it as tight as possible. Slide the right end into the clamp.
This is the instruction missing from the JET manual and video: After inserting the strip into the right clamp – clamp held completely closed – and keeping the clamp compressed, move the clamp assembly away from you. This is to say, pre-load the tensioner, then release the clamp.You are bending the tensioning spring, which is spring steel sheet metal. Push the strip into the clamp as far as possible before releasing the clamp. See diagram above.
Helpful Tricks
I only buy JET pre-cut strips. They are too long by 1/2-inch at least.
Cover 3-inches of the point on both strip ends with metal duct tape. This is made by Nasua. Use the thick stuff and cut or trim to fit. This helps the pointed end slide into the clamp easer and prevents tearing.
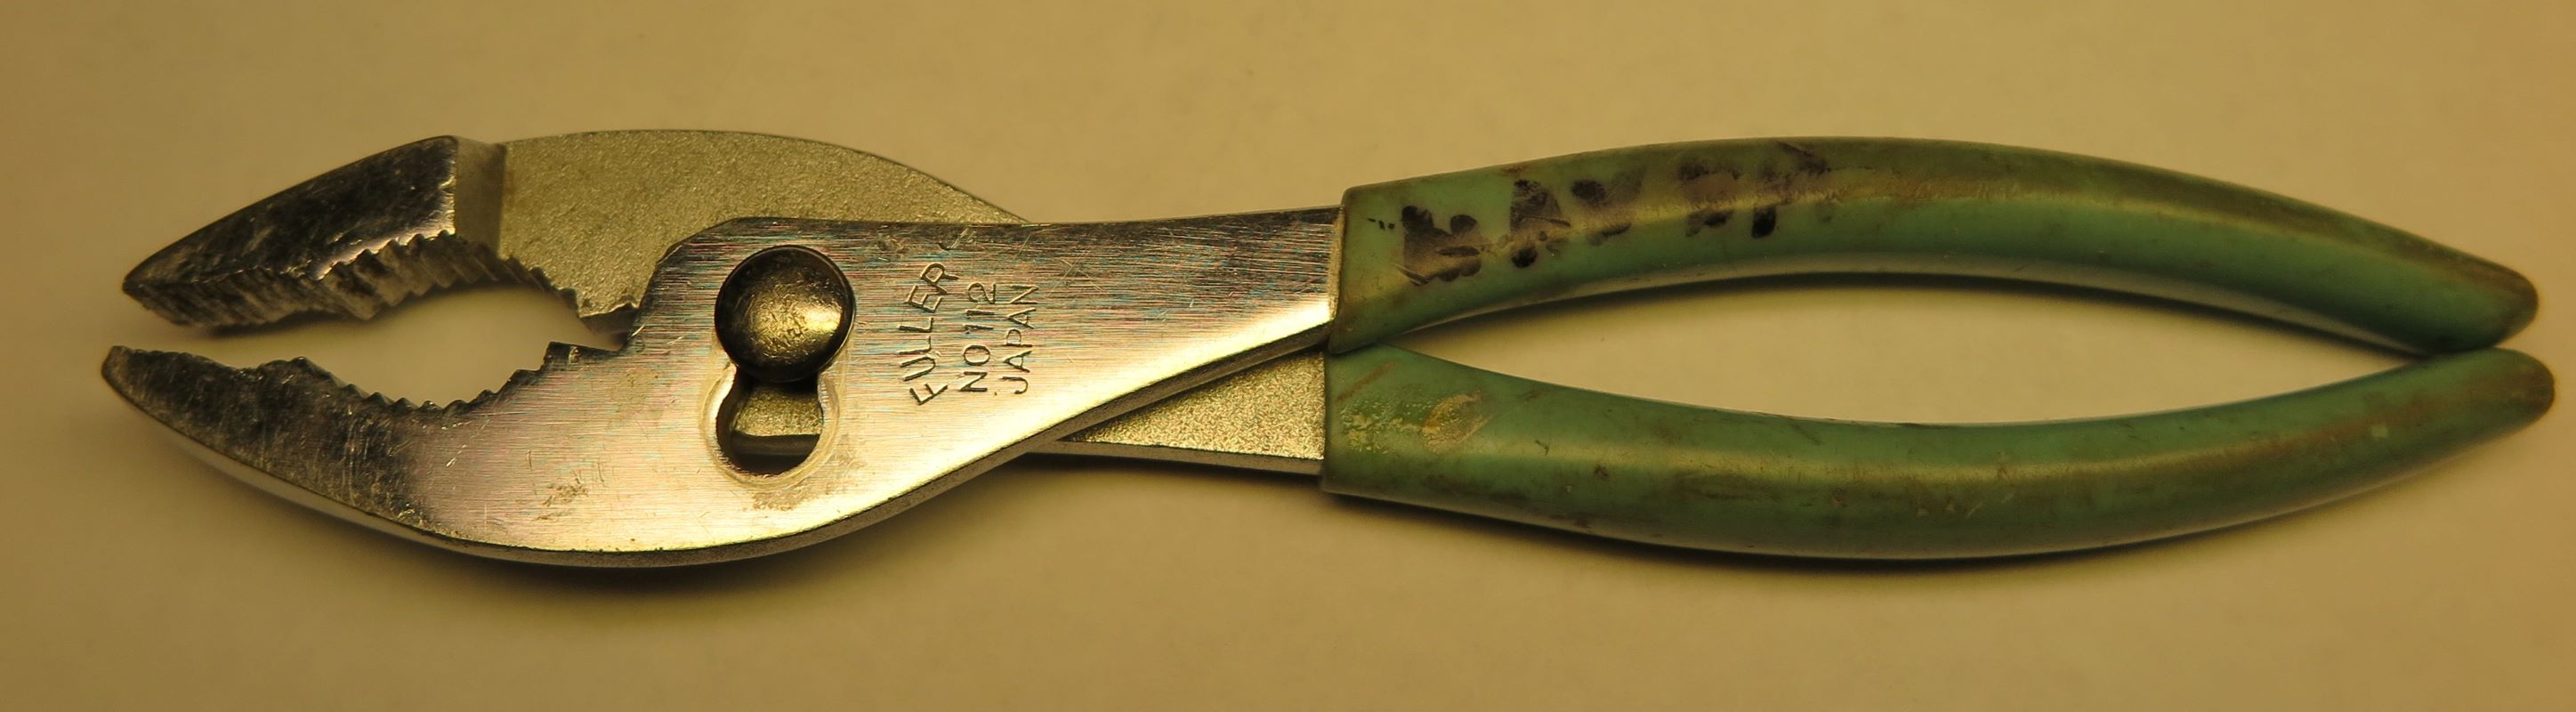
Finally, I experimented with a bunch of different pliers and clamp gripping tools. None of them were close to working except for a pair of gas pliers. (That’s what my dad called them and I am sticking to it.) These are shown below.