Plenty of acoustic guitar repair work requires removing and replacing the back. It is fairly easy to loosen the back panel from the liner blocks (aka, kerfing). But the neck and tail blocks are much more difficult. On quality built guitars, you risk major damage to the back attempting the pry several square inches of glue surface apart. This article suggests a solution.
First, tools
Below is a small impact hammer and a miniature froe. The froe is Stewmac part number 4465. They call it a seam separation knife, but it is in fact a froe and can be used as such in other situations. Above the froe is a black plastic dead blow hammer. This is one of the smaller versions of this tool and is useful in many other areas of luthiery. I am unable to find the original of this little hammer. However, the Bearcat No. 10S08 8oz. is also nice. Point is, you want less than 12oz hammer weight for luthiery. 6-8oz is about right. We are not demolishing factory buildings here.
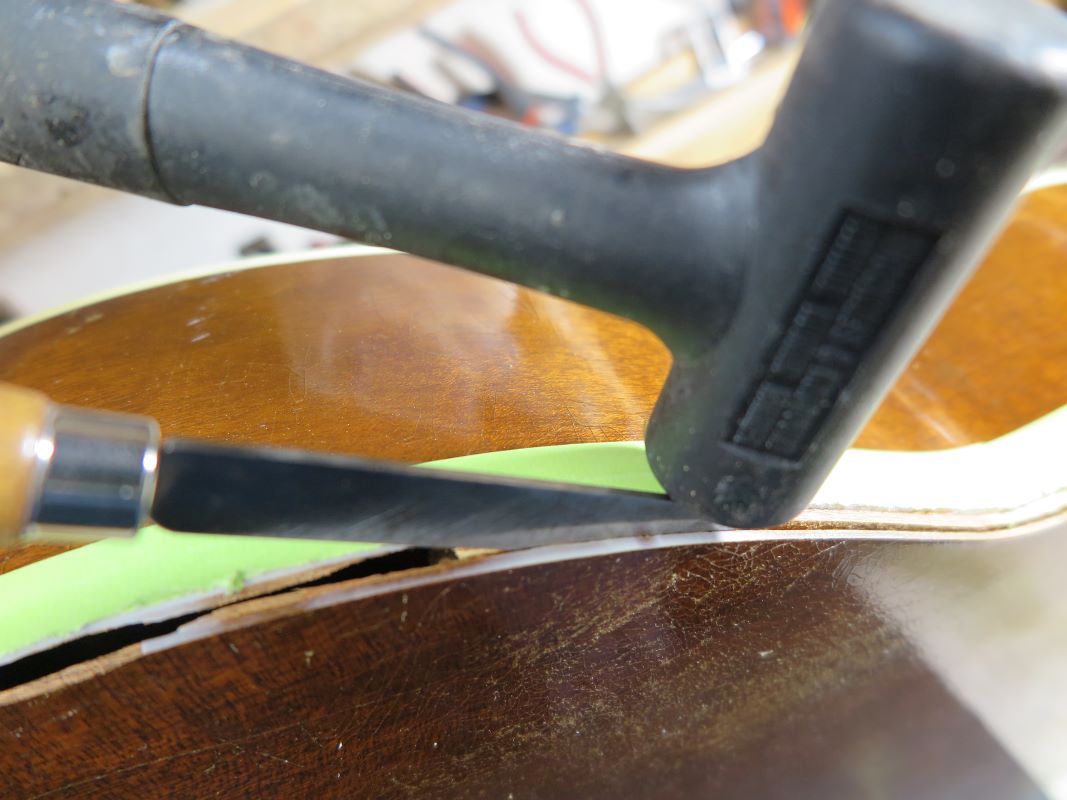
Crack the back loose from the sides and the liner blocks to within 6 inches or so of the tail and neck blocks. To go any closer risks cracking the back panel. No need to go closer anyway.
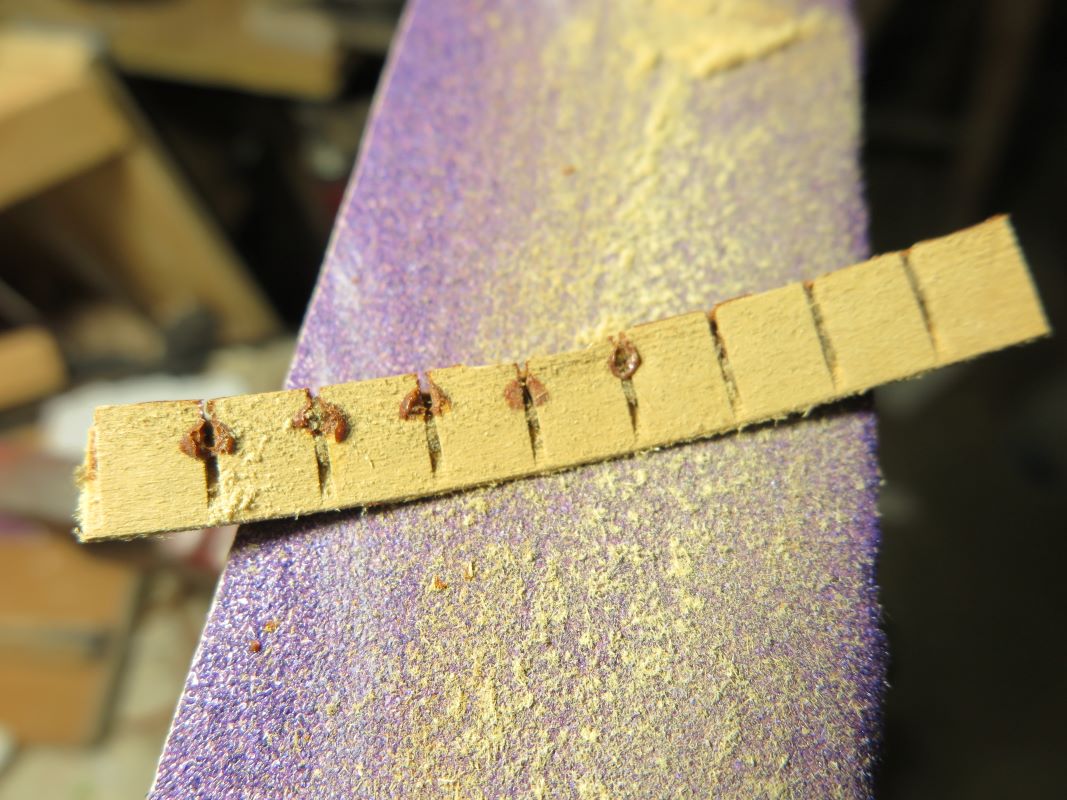
This image shows a procedure for sawing through the neck block next to the back. This cut started 4-6 inches away from the tail block. And, yes, I did cut some of the liner blocks. I will have to replace that material in most cases.
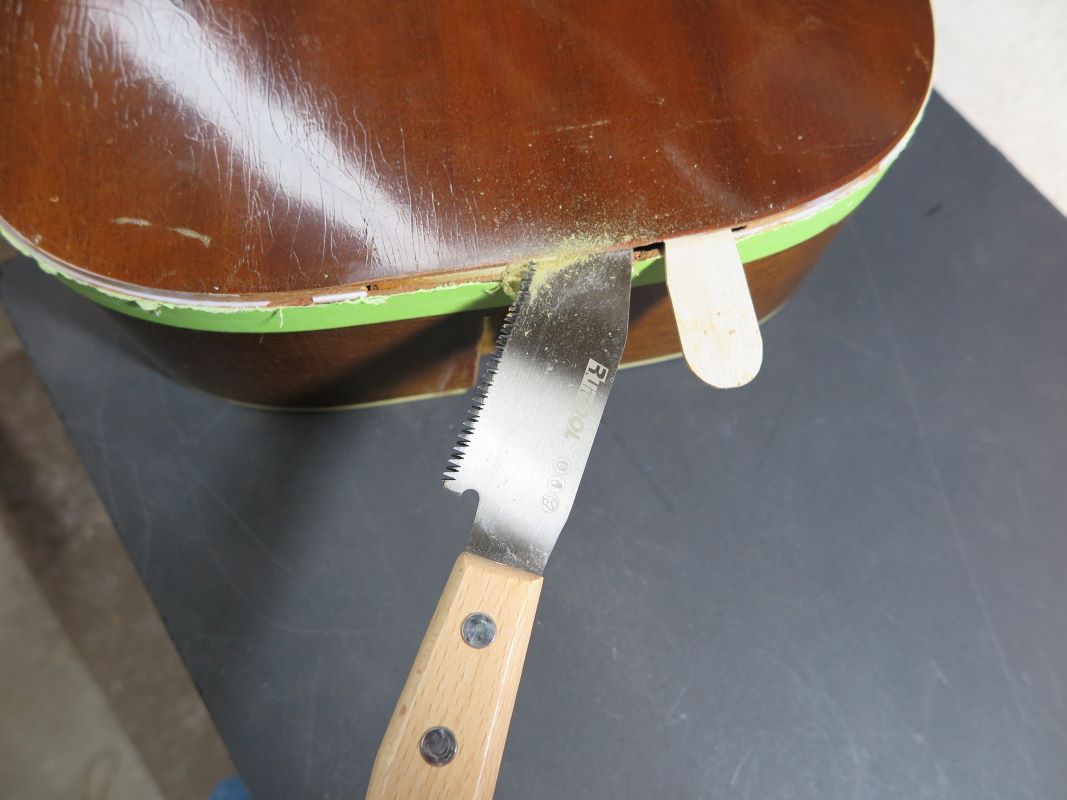
In the image above, note the little maple chip stuck into the side. The chip is 1/6-inch thick. This serves to raise the back a bit so the saw does not bind. The idea is to saw parallel to the back. This is not a precision cut. You don’t want to cut into the back and you must avoid cutting down into the sides at any point. With a good saw, this cut pretty much guides itself. But practise on a junker first if you are not sure of your saw tool skills.
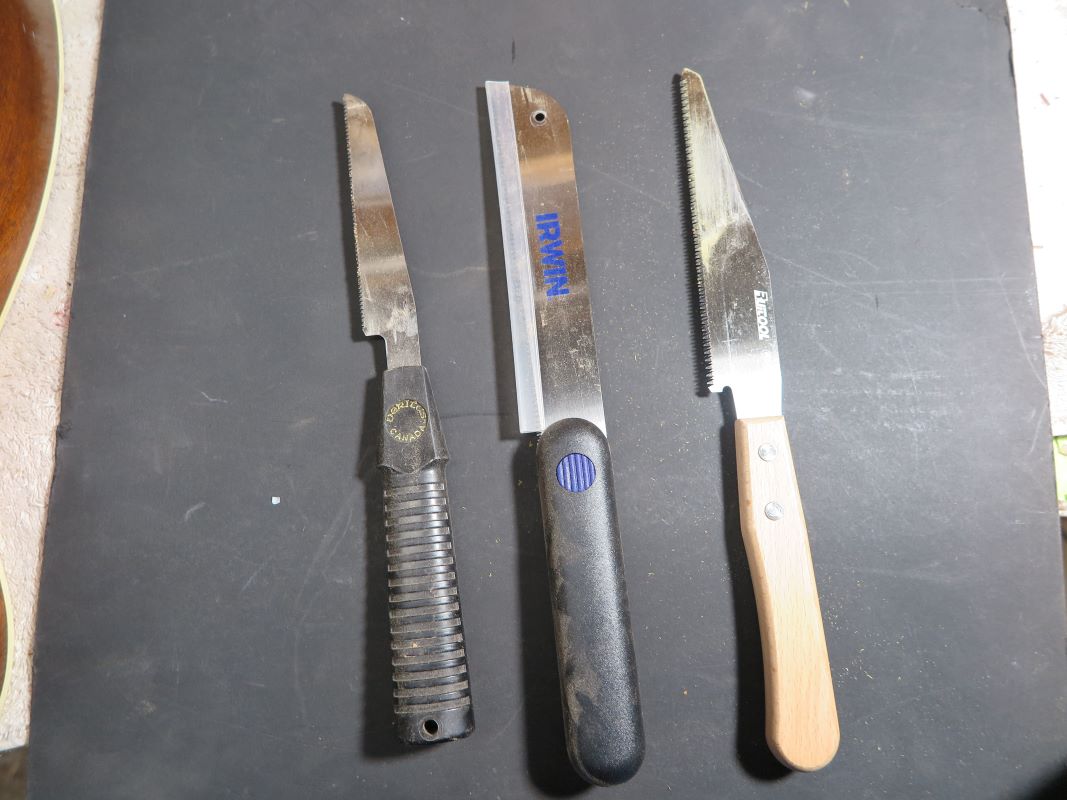
But what saw is best for cutting the tail and neck blocks? The image below shows three possible choices. The saw on the right is by far the best tool. On Amazon, this is the "RUITOOL Japanese Hand Saw 6 Inch Pull Saw SK5-Steel Flexible Blade 14TPI Flush Cut ". I just about never recommend tools made in China, but this excellent saw is designed in Japan. They do know a thing or two about saws. However, it is not a "flush cut" nor is it a "flexible blade" saw. Unlike the other saws shown, it is very stiff and cuts aggressively. The teeth cut both sides. This saw is perfect for cutting tail and neck blocks next to the back panel.
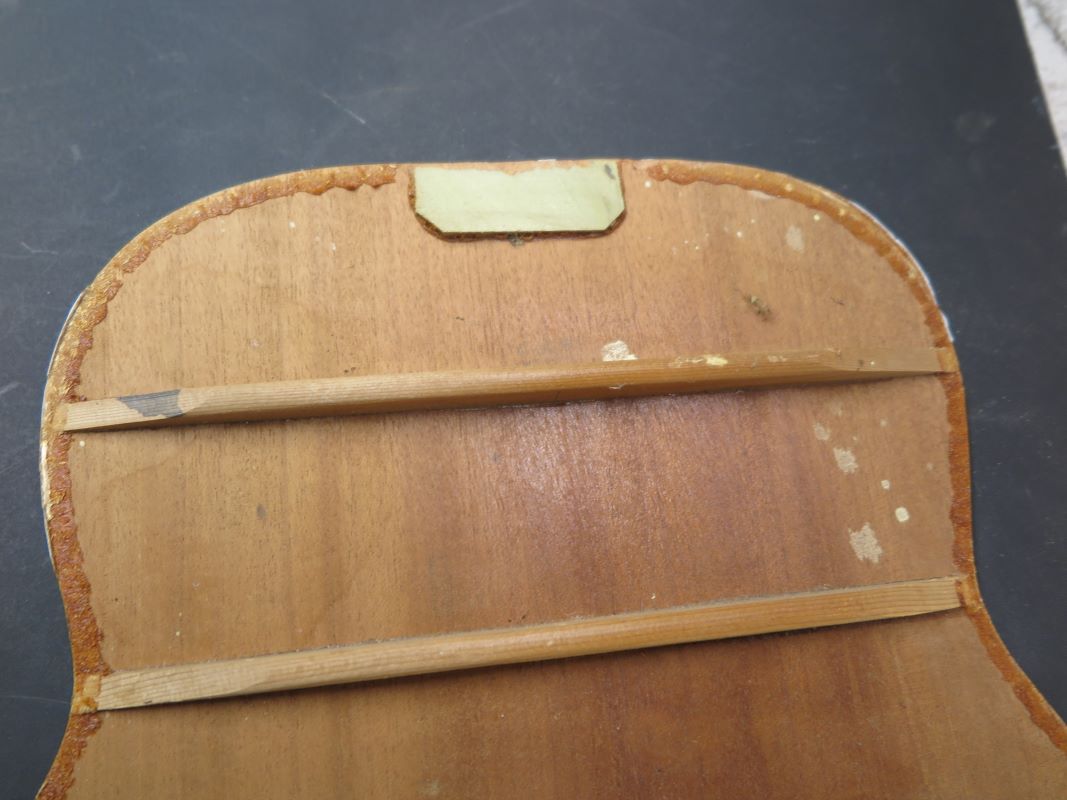
Back released.
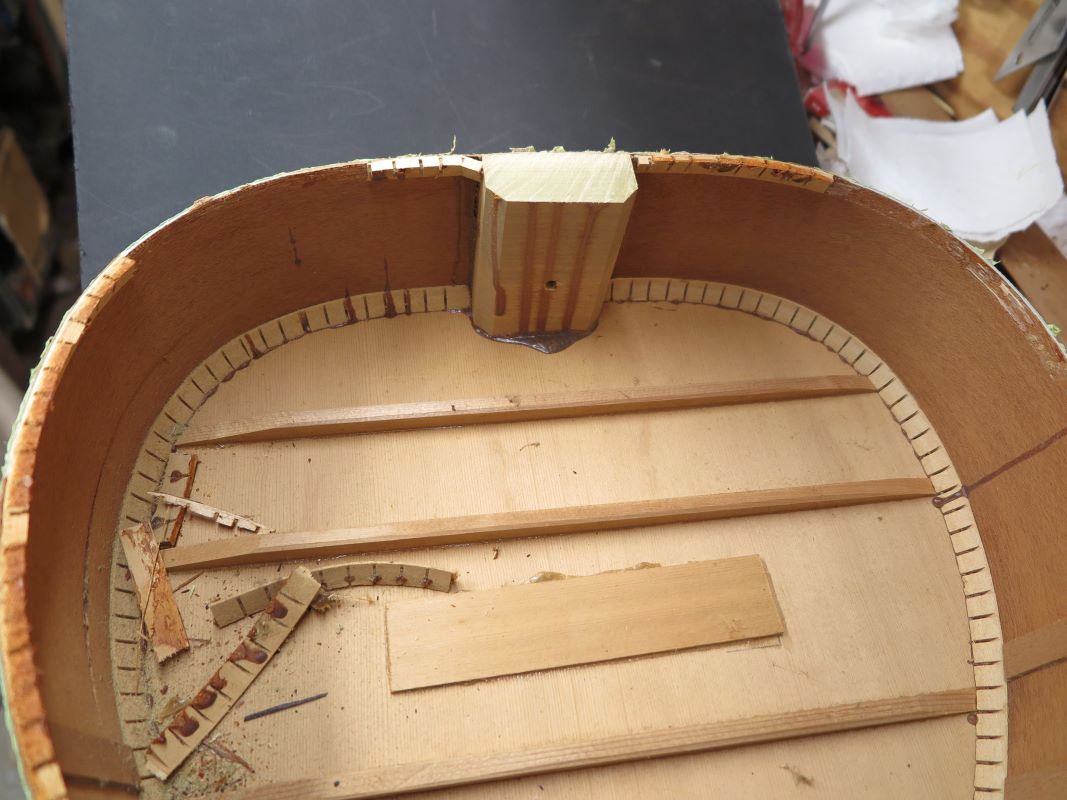
Well, looks like the liner blocks were about to fall off anyway.
Back after removal. Use the froe to pop the rest of the liner blocks away from the back after the tail and neck blocks are cut through.
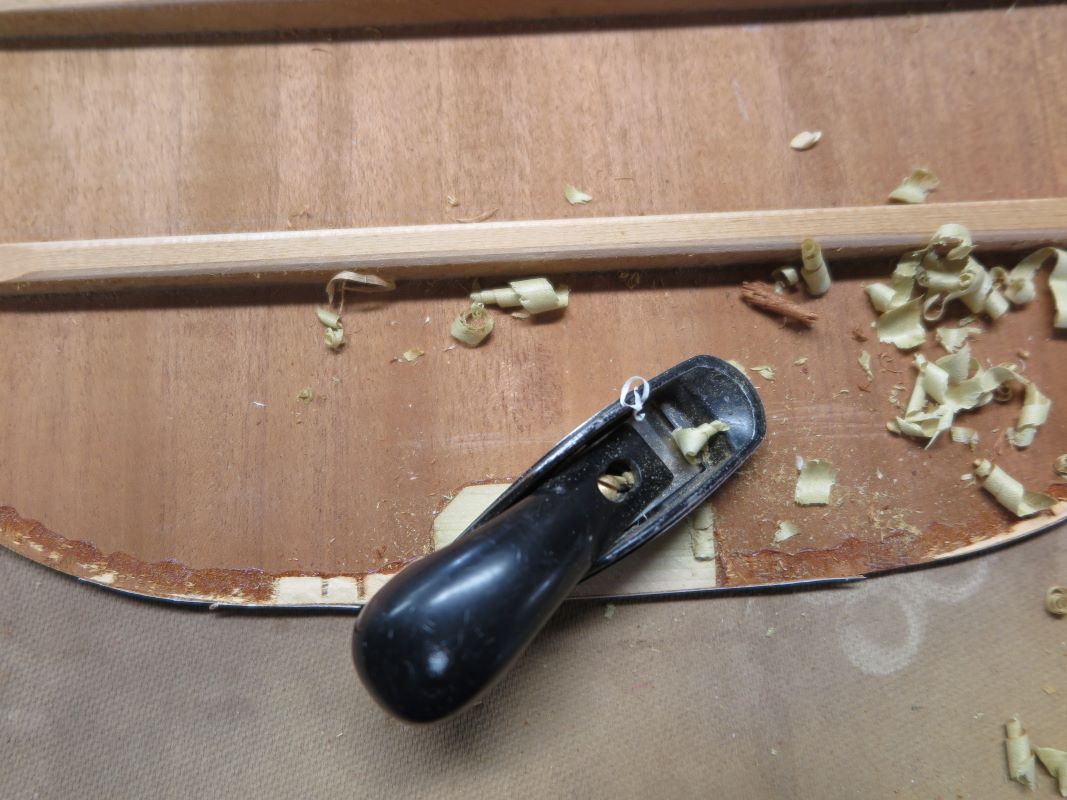
There is a bit of tail block adhering to the back. This is removed. Use a small plane to cut most of it away. You might be tempted to just glue the tail and neck blocks back together. But no. It is not reasonable to attempt to reattach the cut tail and neck blocks when reattaching the back. The wood removed by sawing makes this a sloppy cockeyed mess. There is a better way shown below.
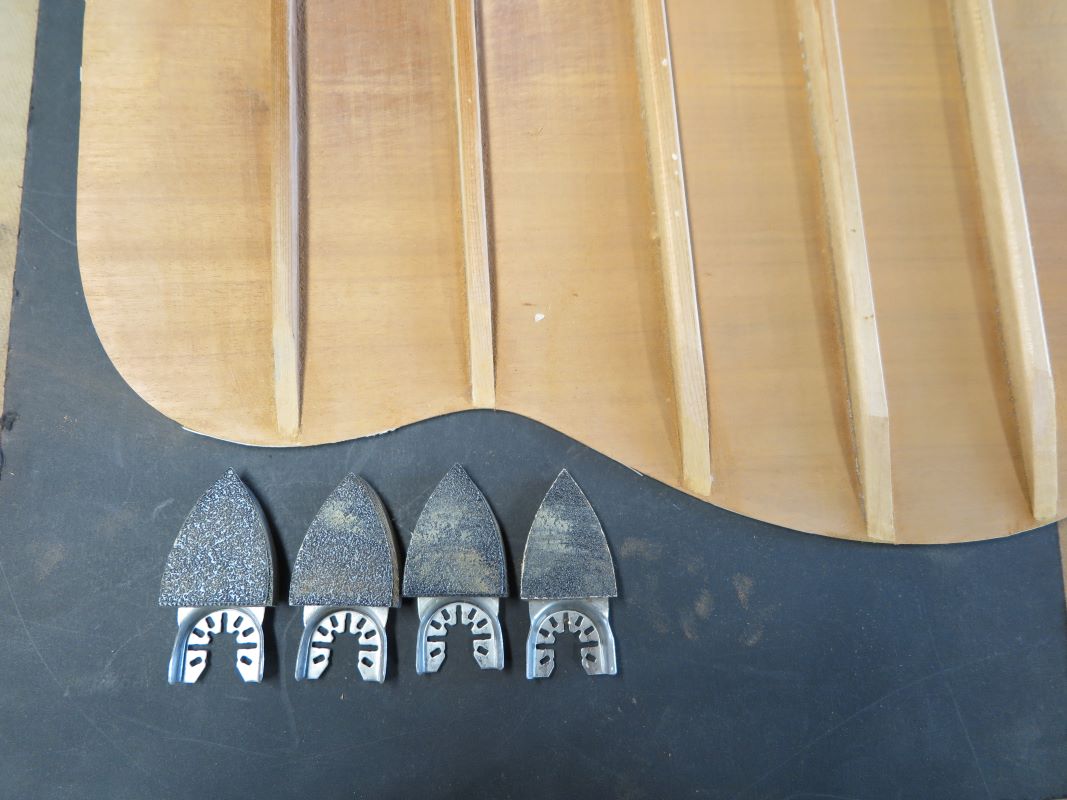
All liner block wood and glue residue must be removed from the back. Use an oscillating tool for this. Use 80 grit sanding pads. Don’t waste time on higher number grit abrasives. Also, change out the pads frequently. You can only sand for a minute or so before the plastic substrate melts. That oscillating tool moving the sanding pad against wood generates tremendous friction and heat. I go through 8 pads at least when cleaning up a back panel.
Back panel all cleaned up.
What about replacing the liner blocks? Try to use the originals as much as possible. Problem is, they may well have glue residue on the surfaces mating to the sides. This must be removed. Also, remove glue from the sides. Put a sanding block in the vise and sand away the glue.
Glue the liner blocks back on, add new as needed to replace or repair the missing
Restoring the tail and neck block.
First, plane down the liner blocks all around the edge just enough to remove all glue residue. Use a small adjustable double square (Starrett No.4) to test how much to cut all around. The liner blocks should stand proud of the sides same height all around the sides.
The problem here is to level the now distorted blocks, add wood, and plane down the added wood thus restoring the glue surface on both blocks.
First you must create a level glue surface for adding new block wood. I am calling this "new wood". To create this glue surface you must level the distorted tail and neck blocks, then add wood back, then adjust (not level) that. Seems like a lot, but it is worth the trouble for a quality result.
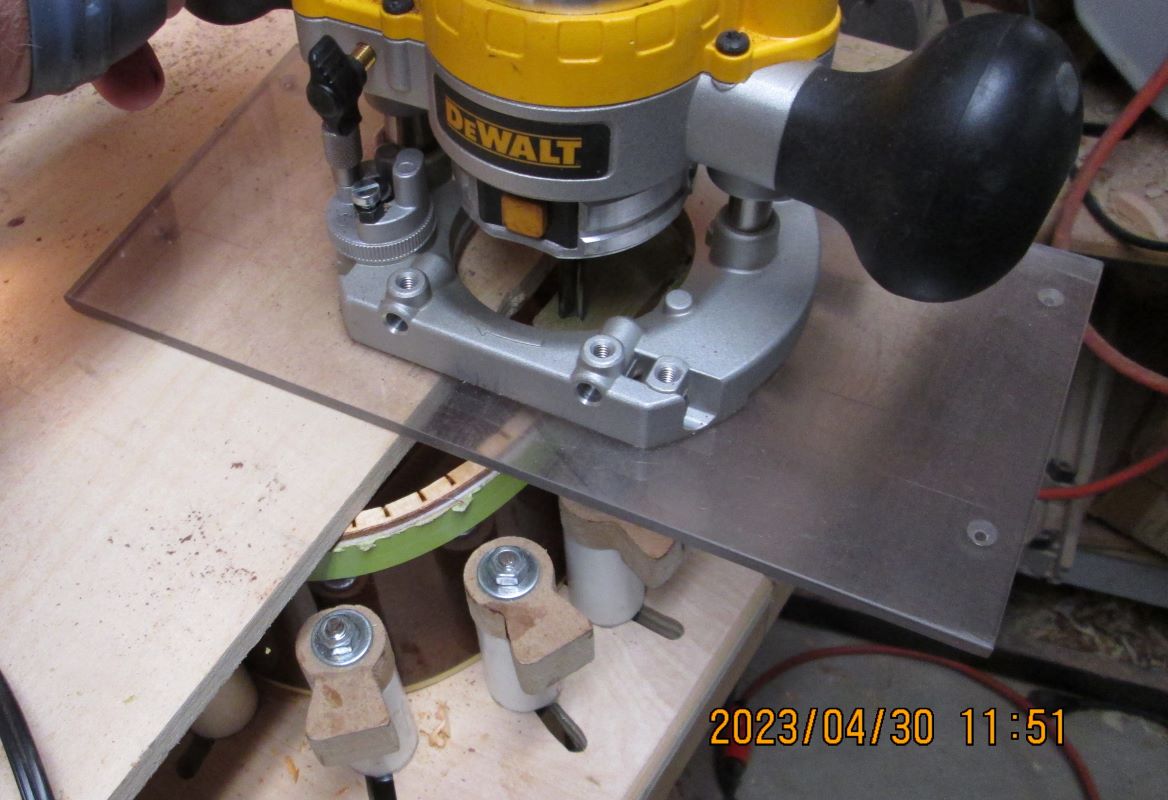
Use a router with plunge router base and a 3/8-inch flat bottom bit installed. (I highly recommend the Dewalt DWP611PK kit as the best all around router for luthiery work.) I added an extra long Plexiglas base for this operation. The Plexiglas base is a must for router stability.
Adjust the router depth of cut so the bit just touches the lowest part of the block. The depth keeping rod works nice for this. The router is resting on a piece of 1/2-inch plywood which rests on the guitar sides. You can see in this image that the liner blocks are neatly adjusted to best height.
After routing the block flat area. Don’t cut through the side wood.
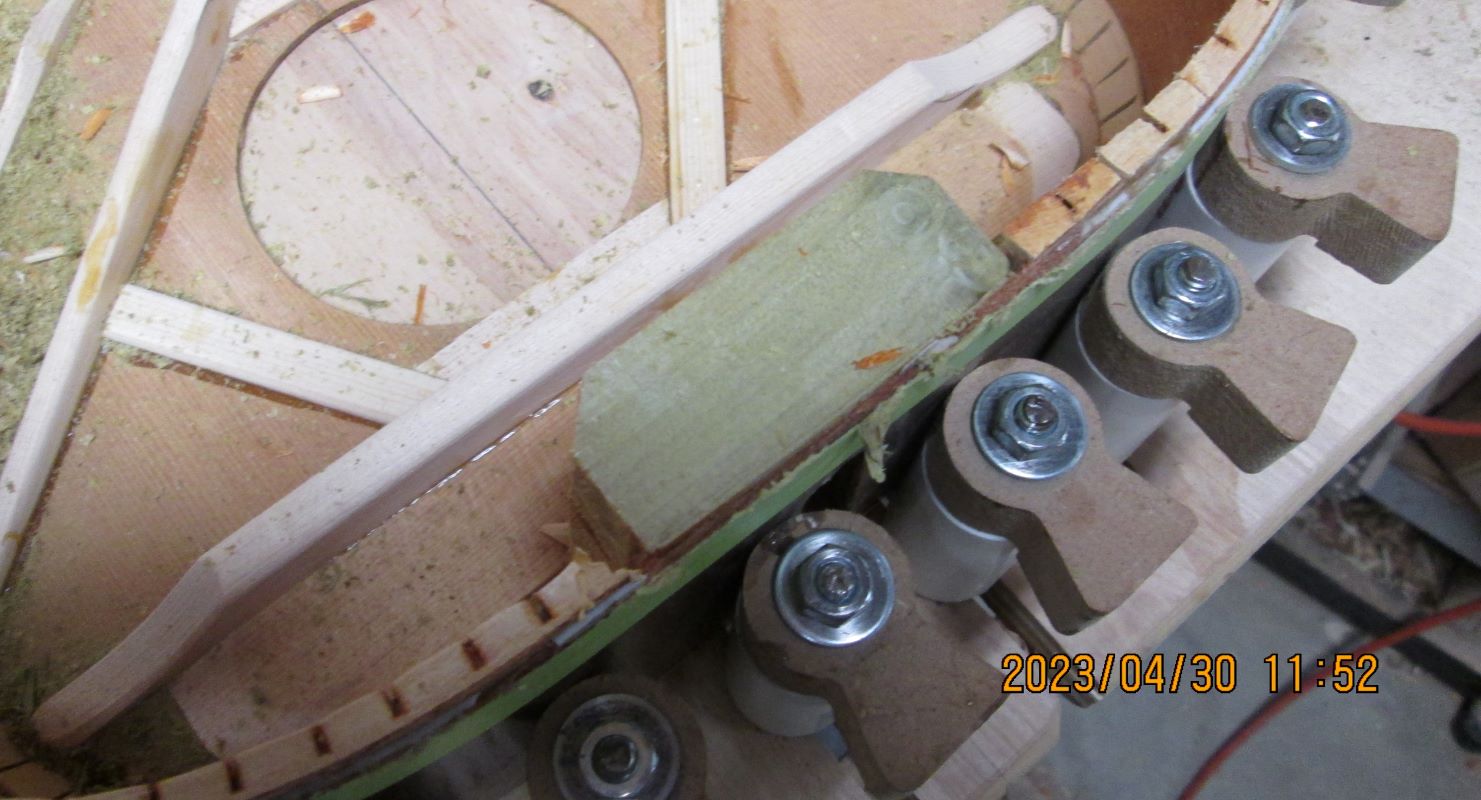
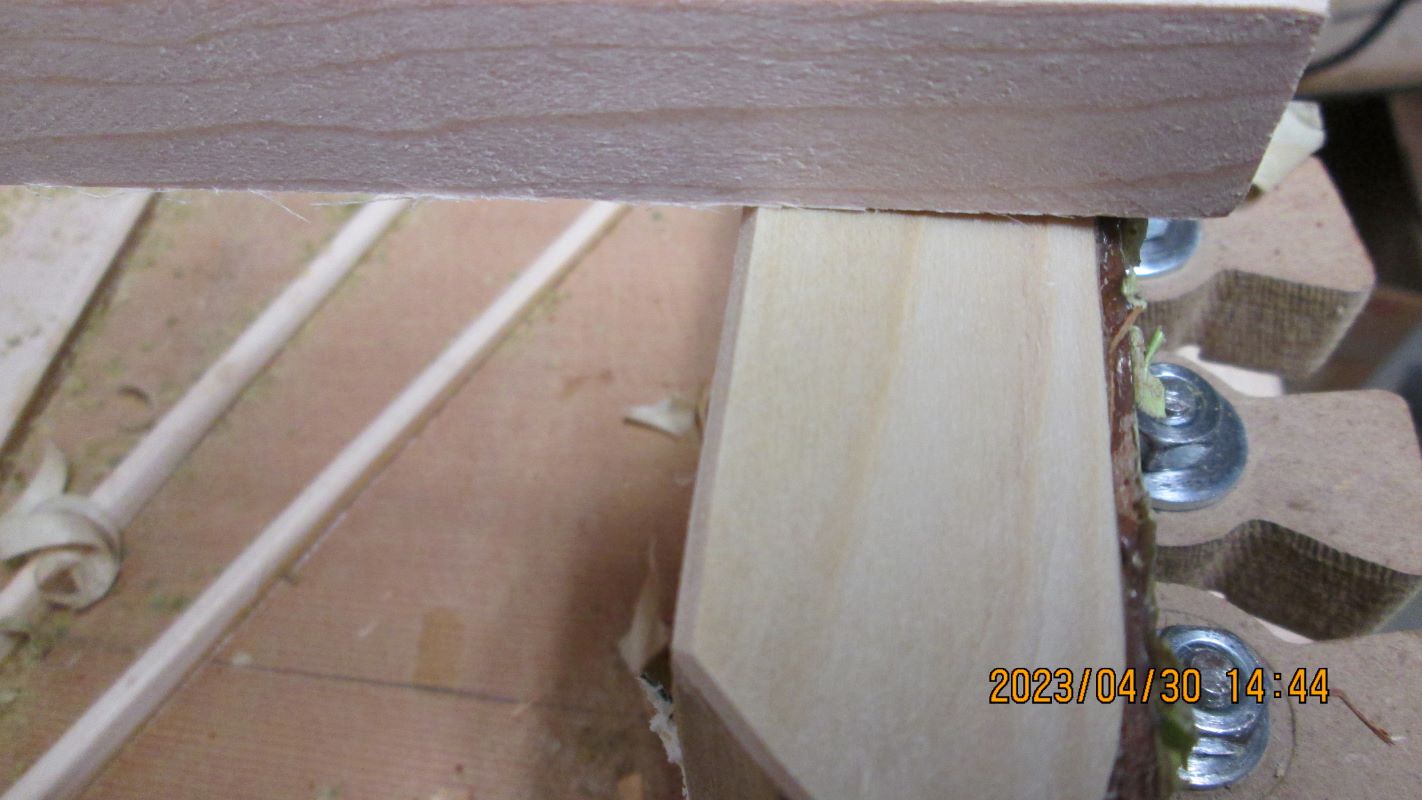
Glue on a piece of mahogany, poplar, basswood, maple or matching wood as appropriate. Cut this to stand a little proud of the sides, approximately 1/16-inch. Trim the edges to match the block underneath. Plane down the glue surface until a straight edge shows the new wood aligns with the sides.
Looks like one end is a bit too high. The new wood should allow the back to set down on the adjacent liner blocks. Use a sharp block plane to adjust the glue surface until aligned.

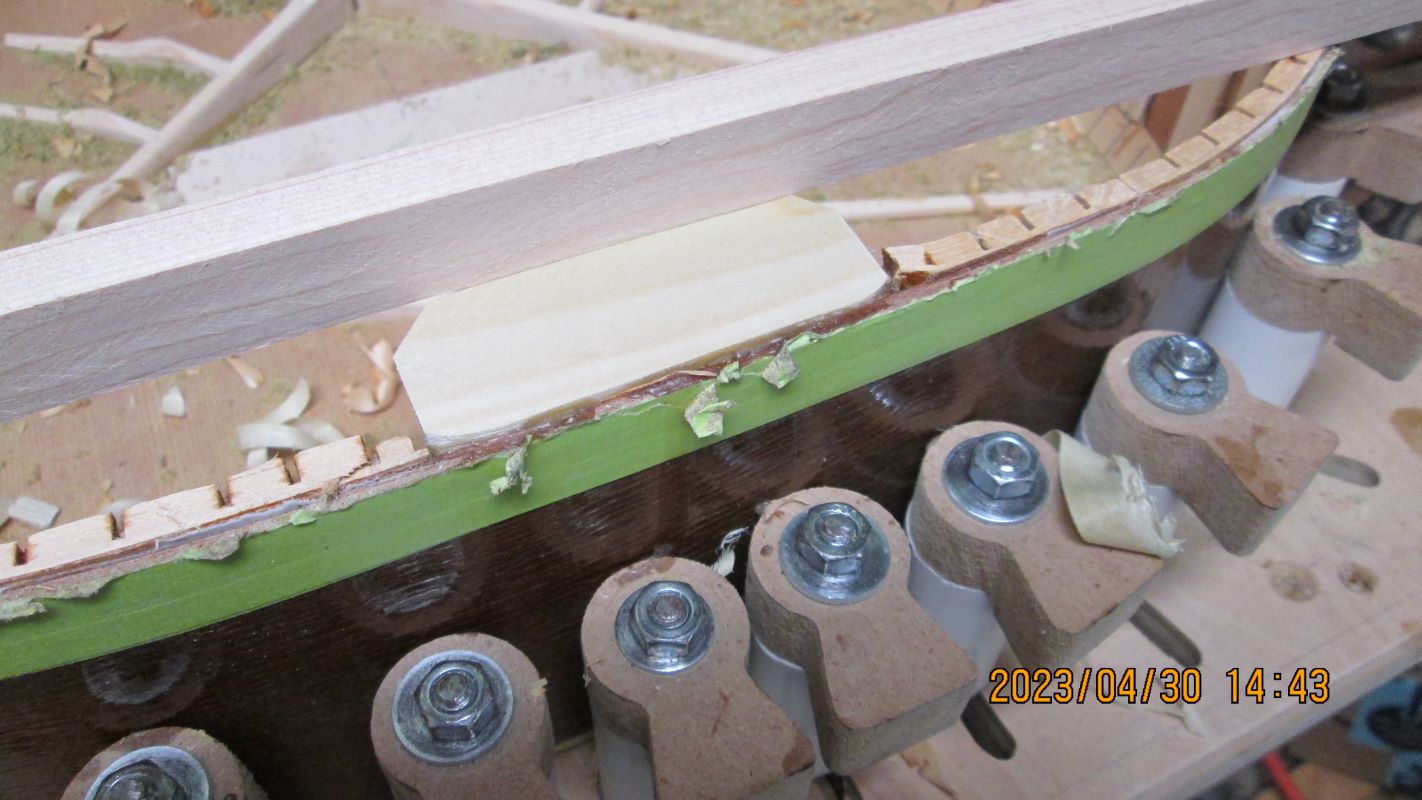
Too much "ramp" showing here. While the new wood should not be dead level when the straight edge is run from block to block, this is too much. You would have to bend the tail block end of the back too much. A slight ramp is OK. 1/2 the ramp shown is better. Adjust as appropriate.
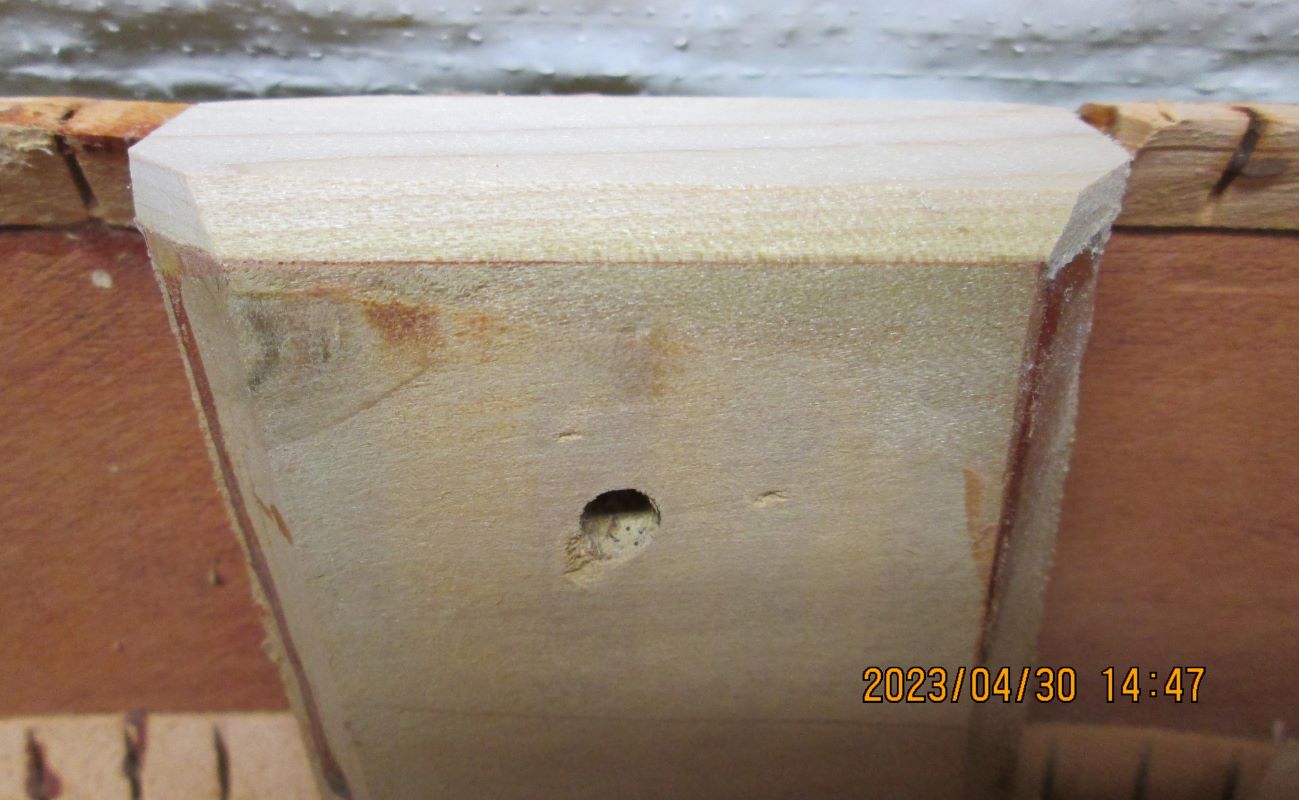
Finished and ready to glue the back on. Note corners trimmed to match the tail block.
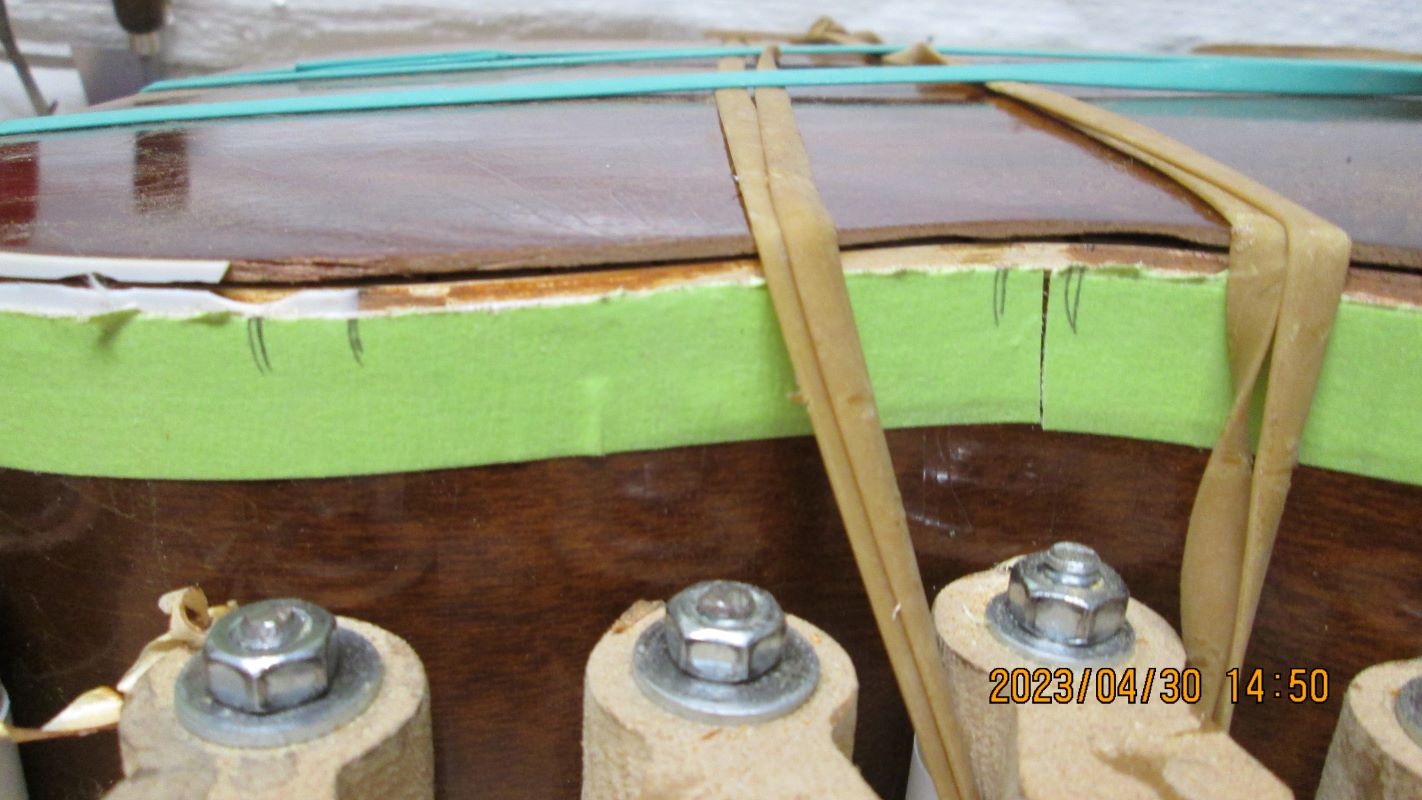
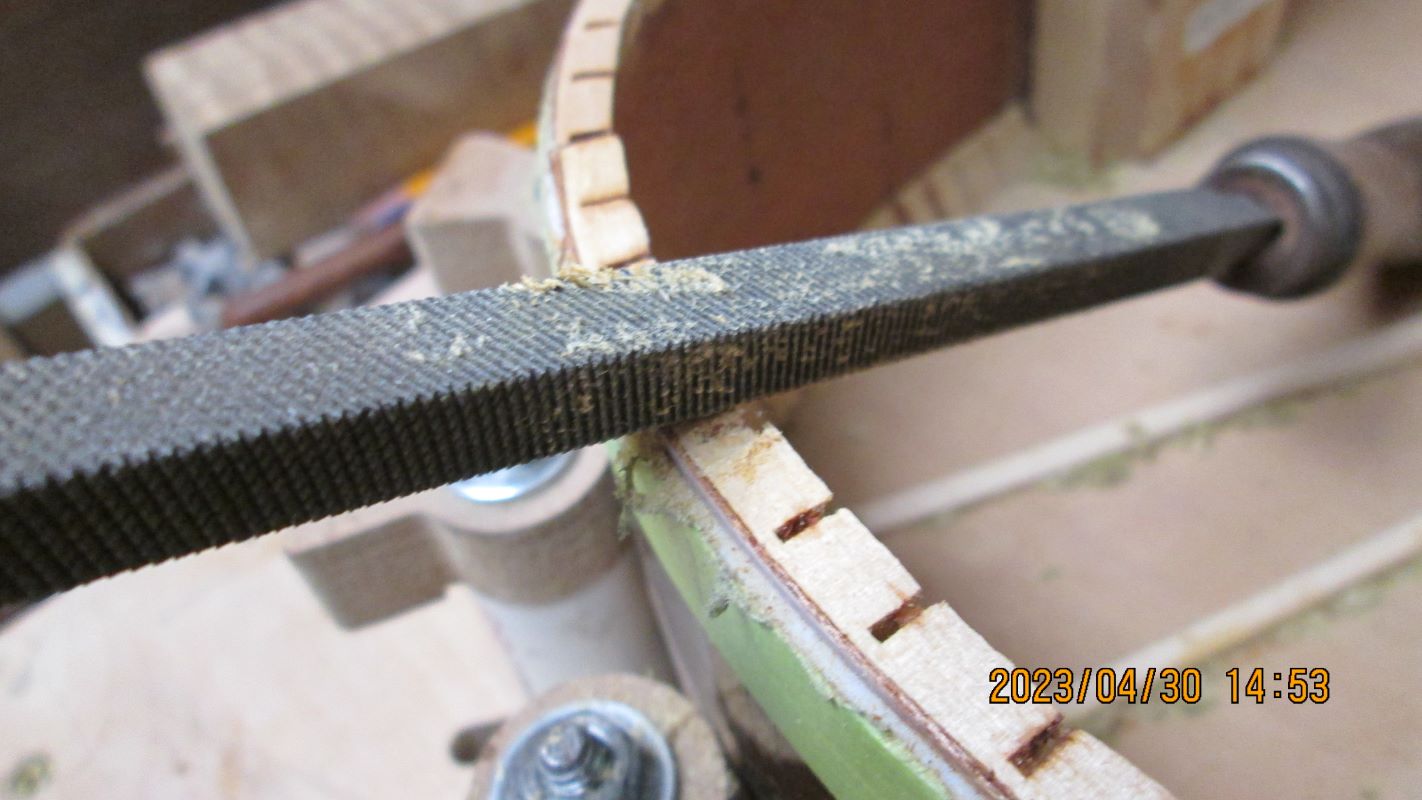
Before gluing the back on, trim the liner blocks as needed to let the back brace ends set down into the liner blocks. An extra large square wood file is nice for this. No idea where to get these. Are these sold anymore? Pull the file backwards and away from the sides. The handle is inside the body. Note the pencil marks showing the back brace end locations. Use rubber bands to hold down and align the back temporarily and mark the brace end locations. By the way, the jig holding the guitar body steady was purchased years ago. The shop making these no longer makes them. You should definitely make your own version. Makes planing, adjusting, gluing operations much nicer.
Finally, glue the back on, replace the binding and you are good to go. No, wait! You remembered to repair cracks, repair or replace broken or defective (ladder) bracing, remove glue mess, sand it all smooth, right?