Gibson LG1 Bridge Replace
This article describes measuring, positioning, and preparation for glue during installation of a Gibson LG1 bridge.
There are five positioning issues when installing a bridge on a vintage guitar.
- Alignment new with old pin holes
- Ensuring enough room in front of the pin holes for the saddle slot, preventing slot splitting towards the front
- Using a new bridge blank that is as wide or slightly wider than the original so as to cover top finish discoloration or damage
- Selecting a bridge blank high enough to align with the fret tops plane
- Aligning the bridge with the fret board center line, which must align with a line between the middle two pin holes
Double checking fret board center line with a line between the middle two pin holes.
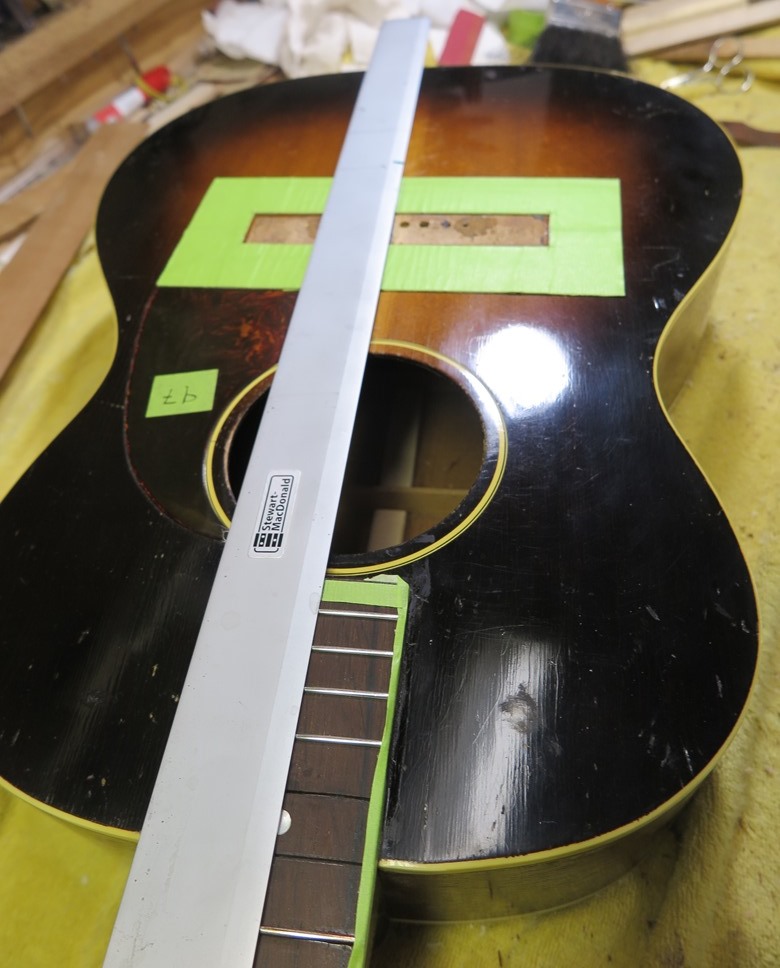
We already drilled the pin holes in the new saddle using the remains (bottom 3/32") of the OEM saddle and we know they are going to align perfectly. A green tape template is already positioned on the guitar top. This will ensure that when we glue the new bridge, it cannot in any way move or shift around. Also, this keeps the hot hide glue off that vintage top.
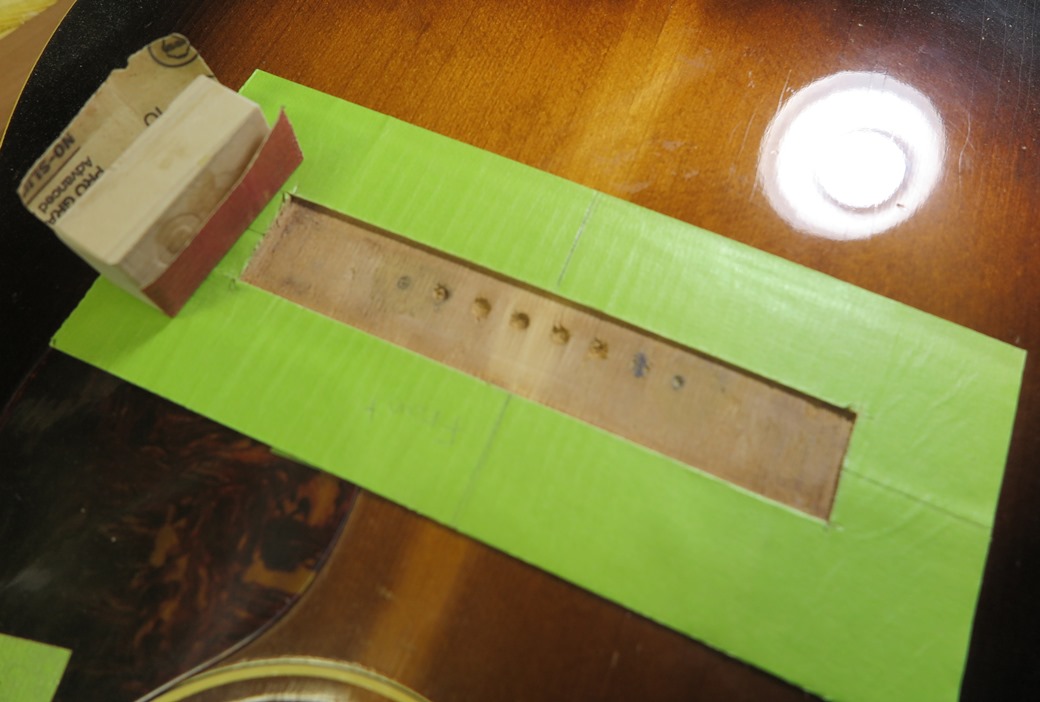
See the top finish, old glue, and stuck down OEM bridge parts on the top where the old bridge was removed? You can see the old bolt holes, which we have no plans to use. Gibson sure does ruin a nice guitar by putting tone killer bolts in the bridge through the top. Bad!
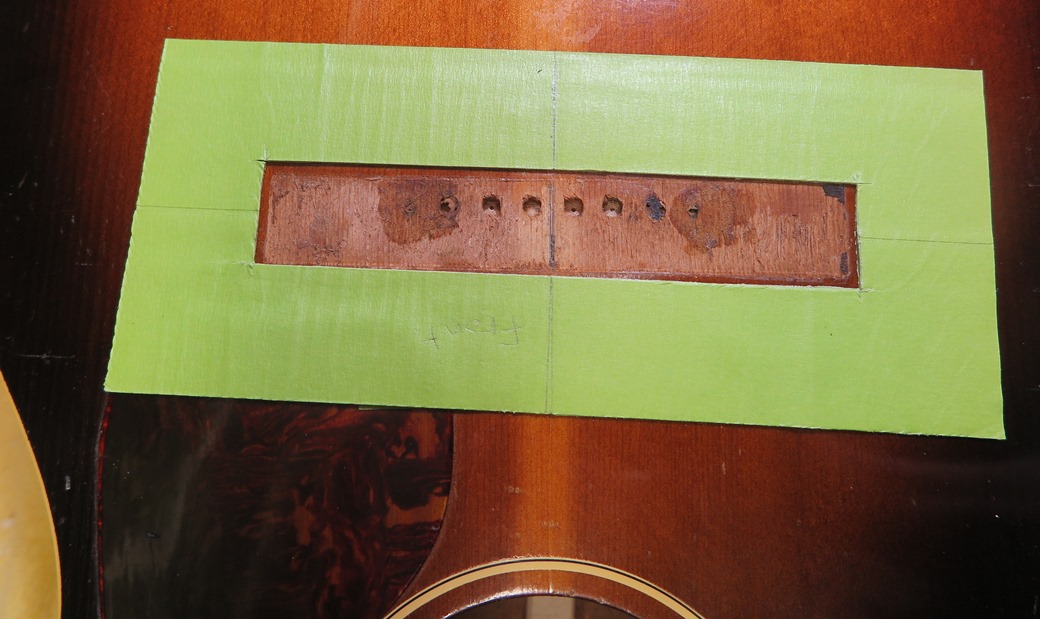
Double checking the alignment of the pin holes in the new bridge with the OEM pin holes which were very slightly drilled out. No holes at all drilled through the reinforcing plate. We drill pin holes after bridge attachment is complete. We always use a backing plate to avoid damaging the new rock maple plate (located under the top.)
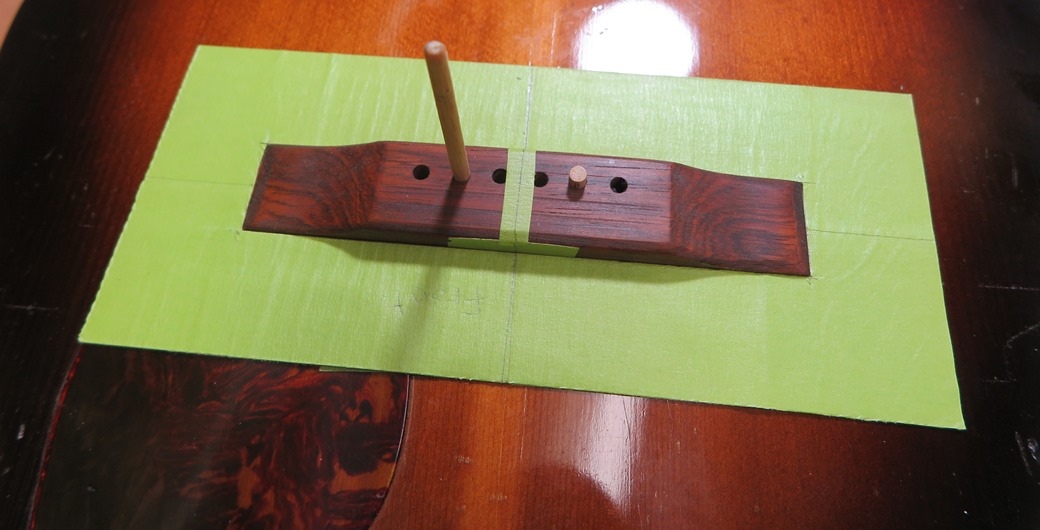
The pin holes in the original bridge line up as expected since they were drilled through the original bridge when the top was built. As you can see here, the new bridge is slightly larger and rotated a little counter clockwise. We did this to provide a little more wood in front of the bridge to prevent slot splitting and to cover up as much top finish wear and tear as possible but also keeping the smallest possible bridge outline. The original bridge was split out in front of the saddle slot. The damage was mostly invisible until we routed off the top 90 percent pursuant to removing the bridge. During that operation, the bridge came off in two pieces. Yuck! This seems to be a common problem with these LG1 guitars. In my opinion, the LG bridges are about 1/16" too small.
Double checking saddle slot placement. Here the StewMac saddle slot finder is in use. We are ensuring correct intonation at the same time. Double checking everything as we move along.
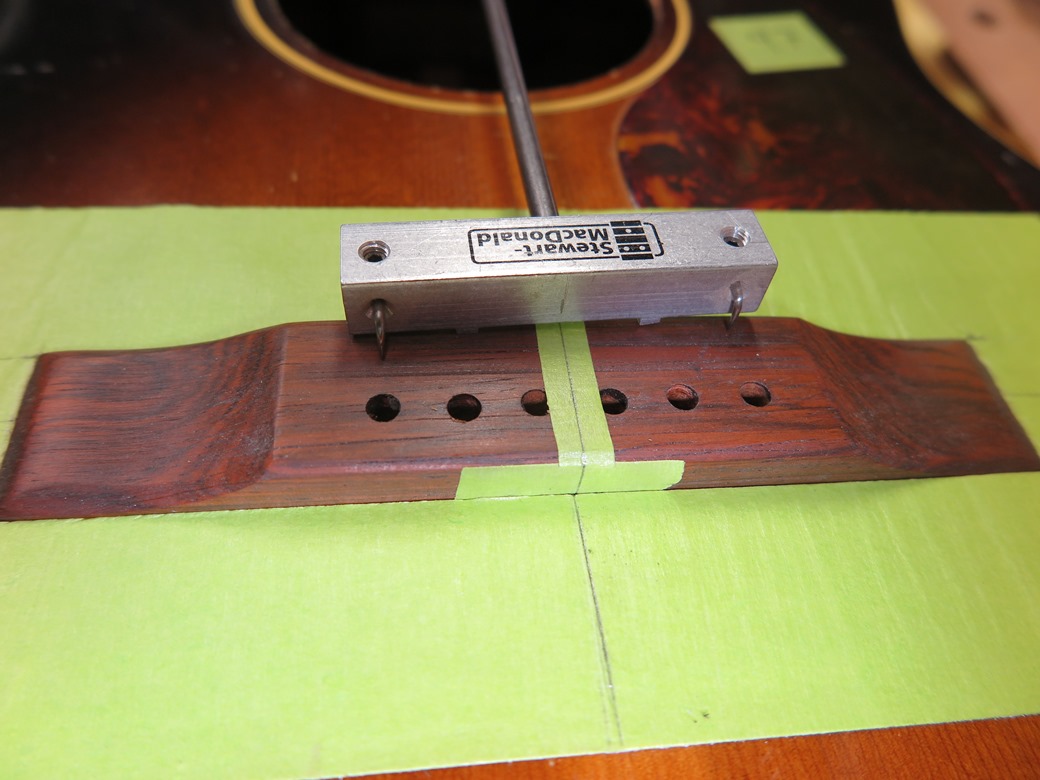
Front of saddle slot marked. You can just barely see it.

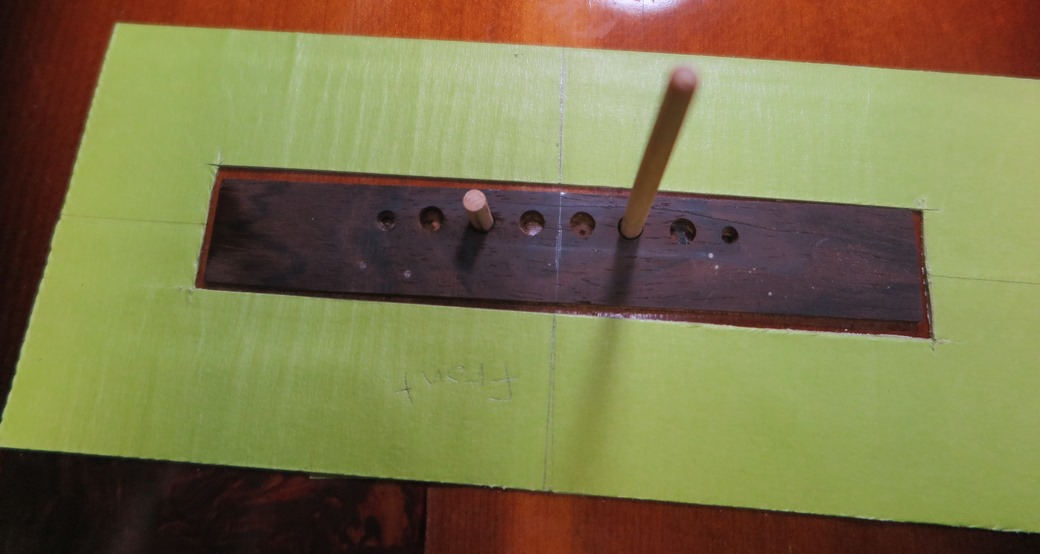
This shows the OEM bridge remnant on top of the new bridge. This is just to show that the OEM holes match up with the holes in the new bridge.

We remove all traces of OEM glue and top finish. Sand smooth. All this happens inside the green tape template which ensures that no scraping or sanding goes beyond where the new bridge attaches. Man these tape templates are fantastic.
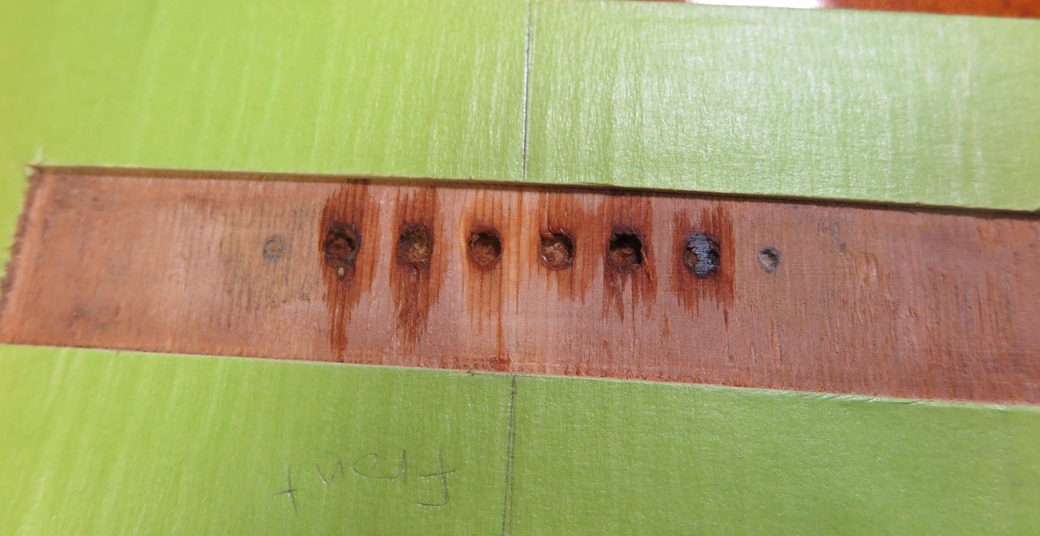
See the slight discoloration around the OEM drilled pin holes in the top? We used thing CA glue to "case harden" the edges of the pin holes.
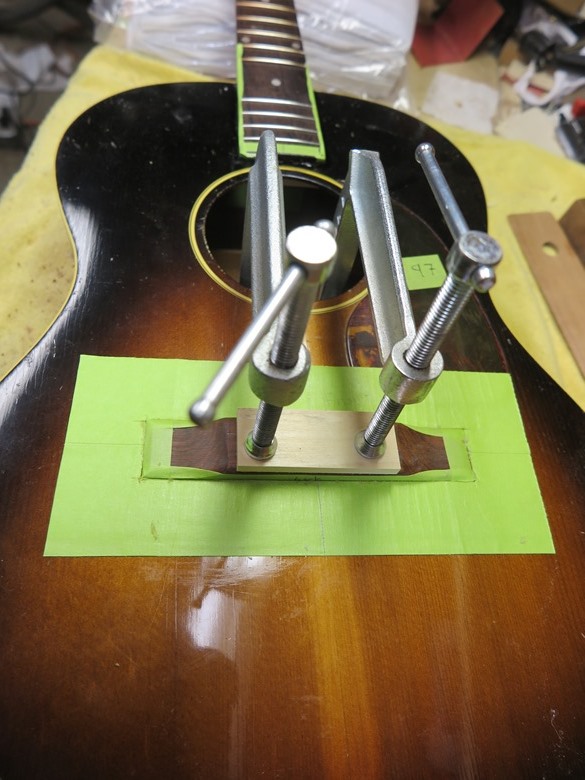
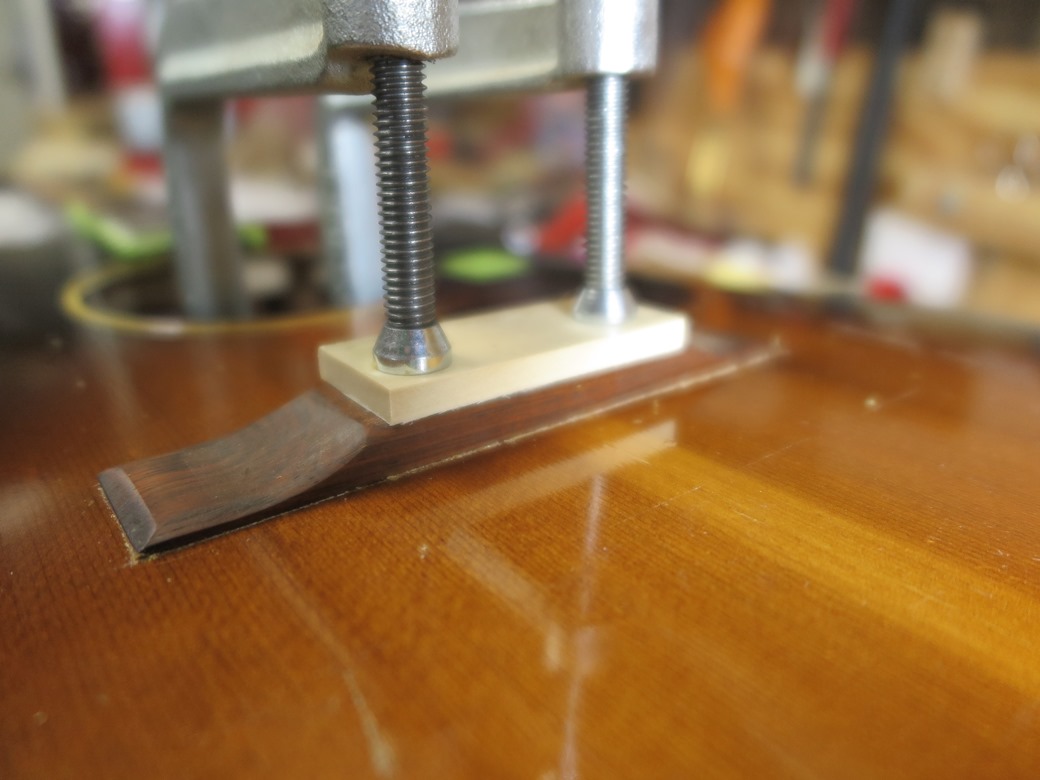
Hot hide glue. Gluing. Clamping. At this point positioning the new bridge is a no-brainer. As soon as the glue has set (10 minutes at the most) but still cooperative we will pull of all green tape thus preventing any mess of glue on wood or top or stuck down tape.
The plane of the fret tops should clear the top of the bridge with enough room to allow the saddle to stand proud 5/32" above the bridge. However, we may slightly reduce the height of the bridge if this height relationship is not perfect. We do not like too low saddles. There is plenty of bridge wood available to do this.
Looking good so far . . .
©2017 D.R. Hanna