Harmony Sovereign Truss Rod Problems and Enhancement
Tightened

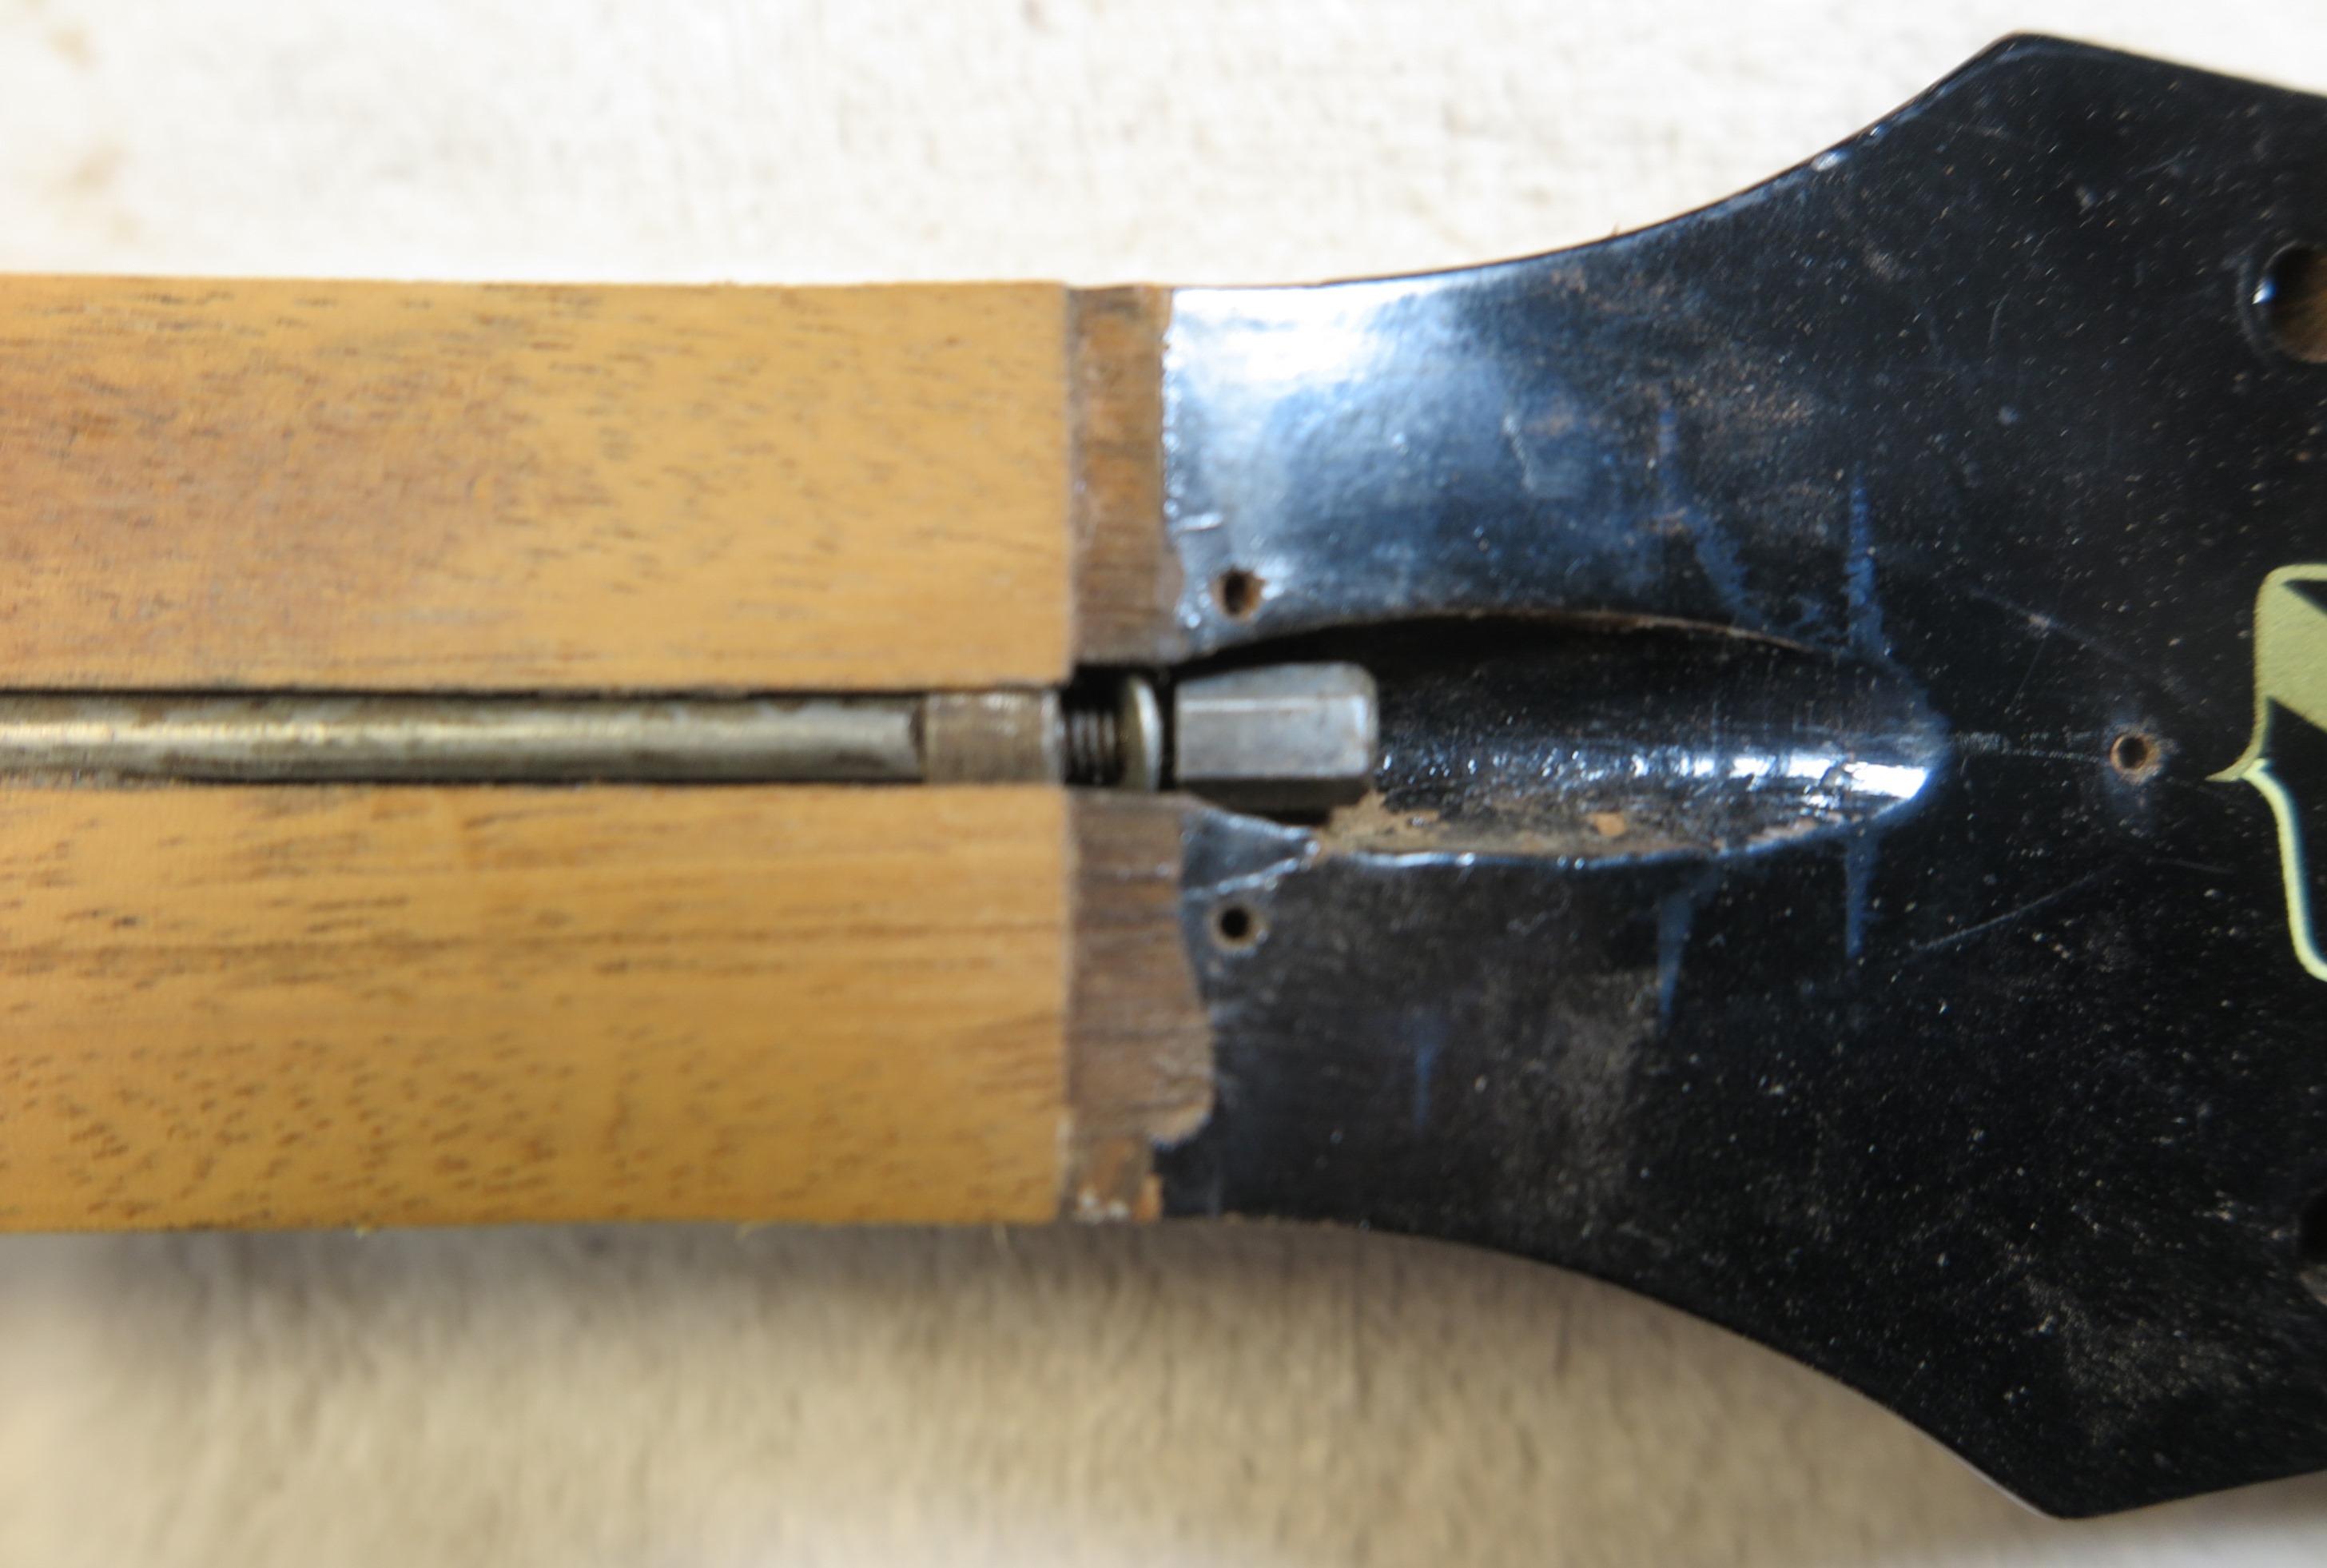
Threaded end close up
 gear head end
tension rod compression rod washer/collar nut
Harmony Truss Rod Problems
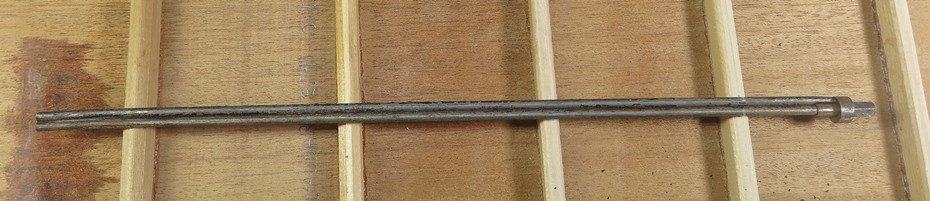
Harmony used an inexpensive but effective truss rod system composed of two high strength steel rods welded together at the neck heel end. A tension rod is threaded on one end. The compression rod has a point. On the gear head end, the threaded rod protrudes through a steel washer/collar fitting. The pointed end fits against the back of the washer/collar fitting. When the nut is tightened against the washer/collar, the threaded rod is shortened thereby causing the pointed rod to push against the washer/collar and bend towards the under side of the fret board. This tends to bow the neck backwards slightly between the 1st fret and 12th fret.
Truss rods only affect tiny string height measurements at the 7th fret on a 14 fret guitar. The total range of adjustment is from zero to 1/32 inch. Maybe slightly more. This is to say that on a 14 fret guitar neck, only neck straightness (tight) or curvature (loose) between 1st and 12th fret is affected by tightening the truss rod. We are asking that little bit of welded wire to move a mountain. The Harmony truss rod works well if adjusted properly and used within appropriate limits.
It will break if abused.
Three reasons Harmony truss rods break:
- Rust on the threaded end preventing the nut from turning.
- Insufficient threads on the threaded end. Problem is the nut is at the end of thread on the rod, or the rod is bent just beyond the washer/collar. If the rod is turned further, excessive torque breaks off the treaded end or breaks the weld at the neck heel.
- Lack of understanding about what a truss rod actually does and how to adjust.
All of the above problems cause the rod to break off at the threaded end or the weld to separate at the neck heel end.
Prevent reason one by lubricating the nut with a quality high pressure automotive grease (not lithium). Always wise in any case.
Prevent reason two by adding a washer to the threaded end. This usually provides additional adjustment distance allowing the rod to work as intended. Number 4 metric washers work great for this. SAE washers are not made in appropriate sizes for optimum fit on the rod end.
Reason three is the toughest. The guitar owner notices increasingly high string action on a beloved vintage Harmony guitar. Guitar owner thinks the truss rod can fix excessive high action. Hoping the truss rod can affect string height at the 12th fret, guitar owner torques the truss rod nut until rod breaks. We have received Harmony guitars where the rod was tightened so much that the threaded end bent down into the head stock rod cavity. The nut was no longer accessible. Why the rod did not break is a mystery. If you think you can solve string height problems at the 12th fret by torqueing that truss rod down to maximum adjustment, chances are you are going to break or deform the truss rod. Don’t do it!
No truss rod on any guitar has any affect at all on string height at the 12th fret.
To adjust correctly, make truss rod adjustments in one quarter turn increments.
Truss rods only affect RELIEF (distance between string and 7th fret) and only 1/16 inch maximum. That of course is way too high.
Here is one way to evaluate RELIEF on a 14 fret guitar.
- Put a capo at the first fret
- Depress the string at the 14th fret
- Tap every string at the 7th fret down into the fret below.
- If you hear a clank, relief may be too high.
- If you hear a tink sound, relief may be just right.
- Should use a feeler gauge to evaluate more accurately.
- Try this technique on a correctly adjusted guitar and compare to one with excessive relief. The difference between tink and clank sounds can detect some interesting neck problems or qualities once you learn how to recognize the sounds. A warped or twisted neck will show excessive relief differences between low and high E strings. Electric guitars with low quality maple necks can show amazing relief tink and clank sounds between the low and high E strings.
HARMONY TRUSS ROD ENHANCEMENT
During a recent fret board removal and repair, thought it might be helpful to show how we enhance the stock Harmony Sovereign truss rod.
The image below shows the entire truss rod with fret board removed. On the left is my little ruler. On the right is the gear head.
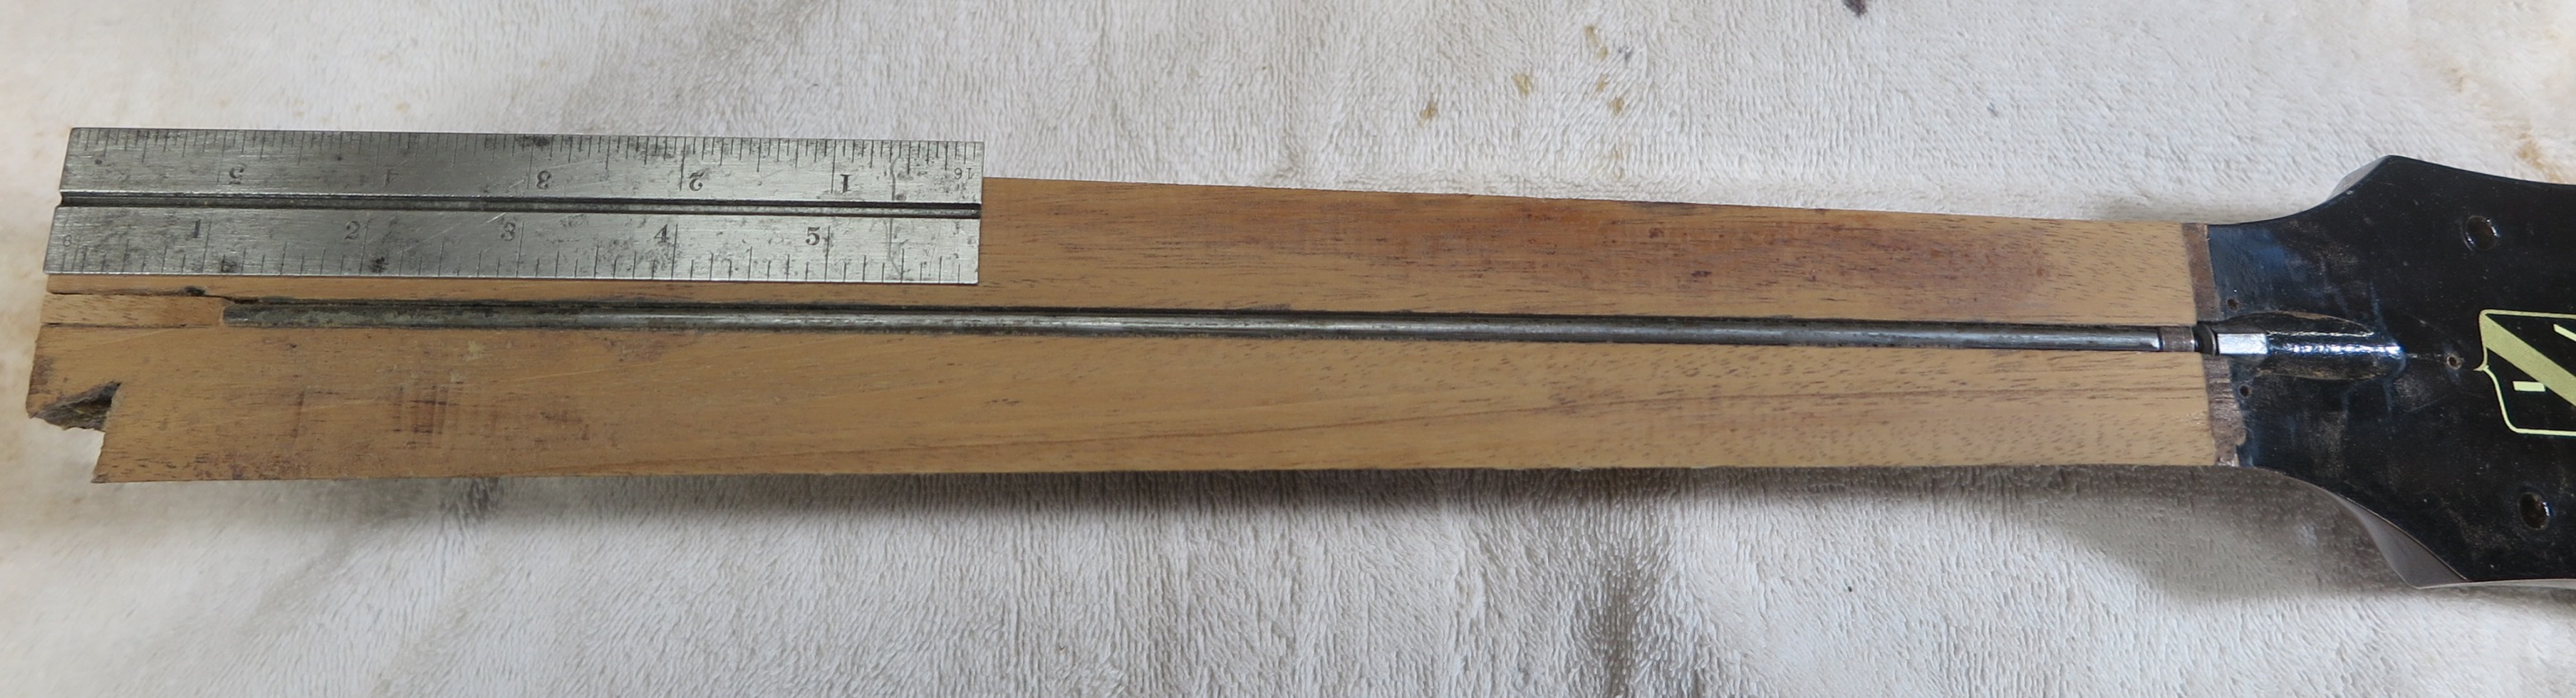
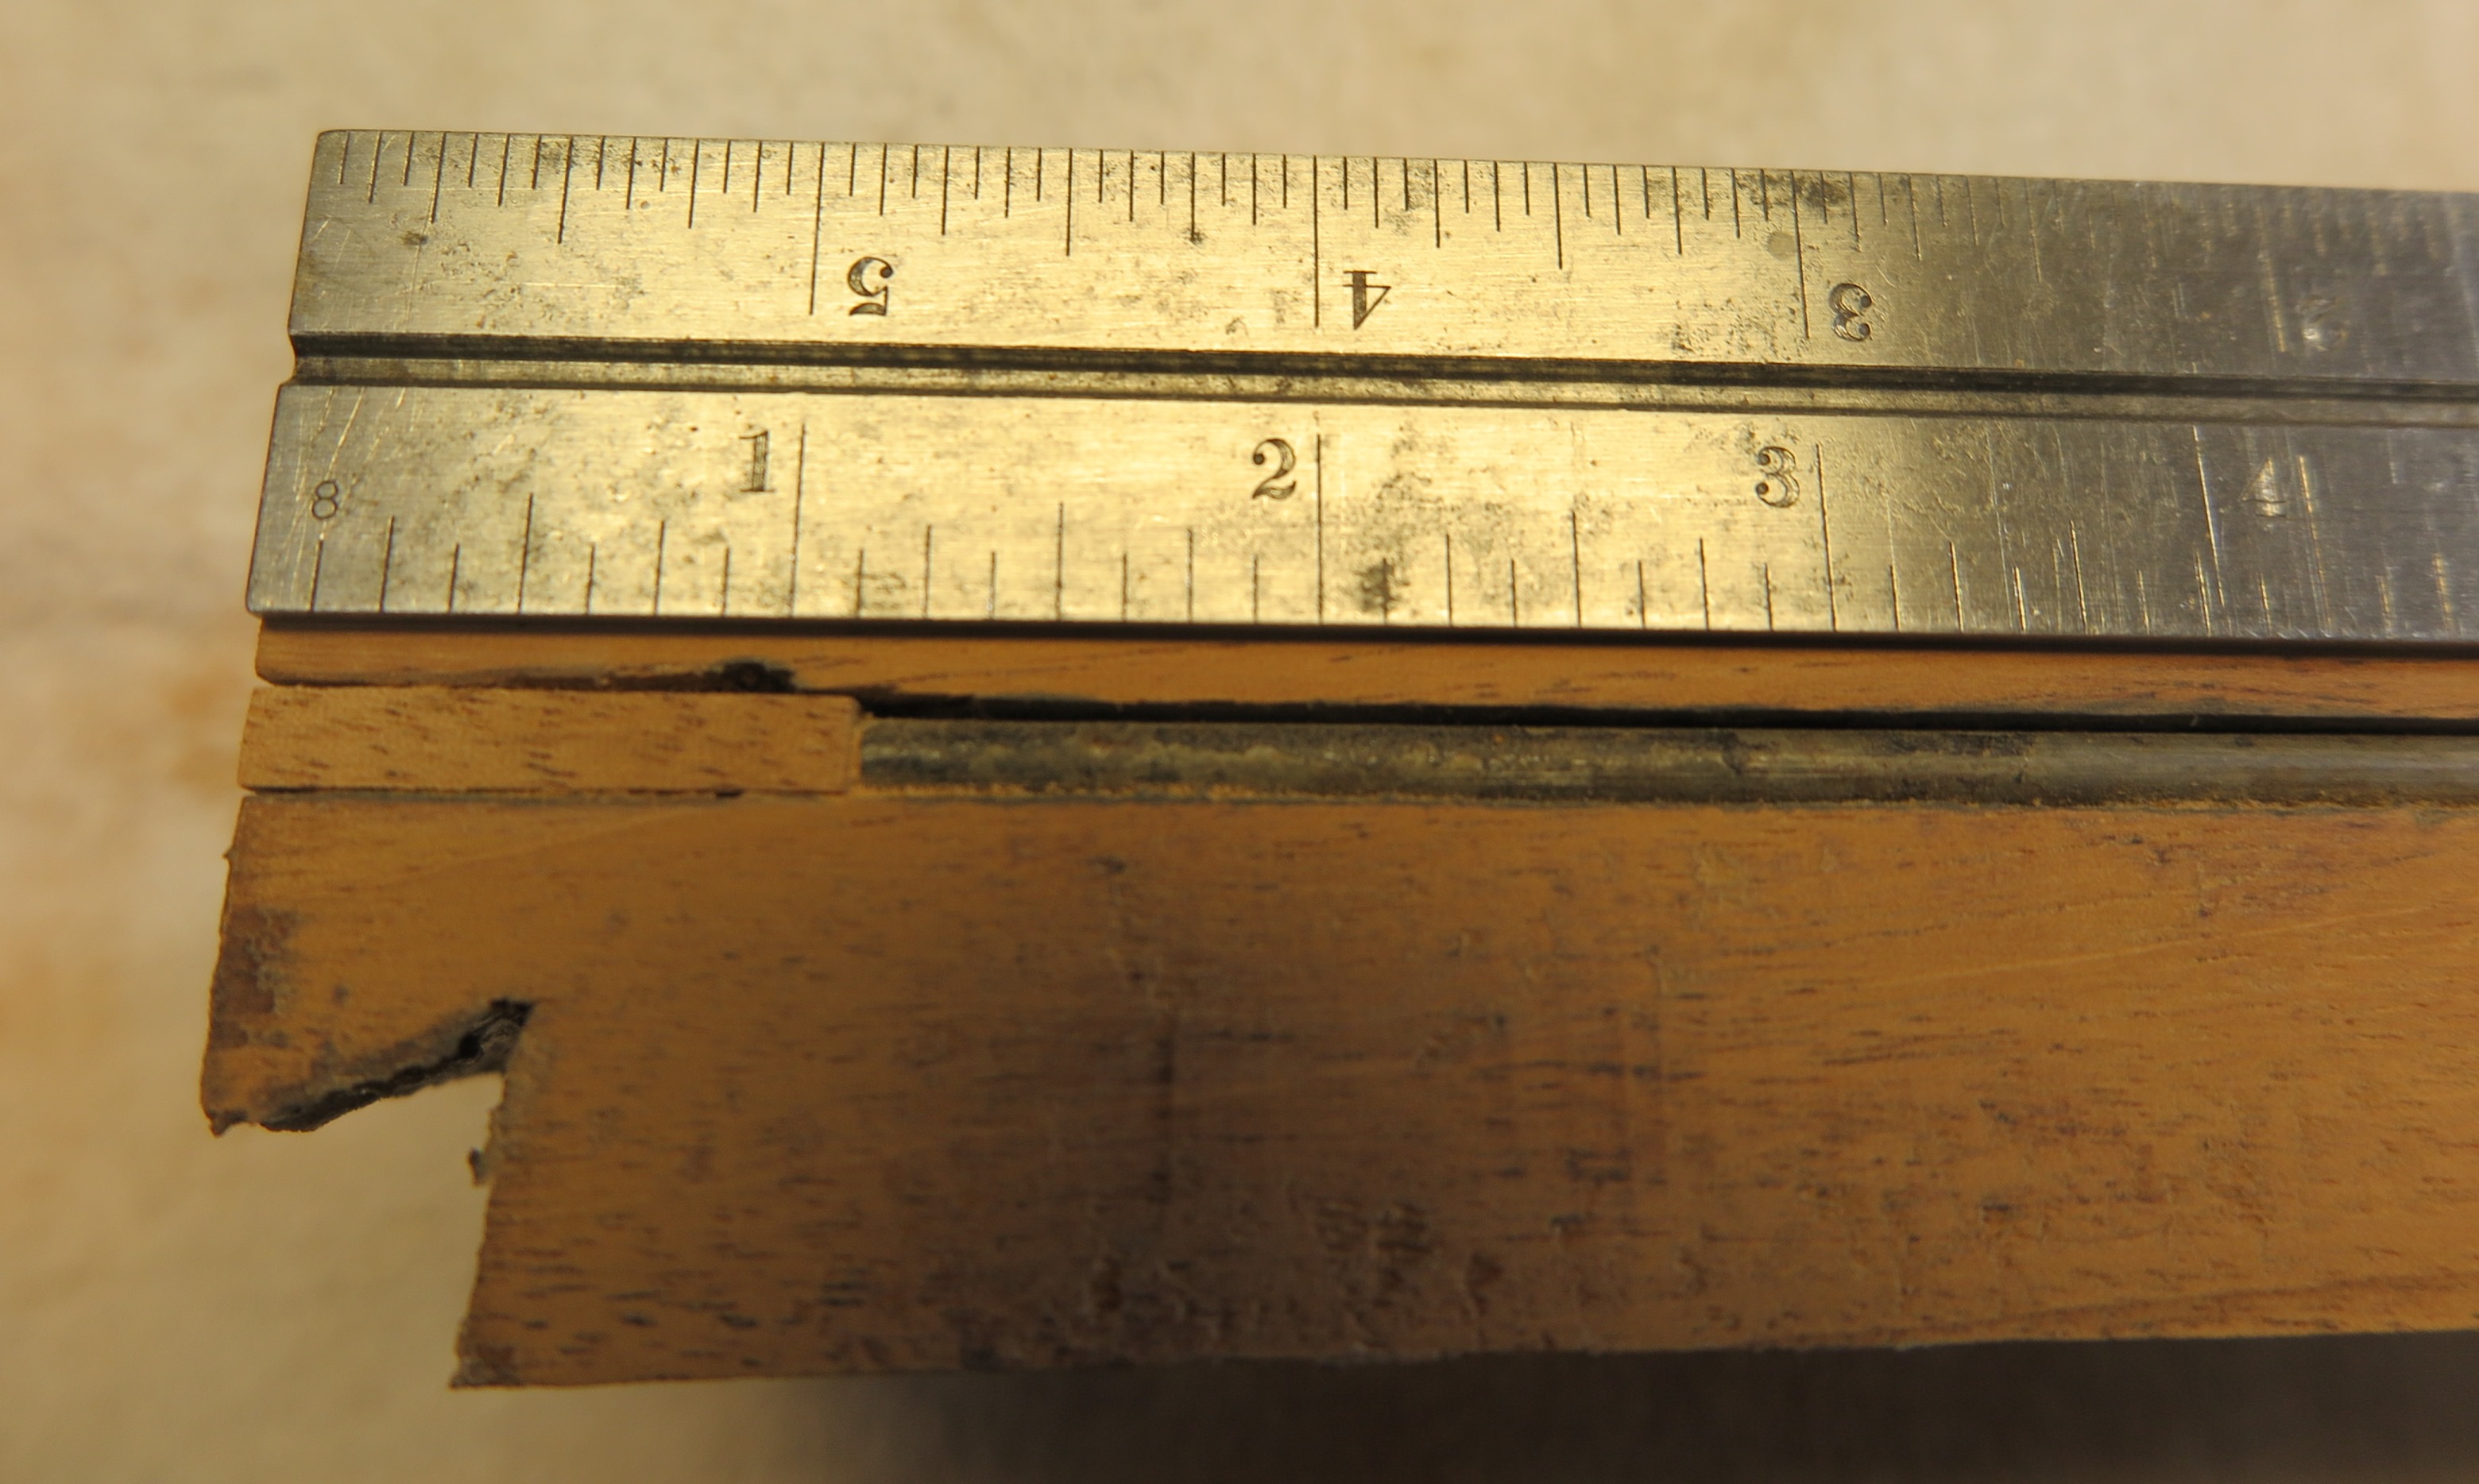
This image shows a little mahogany block glued into the truss rod slot. Below my stubby little ruler is a little 1 1/8 inch block. This block is 3/16 inch deep and 9/32 wide. It is glued into the truss rod slot with Titebond Type III water proof glue. This block serves two purposes. It ensures that the truss rod does not slip down into the slot. The block slightly stabilizes the dovetail end of the neck. No big deal there. Most important, the block prevents steam from venting out the other end of the slot during neck removal. This prevents a lot of damage during neck removal.
You can add this little block after the neck is off the guitar. You do not have to remove the fret board. The end of the truss rod slot is easily accessed under the fret board extension.
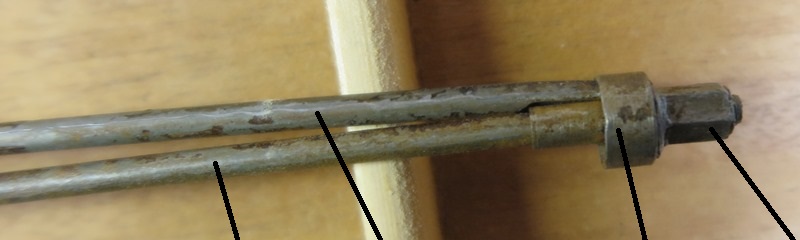
This image shows the gear head end of the truss rod. To the left of the washer and nut is the rod compression doo-dad (washer/collar??). I have no idea what to call it. When the nut is tightened, the doo-dad pushes against the pointed end of the rod and forces the middle up against the bottom of the fret board. Note that the doo-dad shown below is located in the ideal place on the neck. The flat face of the doo-dad is flush with where the end of the fret board will be.
Please see the "Tools and Techniques" page entitled "Magic Truss Rod Removal Tool" for an image of the best tool for knocking out a Harmony Truss rod.
©2017 D.R. Hanna