Installing Solid Metal Tuner Bushings
This shows how to install solid metal tuners bushings in a Harmony Sovereign gear head. The goal is to install a modern tuner set, such as the "Golden Age Restoration" set or Grover Sta-Tites. The procedure also works for many other similar tuner sets. The cutter/reamer diameter may vary according to the bushings supplied with the tuner set. Since accurate and appropriate bushing diameters are usually not supplied online, you just about have to buy the tuner set, measure the bushing barrel diameter with a drill bit sizing plate, then order the correct cutter/reamer. The cutter/reamer diameter must be slightly smaller than the bushing barrel diameter.
Factory original Harmony Sovereign guitars have sheet metal bushings. These are made to fit into a 1/4 inch diameter gear head hole. We will use the original hole to guide our hole widening and installation procedures. The following is applicable to any guitar having sheet metal tuner bushings or no bushings at all. If the OEM hole is too small, use a drill press to increase to 1/4 inch.
Please note: at no time in this procedure is a brad point bit used.
A drill press is required for quality installation.
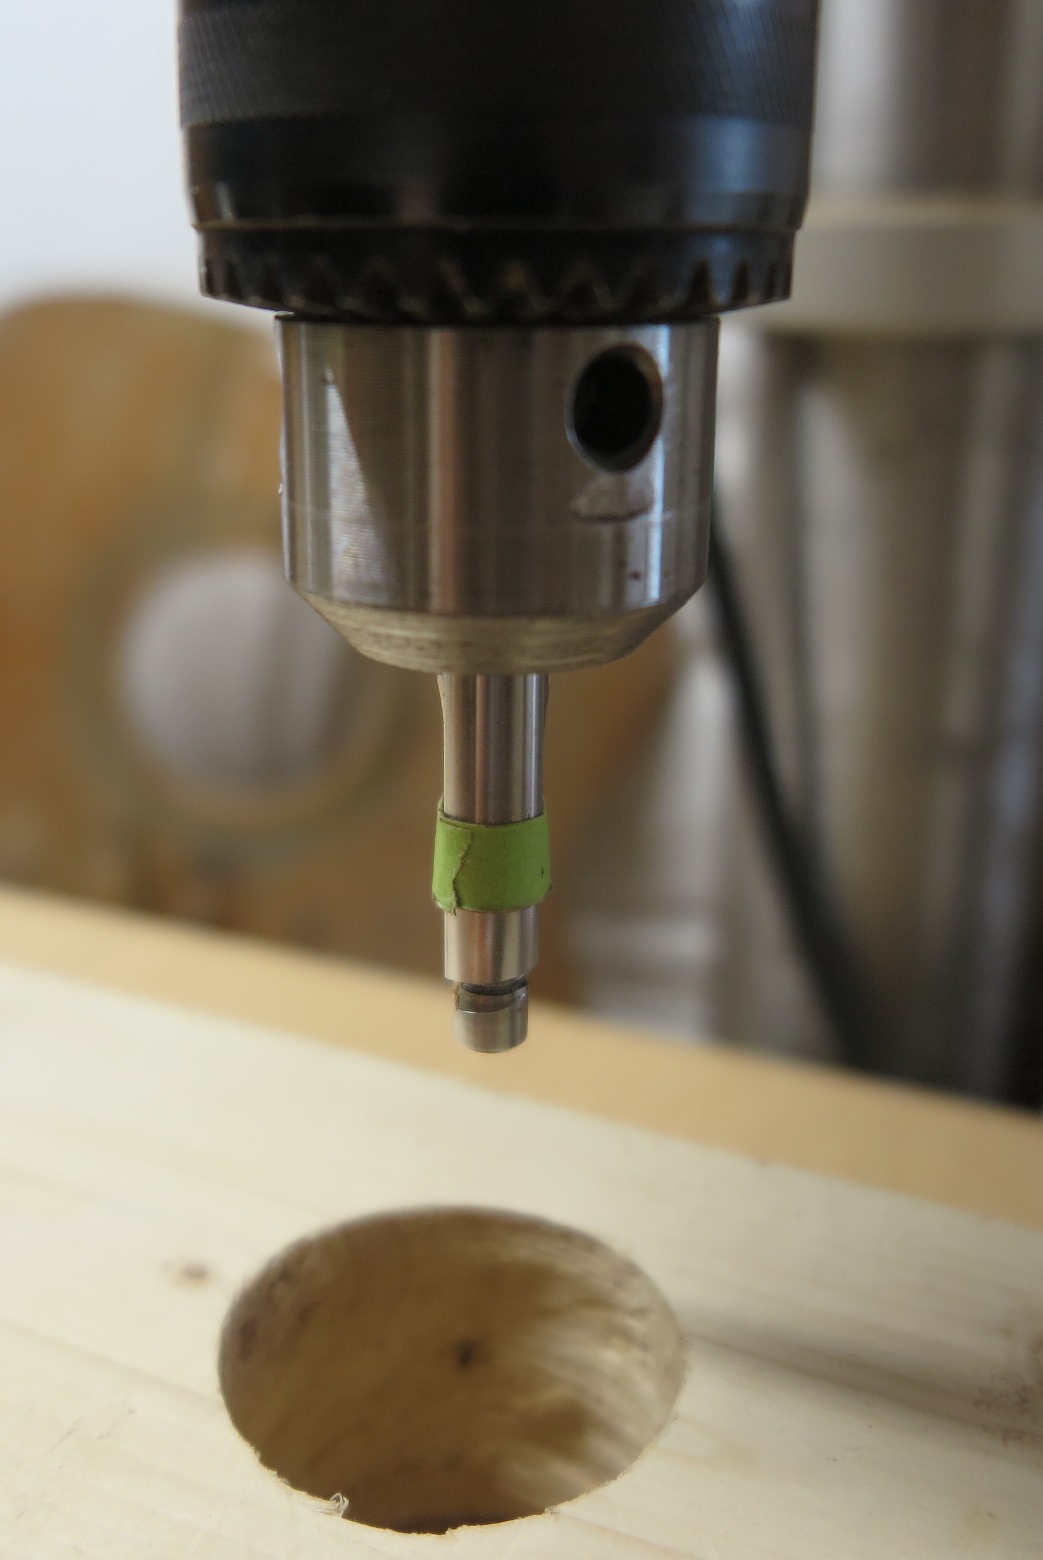
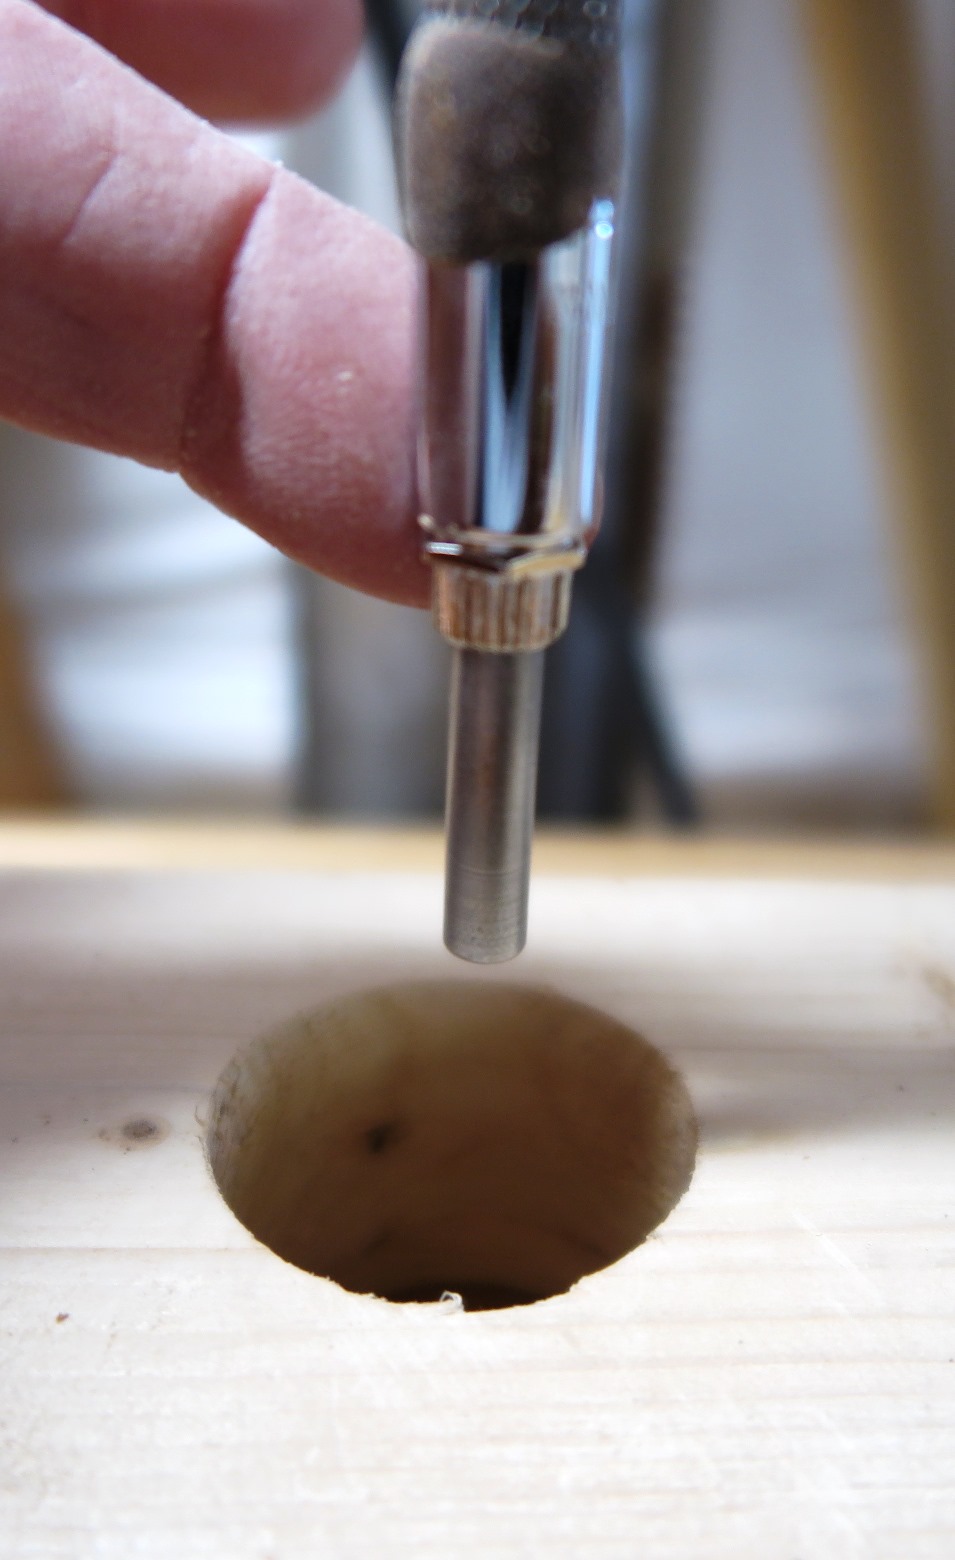
The next image shows a reamer ready to make the first cut into the gear head face. This tool widens the existing 1/4 inch hole (per the original tuner installation) to an 11/32 inch diameter hole. The tool has a 1/4 inch pilot which perfectly fits the original 1/4 inch tuner post hole and which guides the cutter into the hole. Widening this hole accurately is the key to installing tuners accurately. Installation accuracy is critical to achieving optimum tuner functionality.
Furthermore, 11/32 inch (Golden Age Restoration Tuner bushings) provides a perfect high friction fit so that the bushing will not slip out of the gear head. This is to say, no glue is needed to keep the bushing in the gear head face. (See bottom of this page for a better image of the cutter/reamer.) The huge hole in the 2 x 4 is explained later.
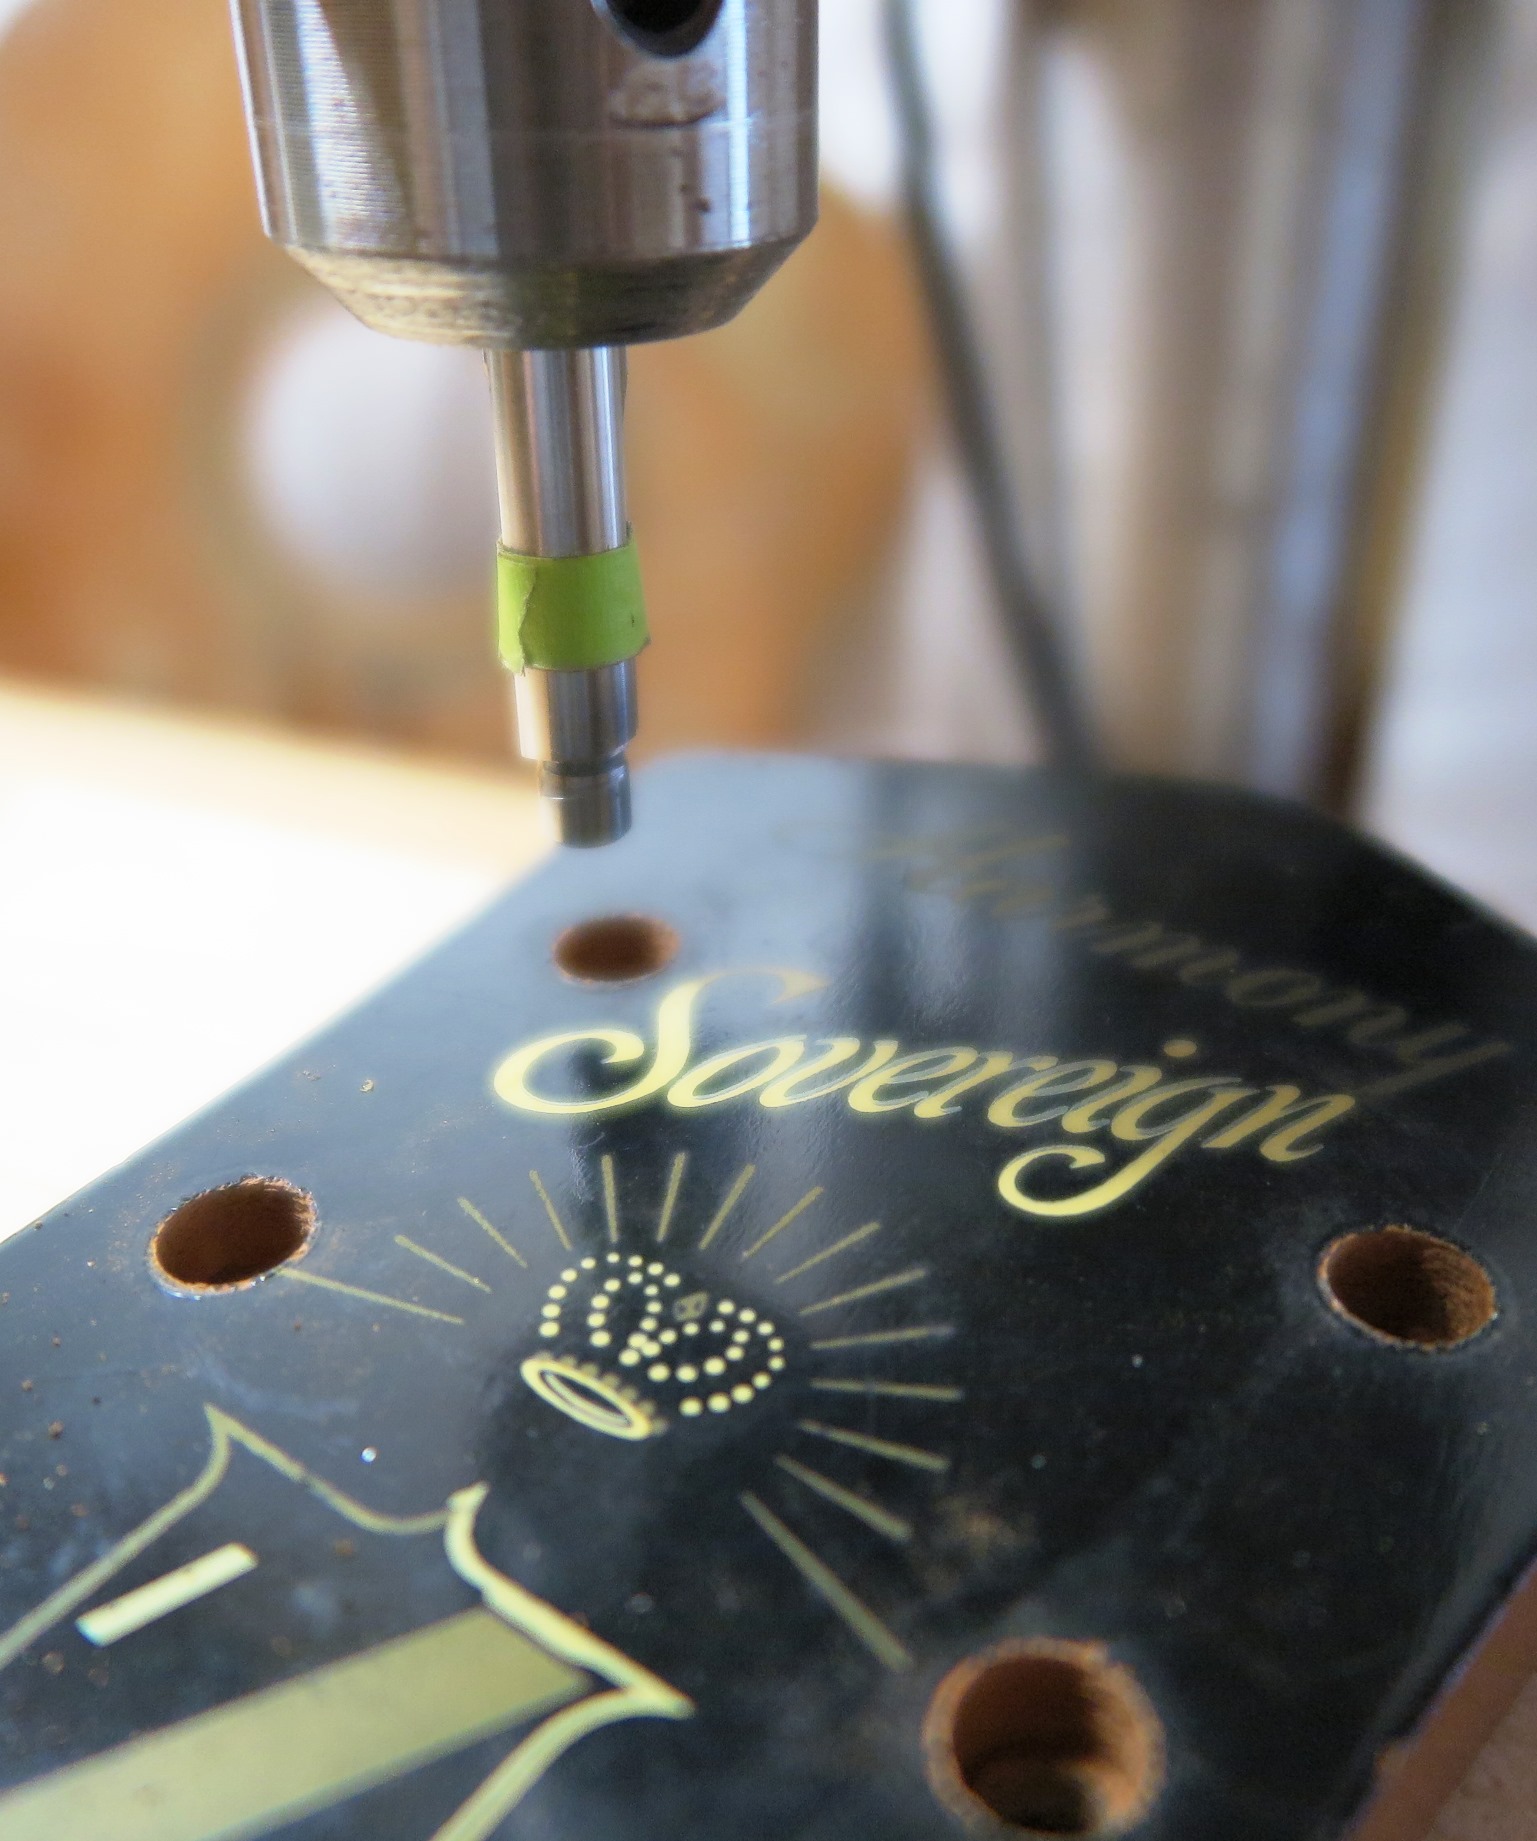
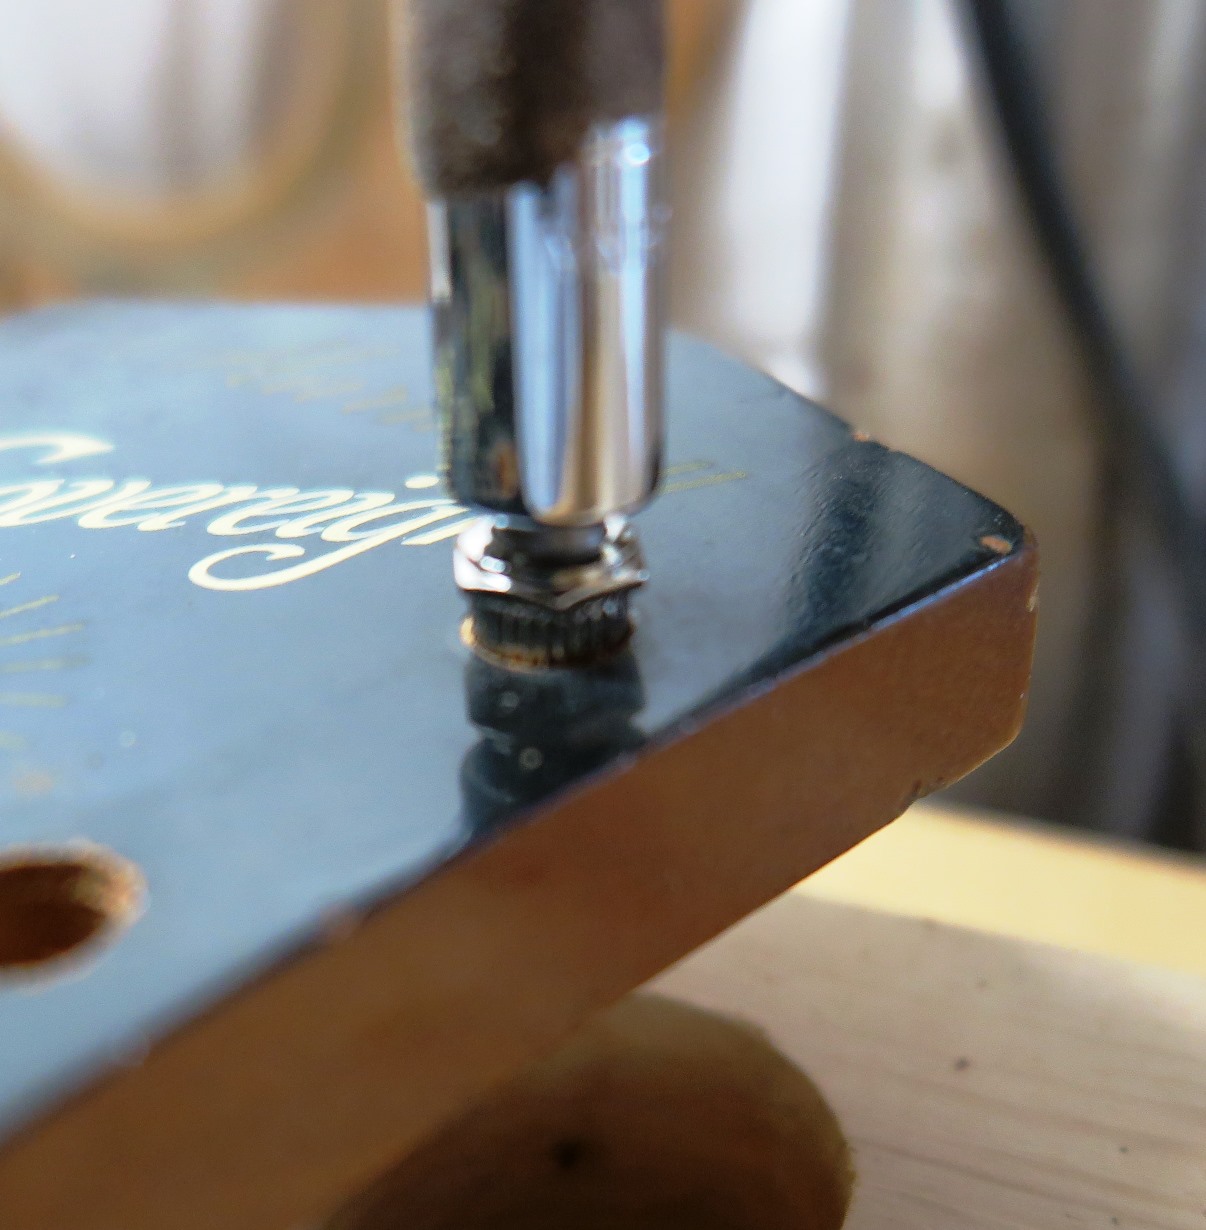
This image shows the bushing holes cut/reamed to the bushing installation diameter. No drill bit was used so far. The cutter/reamer does it all. Note the tape on the reamer. You do not want to cut all the way through the gear head. Cut just deep enough to house the depth of the bushing plus 1/32 inch of depth. Leave as much of the original 1/4 inch hole in the gear head as possible.
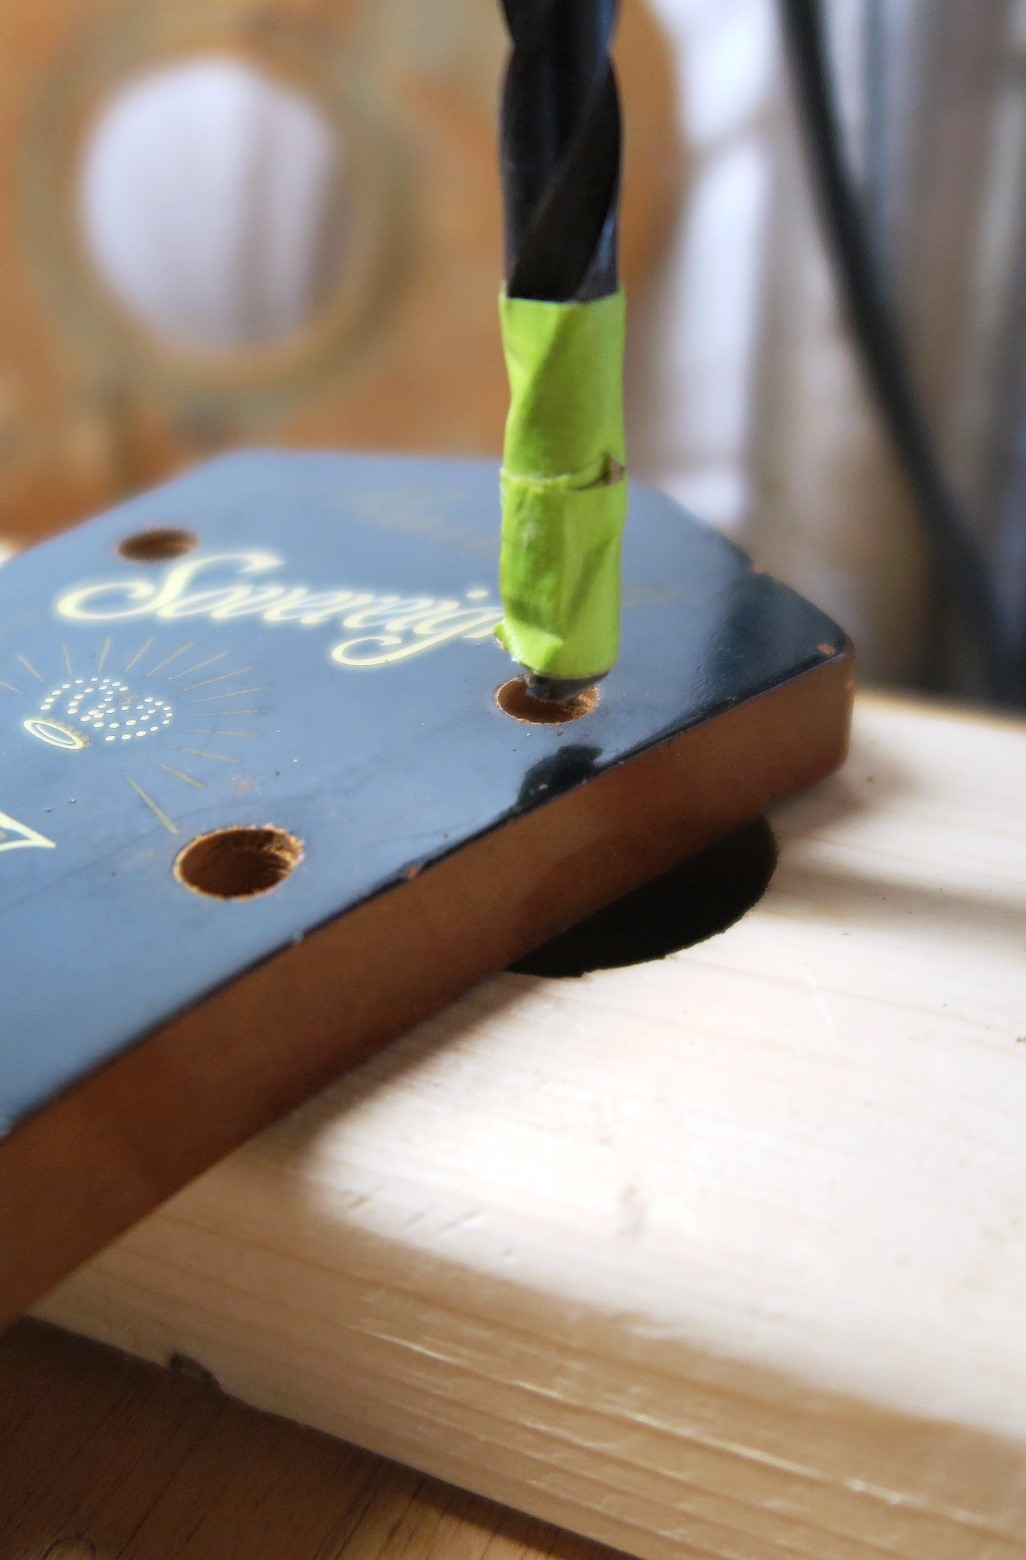
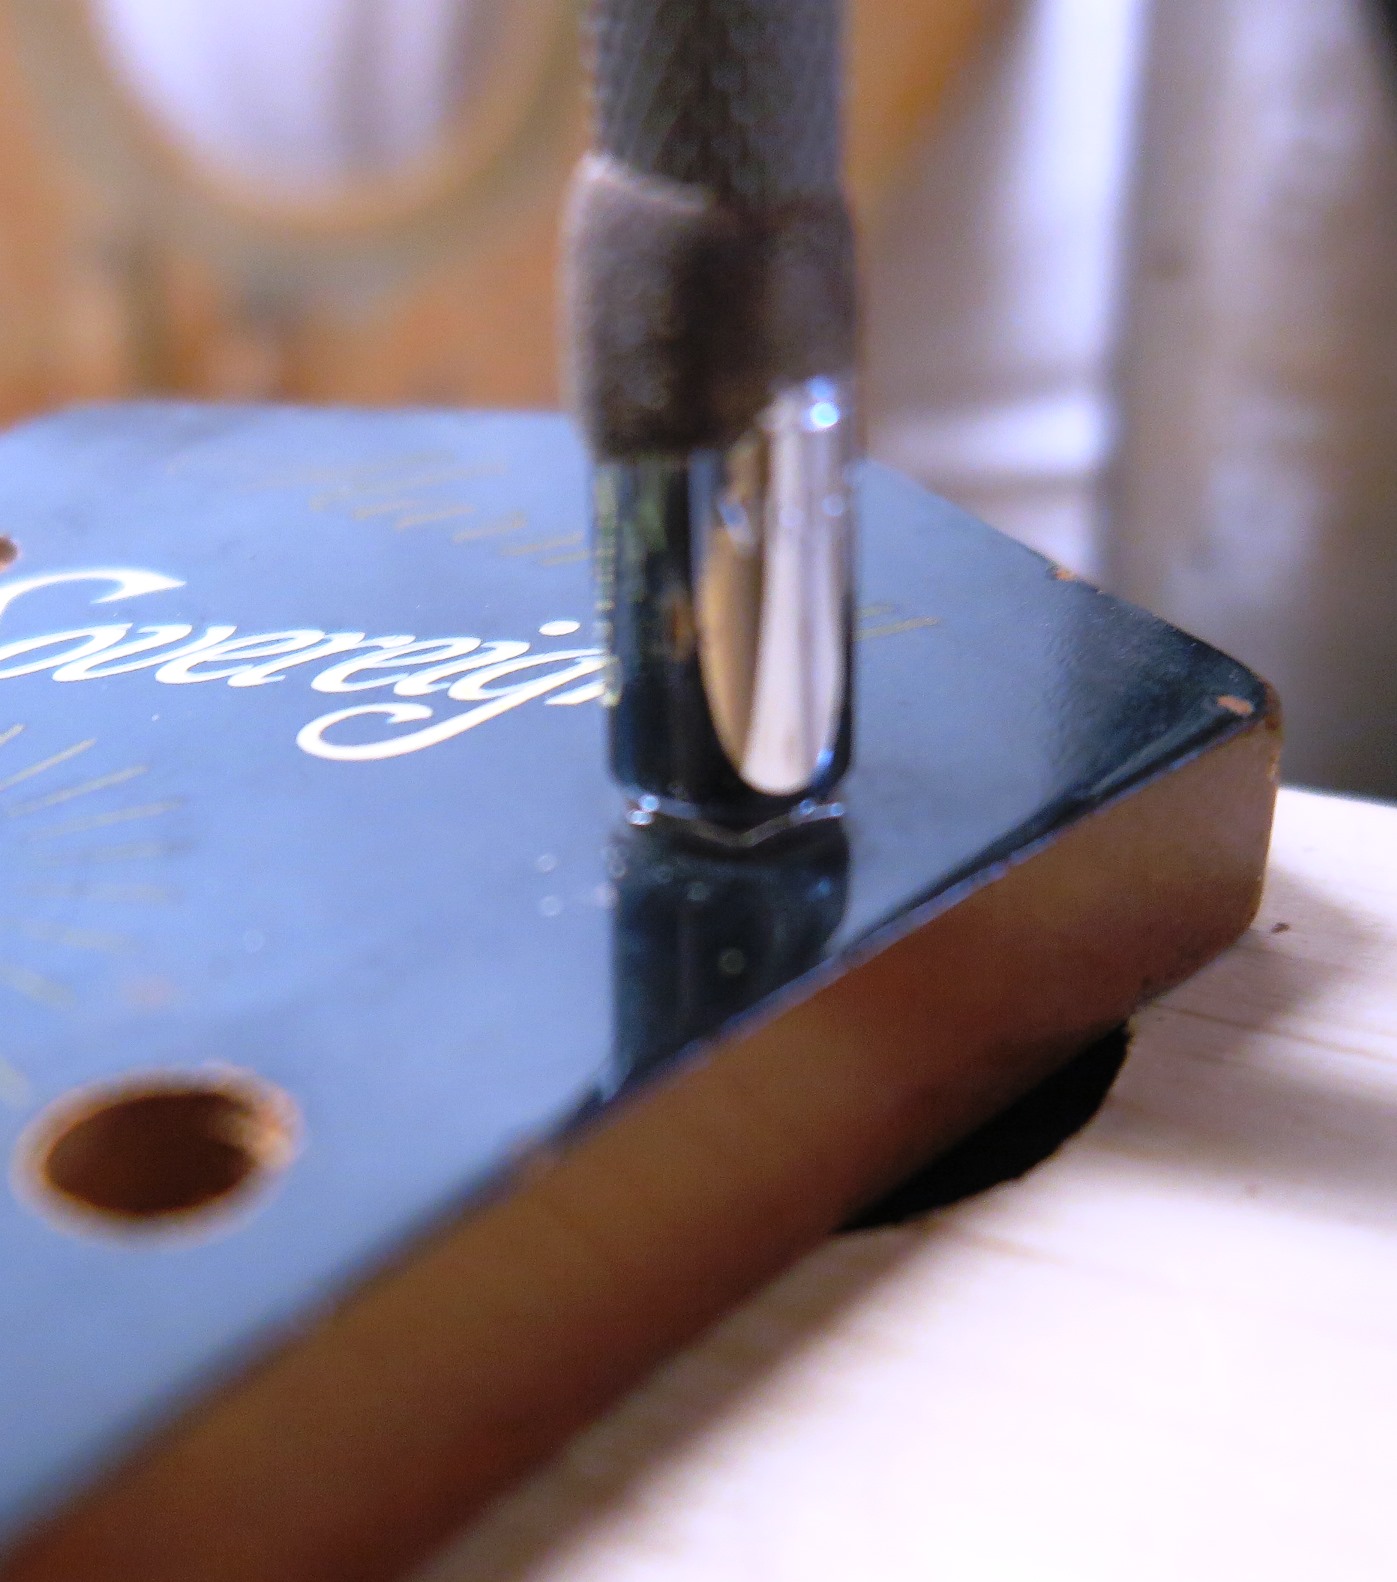
To avoid splitting that 50-60 year old mahogany, it is a very good idea to widen the entry hole. So if the bushing installation diameter is 11/32 inch, what is the diameter of the drill bit to do this? The next image show a 13/64 inch drill but with tape on the end. This limits the widening depth to 1/16 inch depth. You can see the resulting shallow but wider diameter hole made by the drill bit.
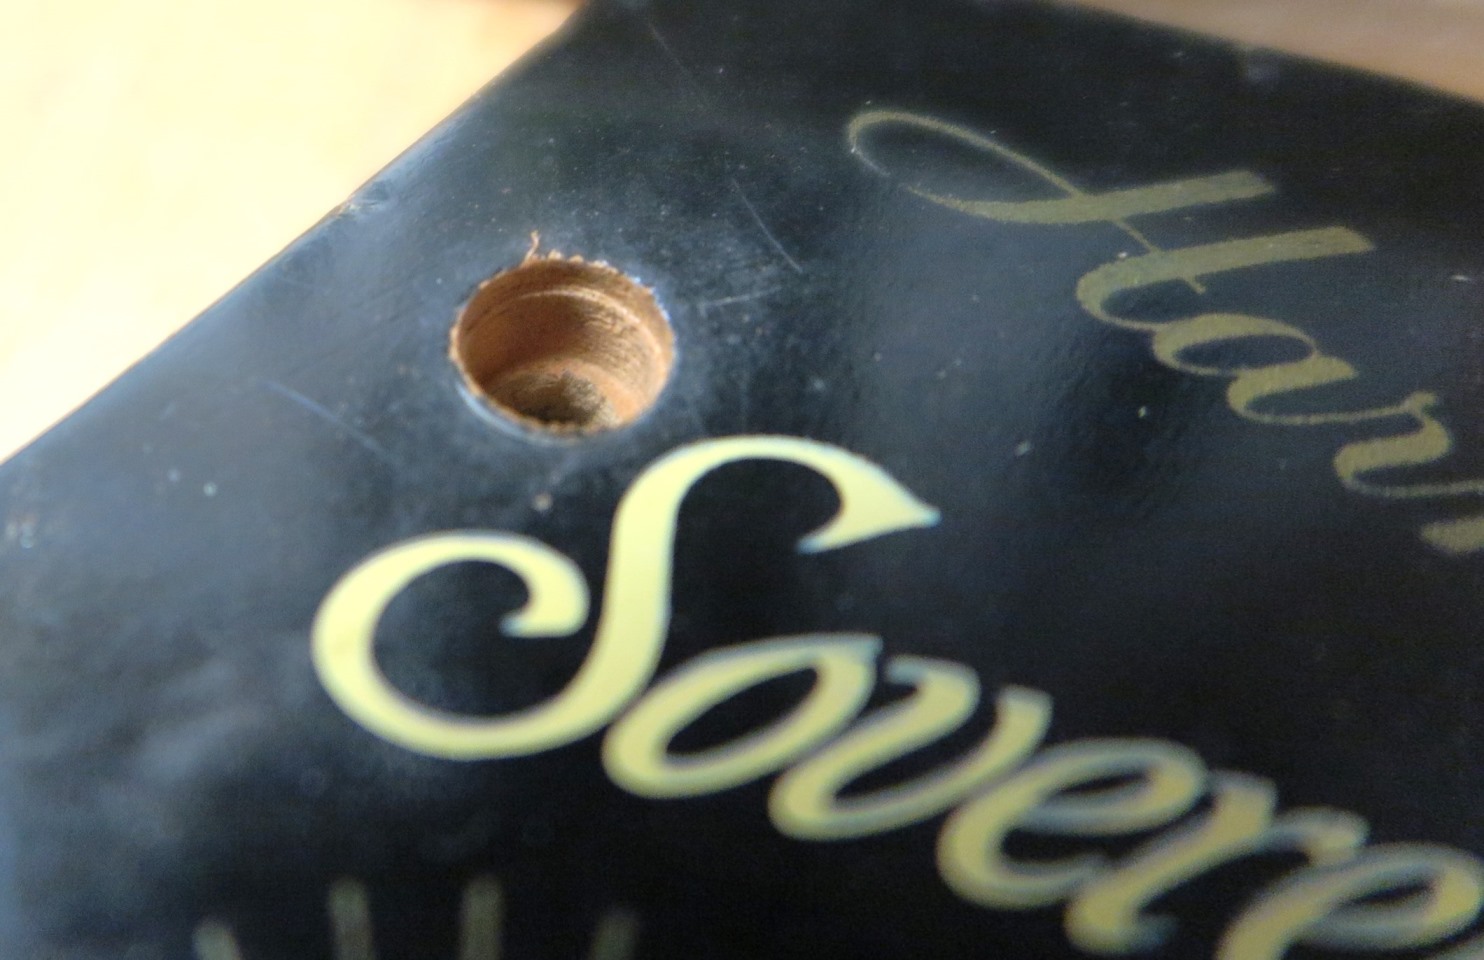
View of the 1/16 inch depth widened hole in the tuner holes. You are now ready to press in the bushings.
Next image shows our bushing alignment punch in action. This is a 1/4 inch diameter punch with a small socket glued to the fat end of the punch at the high end of the round shaft. Note that I am holding the bushing all \ the way up on the 1/4 inch diameter punch shaft. Next put the 1/4 punch shaft into the gear head hole. Slide the gear head right up against the bushing. This guides the bushing into the hole for a perfect press fit installation using the power and aligning capabilities of the drill press.
Starting to press the bushing in (Double checking alignment.) Note that the gear head is raised up off the 2 x 4. This aligns the bushing with the newly cut installation hole and with the tuner post hole. The tuner posts have to go through here, remember? Now you can see what the huge hole in the 2 x 4 is for. This provides enough height to prevent the end of the punch from striking the drill press table. Also, hemlock is nice and soft and won't scratch the back of the gear head. Also, the 1 5/8 thickness of the 2 x 4 keeps the guitar neck off the drill press table.
Bushing pressed home. When pressing the bushing into the gear head, the back of the gear head must rest flat on the 2 x 4. Otherwise you can easily split the gear head. Go slow at this point.
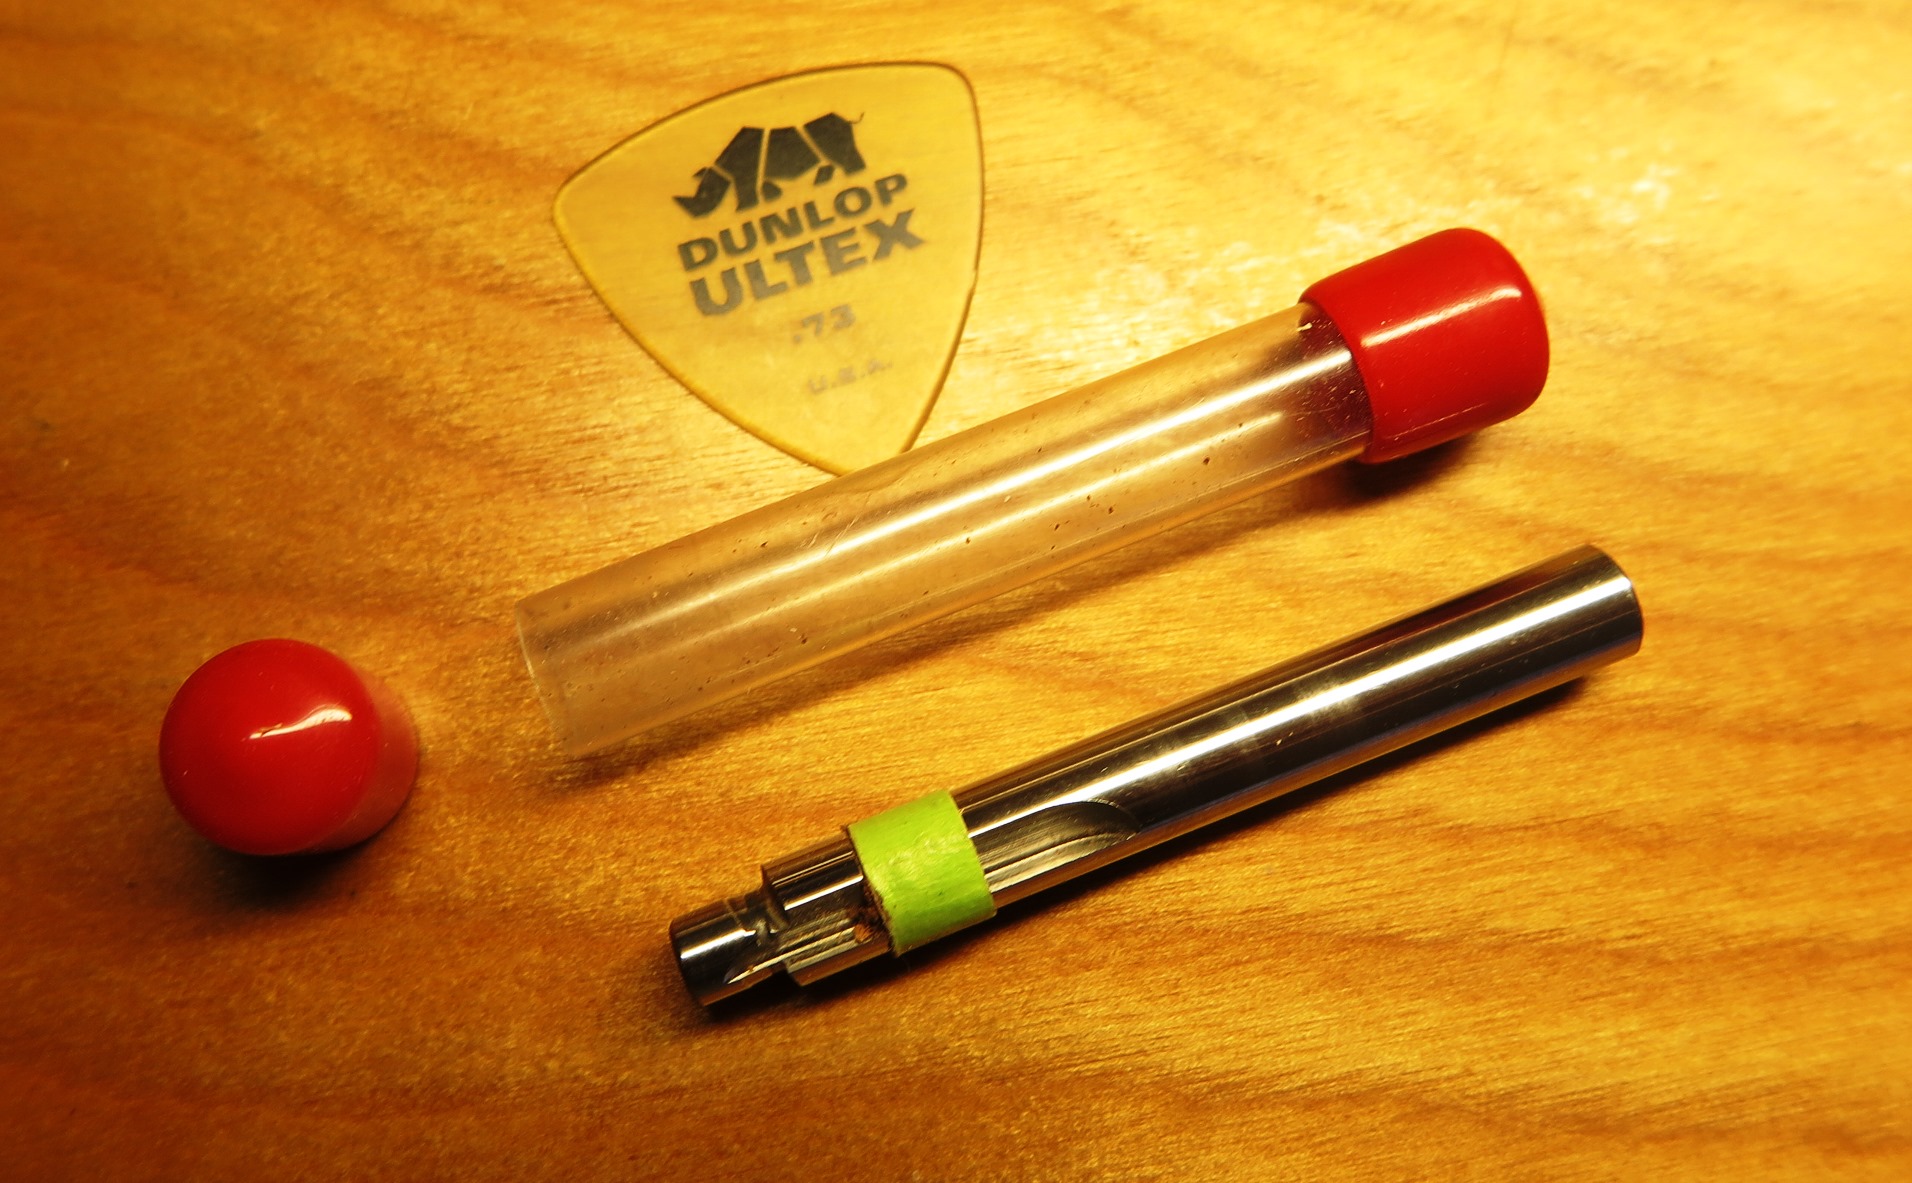
This shows the cutter/reamer. You can see the 1/4 inch pilot on the end. Next to that is the cutter. I hesitate to call this simple tool a reamer because every reamer that I have used has many cutting edges. This only has one cutting edge. So it cuts hole, but also reams because of the 1/4 inch pilot. You also see an exciting image of my favorite guitar pick. Old hands need a huge pick. You can also flip flap jacks with this pick.
A note about buying solid metal bushings not associated with a matching tuner set. Online vendors are terrible about supplying accurate bushing barrel diameters. The OD of the bushing barrel must be press fit into a correctly sized hole -- to the sixty forth of an inch. Even more important, the ID of the bushing must closely fit the tuner post. It is waste of time to install a bushing that does not fit the tuner post very closely. Bushings that come with new tuners should fit the tuner posts precisely. It is not a friction fit, more like a sliding fit. Grover Sta-tites have the best bushing to tuner post fit I have seen so far. Sta-tite bushings must be precisely fit to the gear head. Same for Grover Rotomatics and all other similar tuner sets. If you care enough to do a good job of tuner fitment, use a drill press, not a hand drill.
©2019 D.R. Hanna