Re-fretting The Bound Fretboard
Many vintage guitars need re-fretting by now, especially if the original frets are present. There may also be extensive fingernail divots. (Why do people pay big bucks for a nice guitar, then play with long fingernails?). And I really don’t like to see frets "dressed" to unusable flatness. Yuck! Also, it is often the case that the board binding is loose, missing or just plain ratty looking. In this article I hope to describe my fret replacement techniques. Take note that this is the easy part. Finishing the binding requires much more skill. By the way, a tip of the hat to Emory Knode, propriator of Appalachian Bluegrass Shoppe, Catonsville, Maryland for generously sharing this technique with me many years ago. Great guy and a wonderful shop. He is as good as they get.
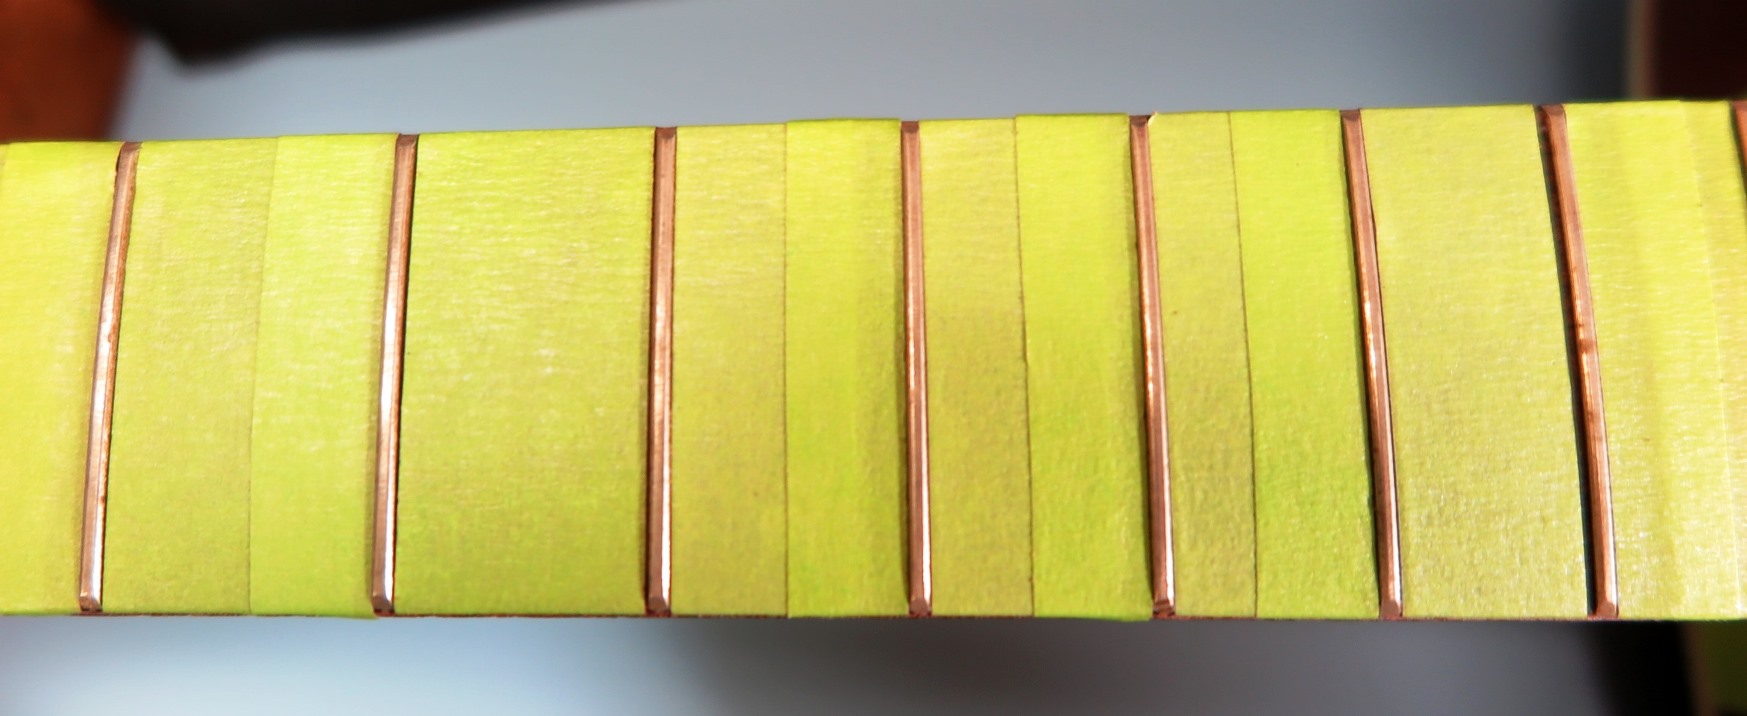
The first image shows the carefully taped board using 3M 2060 "For Hard to Stick Surfaces" tape. The tape extends right up to the sides of the frets. The binding is already removed and discarded. It came off in little broken pieces.
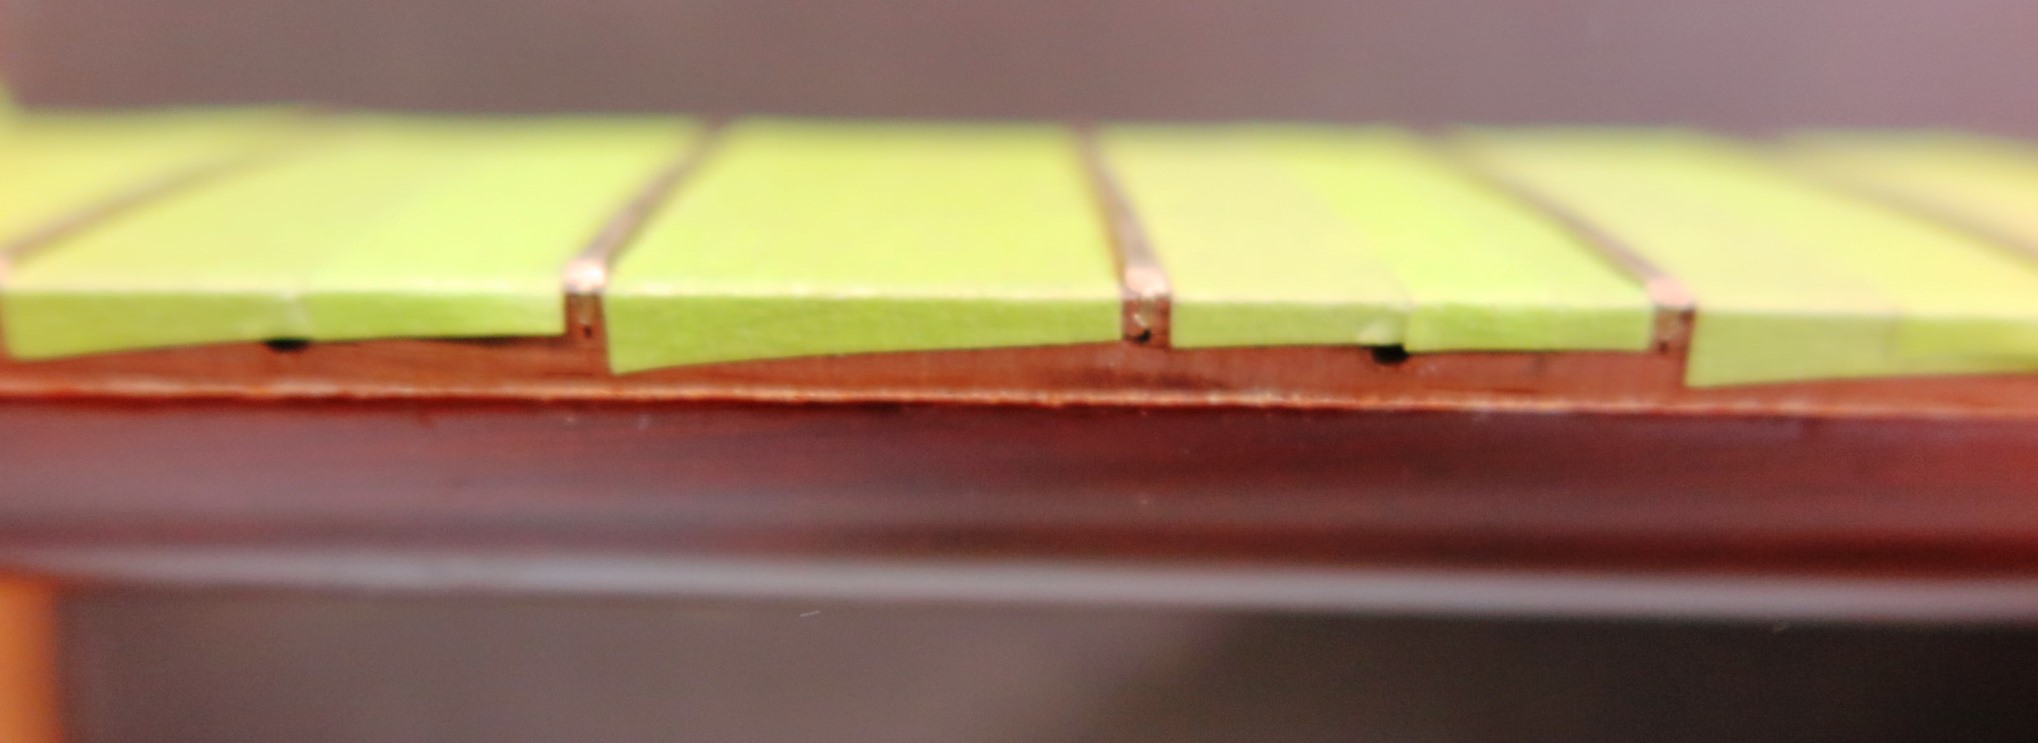
The image below shows the fretboard edge. Note that the tape never extends below onto the finish but stays within the binding rebate. I will explain more about this below.
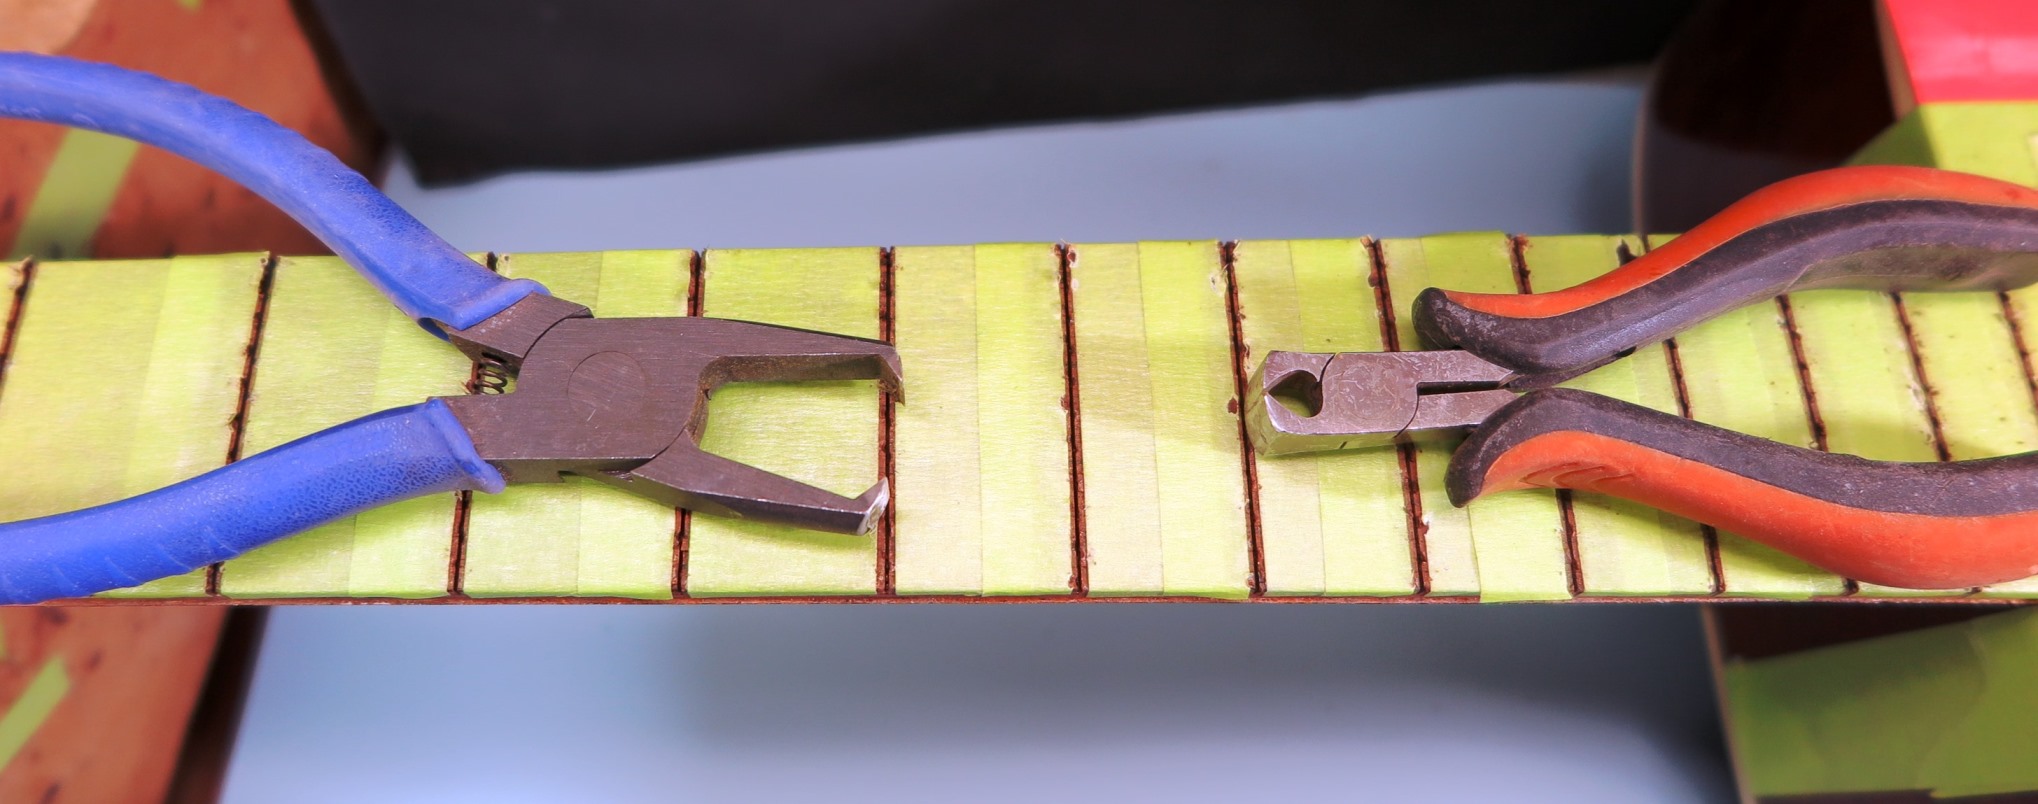
Next, the frets are removed. This guitar had frets with very deep tangs. To reduce chipping in that old fretboard, first start the fret, than pull it with the raiser. Use two tools: the sharp edged fret grabber (left) and the not so sharp fret raiser(right). The sharp grabber is great for starting even the most stubborn frets. This tool does not always pull the frets all the way out. And I sure don’t want to rock the tool back and forth as this tends to cause chipping. The riser tool usually reduces chipping.
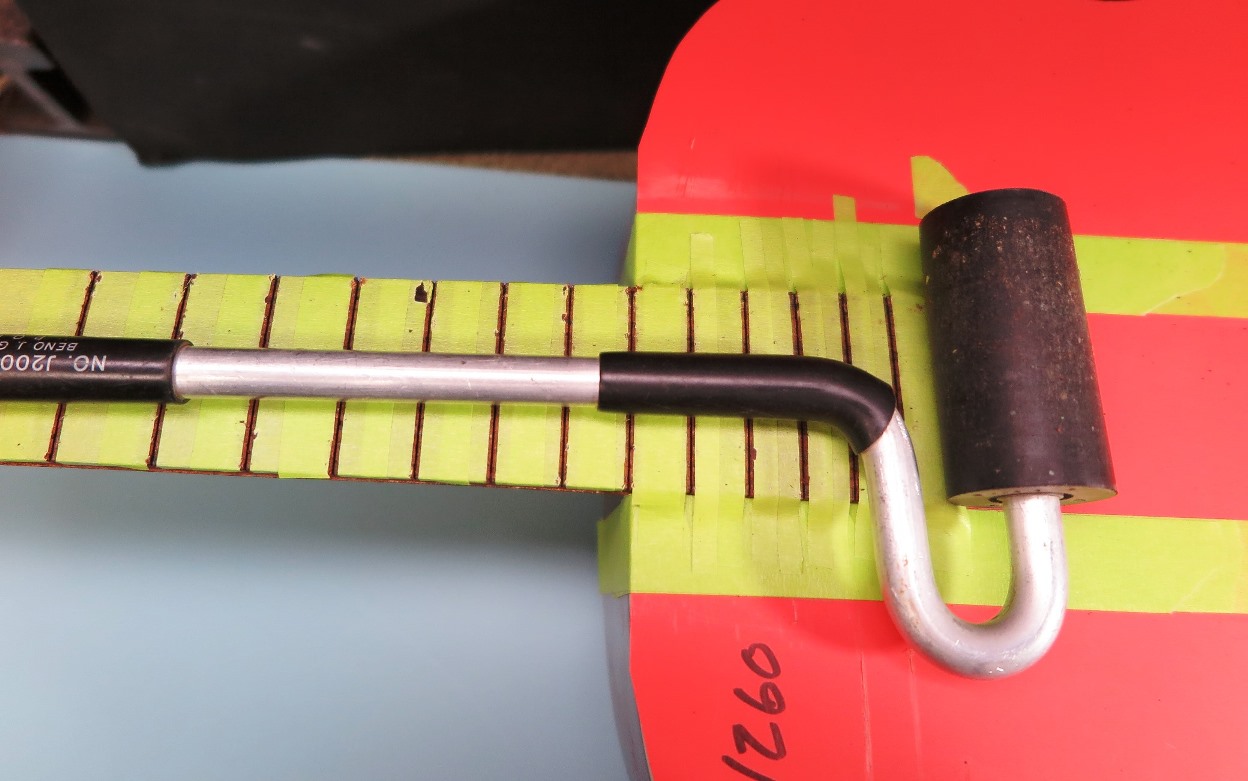
After the frets are all removed, keep the tape in place. Use a veneer roller shown below to press the tape and any chips back down into place. Chips, chips, there are always chips. Keep the tape in place.
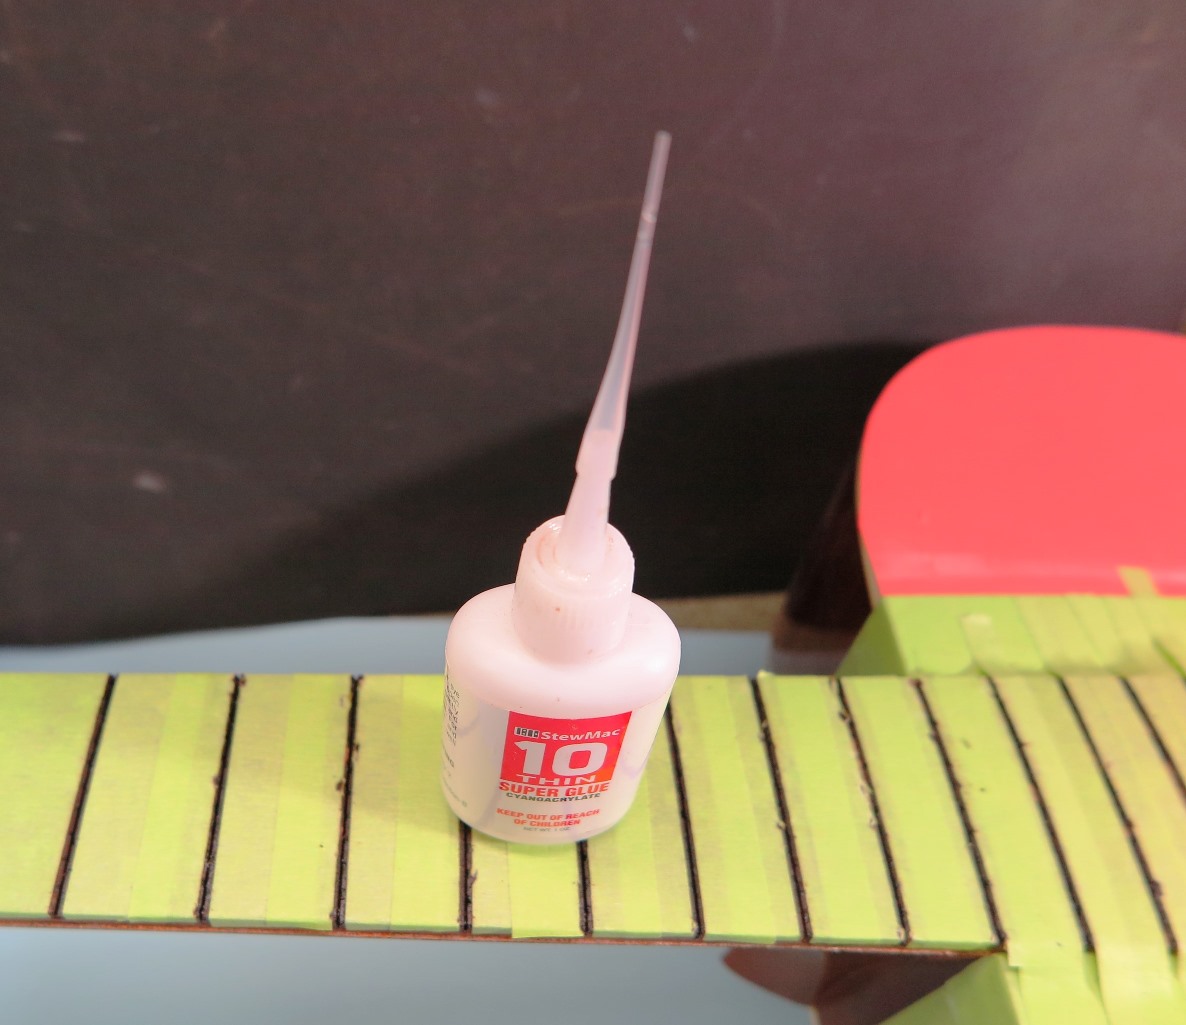
Use Stewmac thin CA glue with whip tip to run a very small amount of adhesive into every fret slot. You want to just soak the slots, not fill them up. And, yes, the CA runs under the tape. Believe me, the clean up and board reconditioning are well worth the mess cause by a little green tape stuck to the board. Now you can see why it is important to keep the tape above the neck finish ending in the binding rebate. Unless you are profligate with the CA glue, it won’t run down on the neck finish.
Wait at least an hour. Do not use CA glue speed dry chemicals. When the tape is removed, scrape and sand the board clean of all tape and CA glue residue. Just sand the board to 150 grit. Finish sand after the next step.
The best tools by far for widening fret slots are the Hosco brand fret slot saws. These come in four blade thicknesses, but in my opinion, only three sized are need for most jobs. Those sizes are .019, .022 and .023. I am assuming you are using frets that require a .023 wide fret slot. Be very care fill with these saws. They cut exceptionally fast and efficiently. Keep your fingers away from the cutting edges. The best thing about the tooth design is that they keep an edge for a long time and consistently cut the desired kerf.

©2022 D.R. Hanna