Replacing Marker Dots
Heating the fret board extension prior to neck removal requires removing the marker dot between the 14th and 15th frets. The Harmony marker dots melt at a much lower temperature than the heat required to soften the PVA or hide glue they used to stick down the extension. So we remove it to preserve it. And who wants to pay good money for a Mother Of Toilet seat (MOT) marker dot?
This explains a neat way to restore that marker dot.
Oddly, the original glue usually shrinks down into the hole away from the dot. If you try to replace the dot in the original hole, it tends to sink into the fret board wood. This is not good since a nice smooth dot installation is desirable.
There are probably other ways of replacing a marker dot, but this method is quick and it works.
Here are the steps for reinstallation:
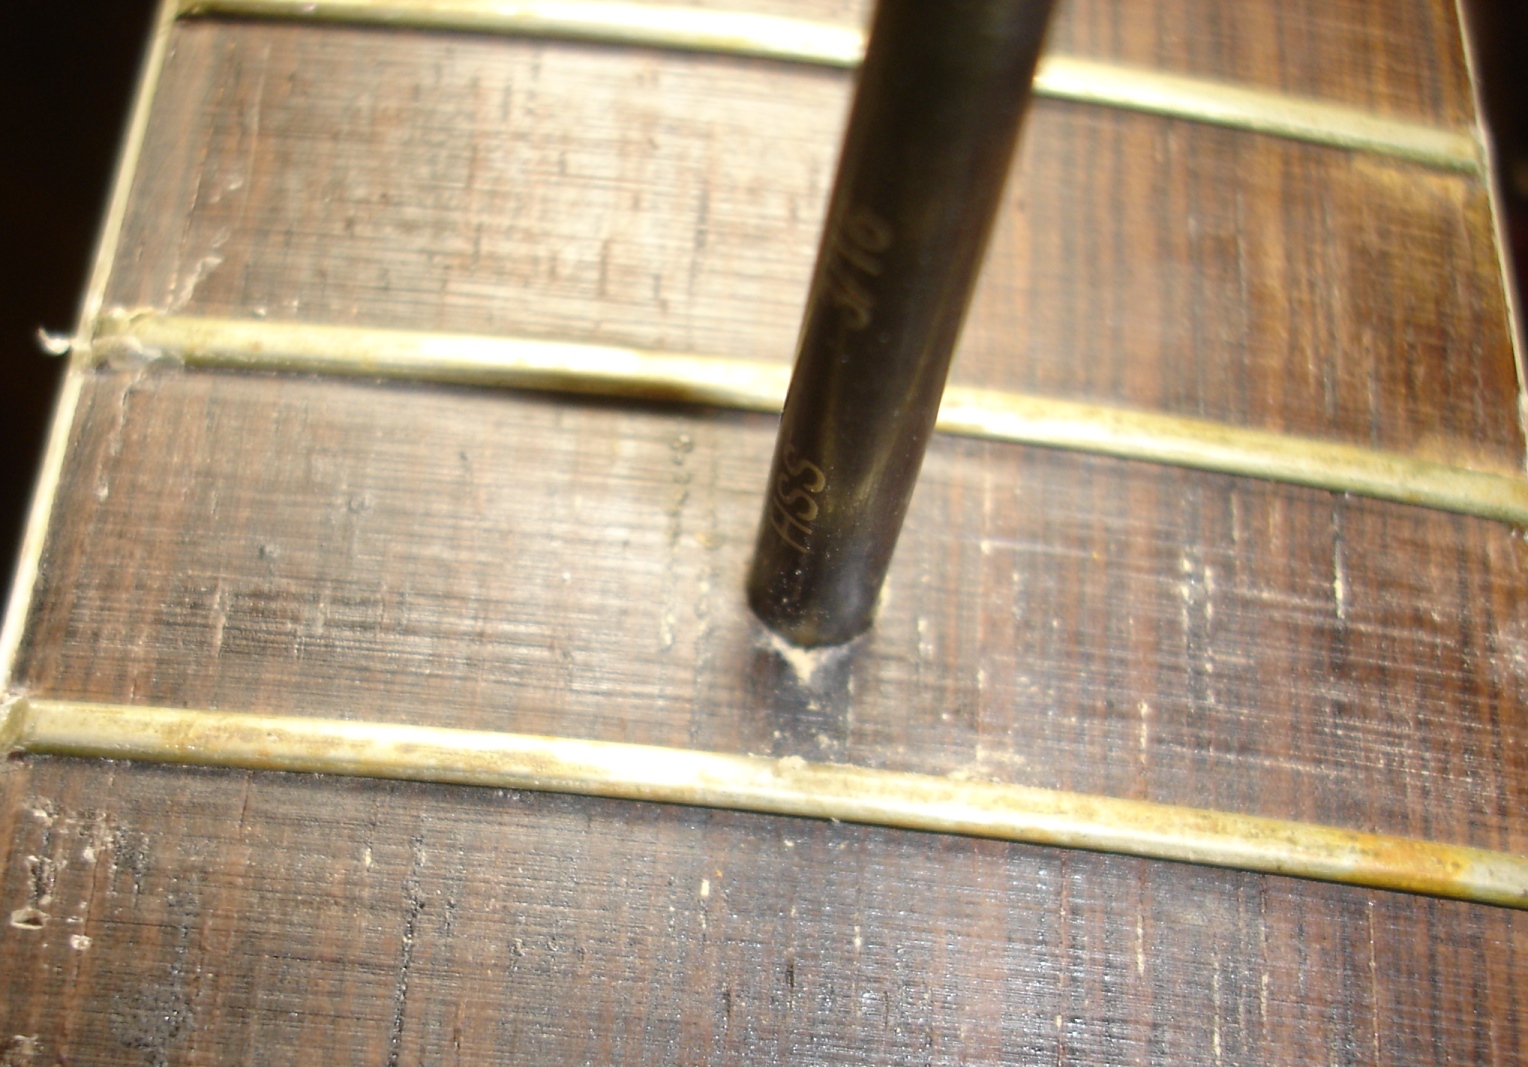
- Remove marker dot using a sharp pointed tool.
- Drill out the old adhesive using a brad point bit.
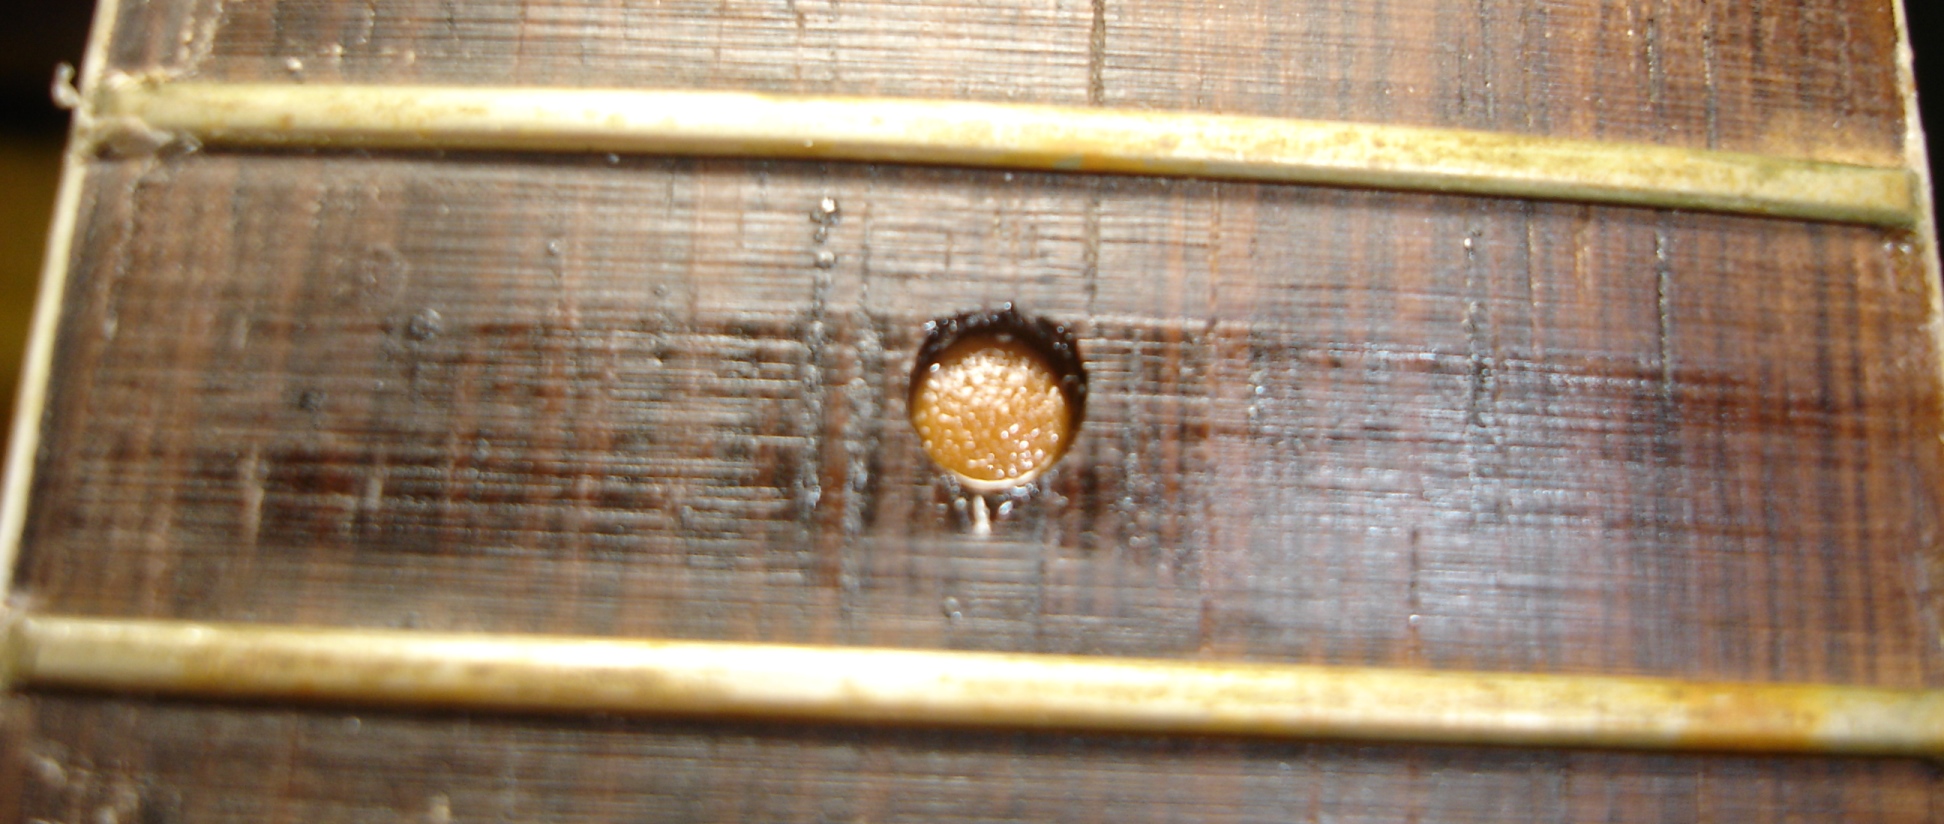
- Back fill the hole using Cherry dust and pack with same drill bit.
- Solidify the cherry dust using thin CA glue.
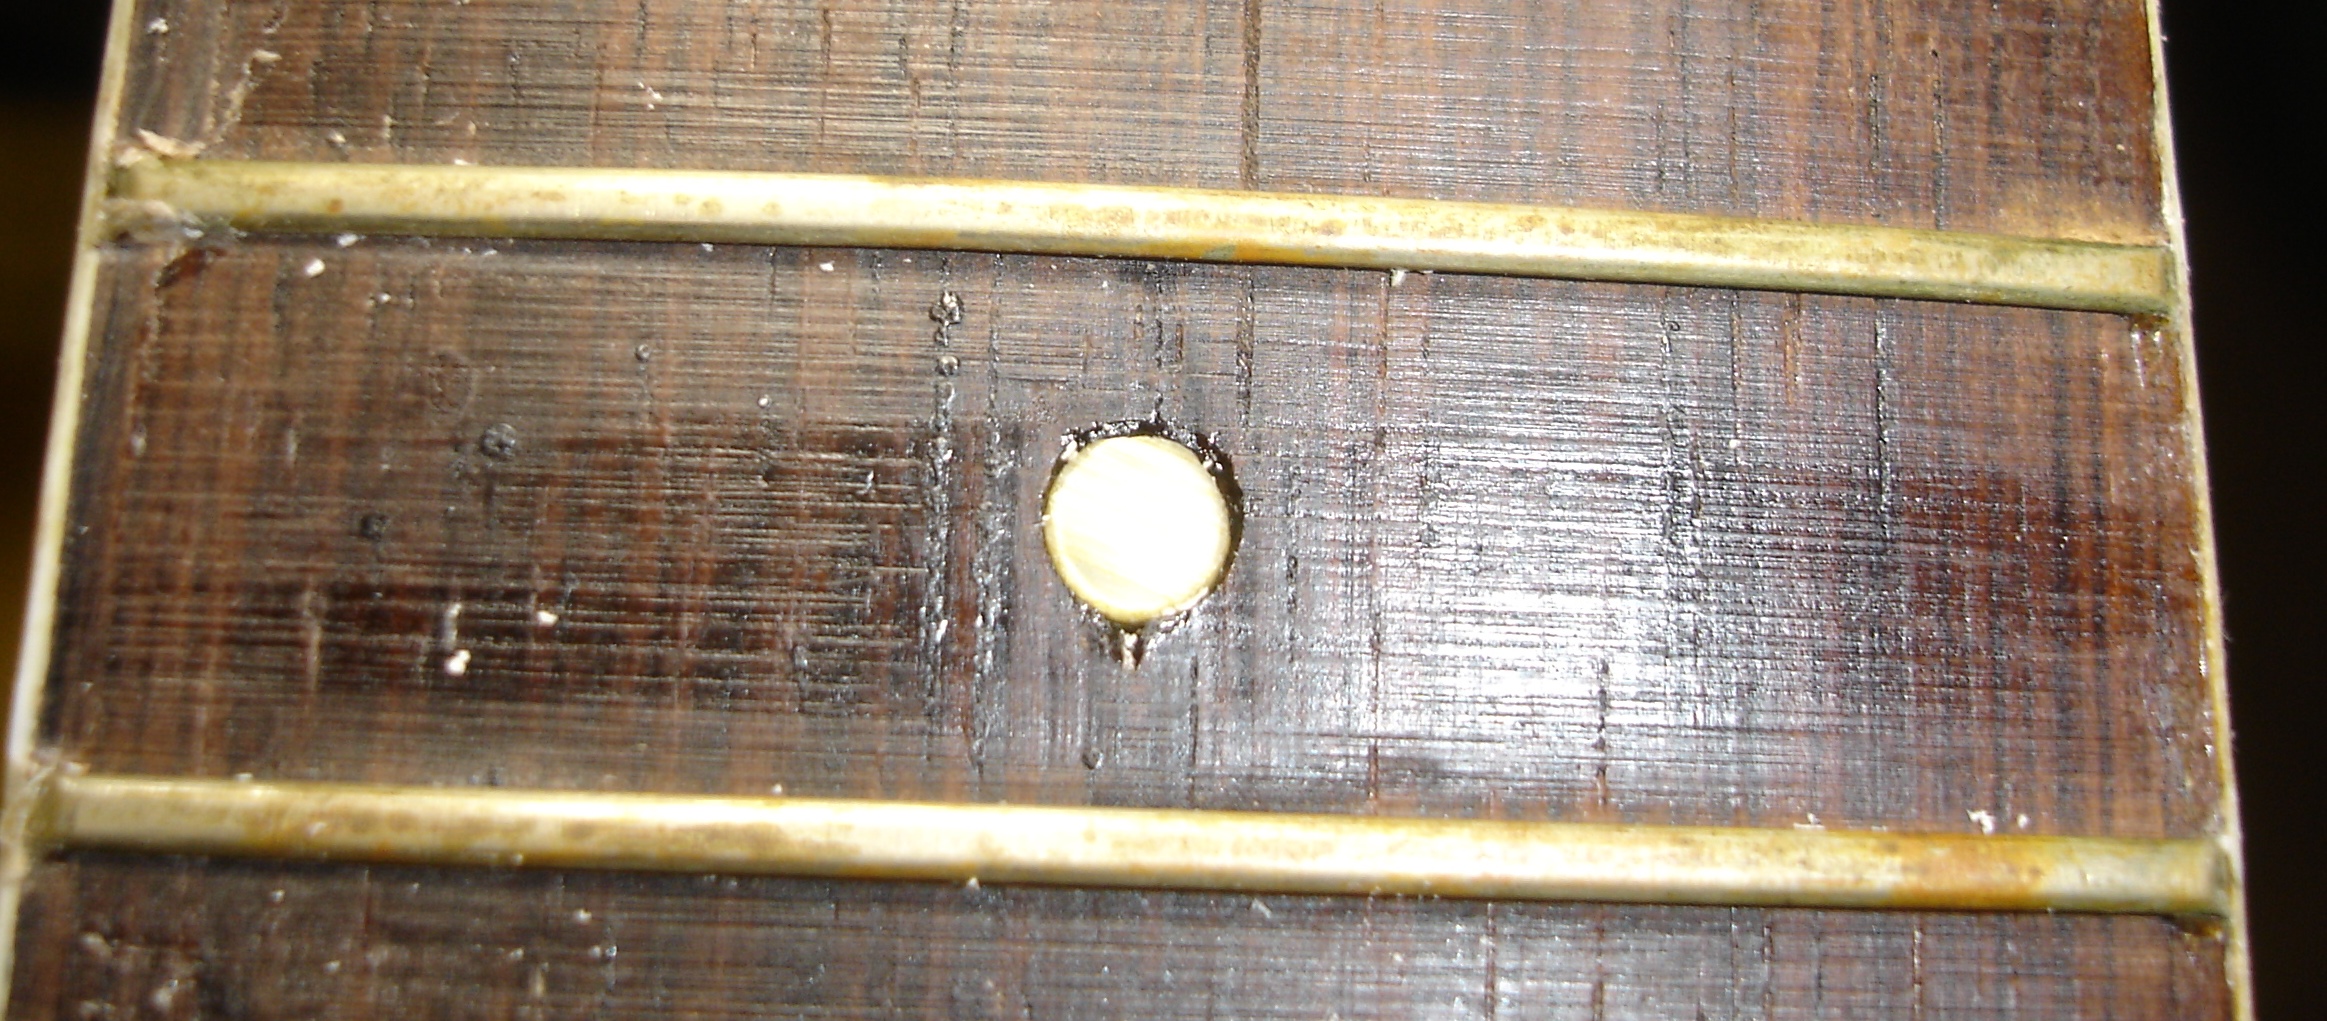
- Drill the hole to desired depth using same drill bit sharpened to a flat cutting end.
Why use cherry dust? Cherry is the most absorbent hard wood. That is why it is so desirable in the furniture industy. Cherry absorbs stain better than any other furniture quality wood. It absorbs thin CA glue better than any other substance we have found. CA and cherry dust dries fairly hard. The resulting filler drills very nicely.
In this image, the marker dot hole is drilled to 3/16 inch or 11/64, depending on the dot diameter. The hole is filled with loose cherry dust and packed with a drill bit.
This shows the hole after thin CA is dropped in.
Below the marker dot is now glued into the hole prepared above. Just before the dot is inserted, we measured the thickness of the dot. Then we measured the depth of the hole using a digital micrometer. At first the hole was too deep, so we added more cherry dust and thin CA. Then the hole was too shallow. A little drilling with a ground down drill bit and the depth is just right. Later, we will neaten up the edges of hole with CA and rosewood dust. Though it does not look like it in this image, the dot is perfectly flush with the fret board surface.
Please ignore the mess on other areas in these images. More clean up is needed.
©2016 D.R. Hanna