Slotting Jig for Acoustic Guitar In-situ Bridge Slotting.
MOONLIGHTLUTHIERS BRIDGE SLOTTING JIG
Materials
- 3/4" X 30" X 20" plywood (cabinet grade, veneer core)
- 1/4" X 20" X 20" plexi-glass sheet stock (clear)
- 3/4" plywood scraps for clamps
- 2 each 1" X 12" stick on felt strips
- four fender washers with 1/4" holes. These go under the knobs described below.
Tools
- Dewalt #611 plunge router or similar
- 4 each 1/4" X 20 jig knobs with large knobs.
- 1/8" to 1/4" shank adaptor
- 3/32" down cut router bit
- 4 each 3/8" or 1/2" hollow rubber bumpers.
- 12 each 1 1/4" #6 wood screws. Deck screws are best. Wall board screws will break.
Procedures
This only explains how to build an in-situ bridge slotting jig. By adding a backing 3/4" piece of plywood behind the square opening, you can also slot bridges as needed when stuck to the backing sheet. The jig works the same both ways.
This slotting jig is infinitely adjustable to fit any flattop guitar and any slot position or angle. In fact, this jig is so accurate that it can perfectly align a 3/32" router bit with a 1/6" OEM Harmony saddle slot and allow re-cutting the slot only removing the OEM plastic saddle and 1/64" on each side of the original slot. (1/64" + 1/64" + 1/16" equals 3/32" which is the finished thickness of a new bone saddle.)
Verify via very detailed measurements exactly where the saddle slot should be. Many Harmony guitars are not correctly intonated. You may have to rout away the original saddle, glue in some filler wood to match the bridge wood, plane and sand smooth, then re-slot if there is enough wood in the bridge. The foregoing explains a second reason why we almost always replace the OEM bridge with a new rosewood bridge. (The first reason is that Harmony string through bridges are a massive PITA!!)
To align the router bit with the bridge slot location, or to remove an OEM 1/16" Harmony plastic saddle, adjust the router and router bit on top of the jig on top of the guitar body so that the cutting end of the bit is aligned with the slot location.
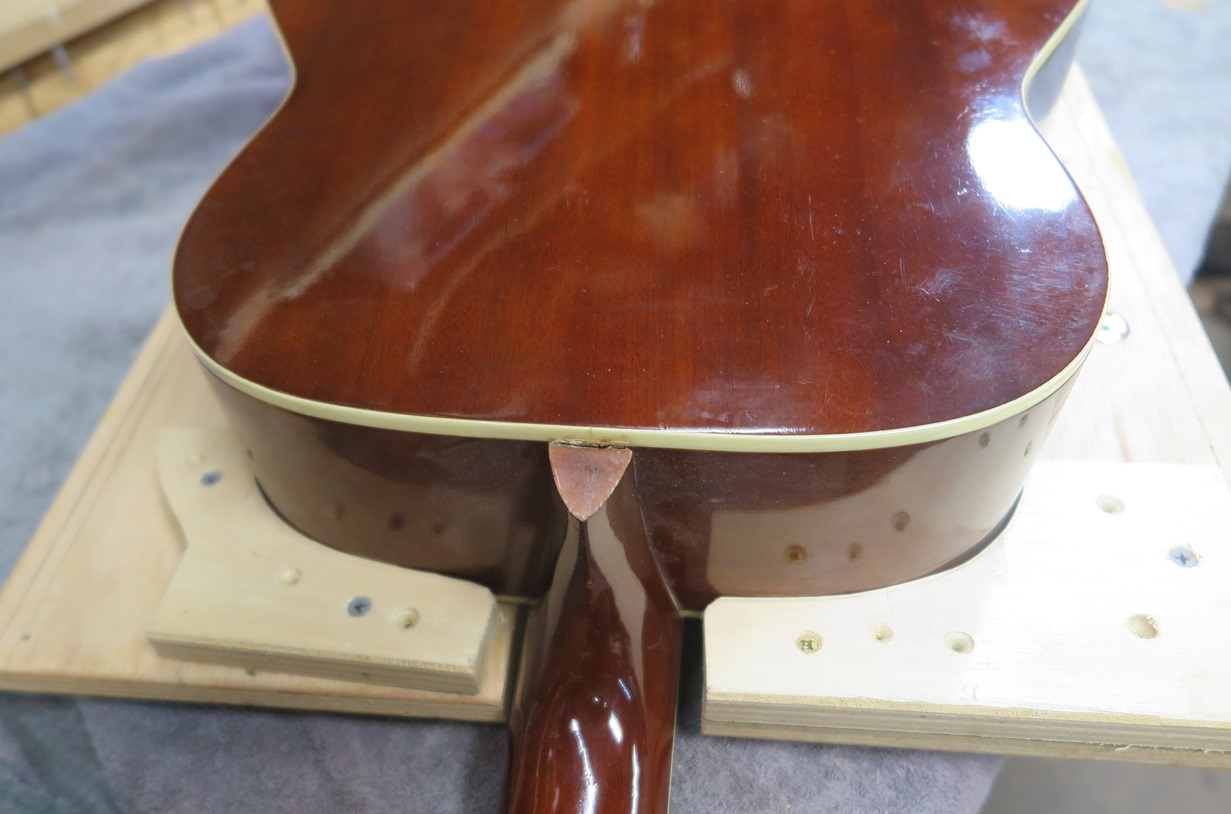
Images #1 and #2 show the guitar sitting upside down on the jig platform. The platform is a 20 X 30 inch sheet of cabinet grade 3/4" plywood. Very good quality veneer core plywood is used here. In order to cut a flat saddle slot bottom the jig working surface must be flat and stable. Best quality 3/4" birch veneer ply would also work.
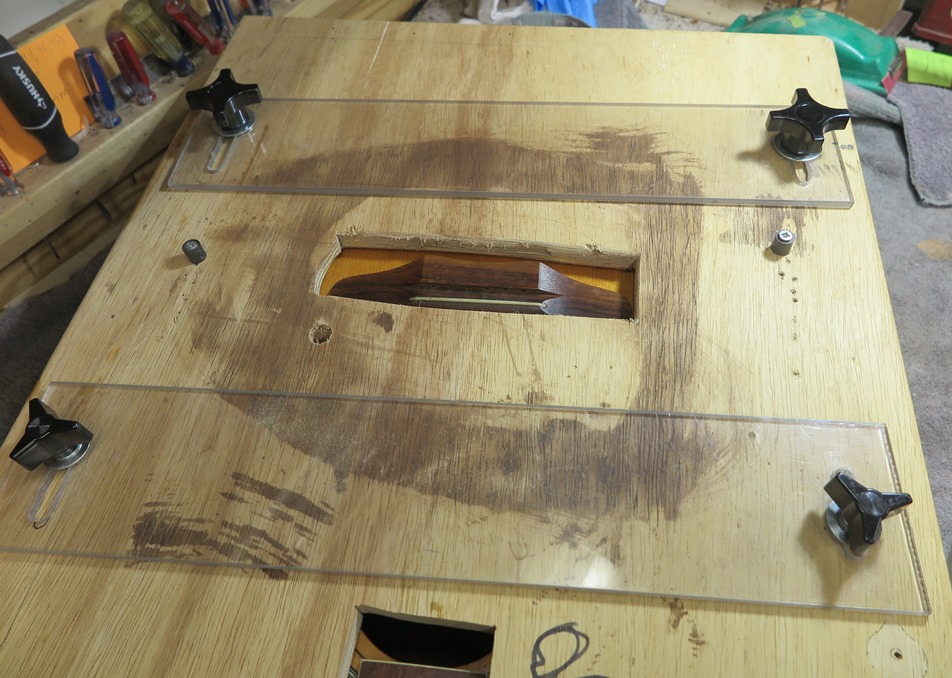
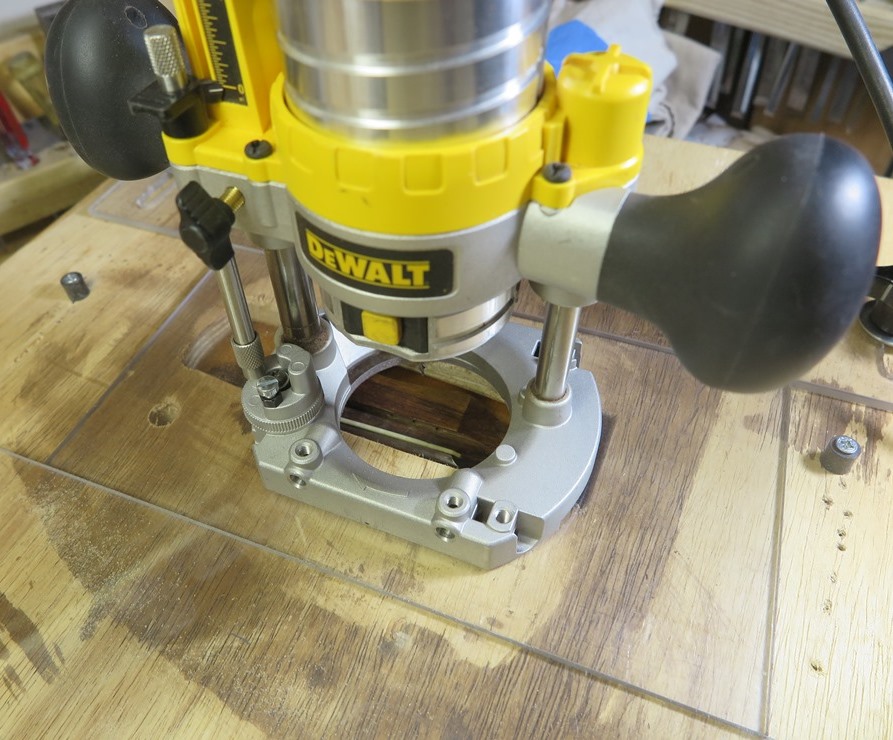
Images #3 and #4 show the working side of the platform. The jig with guitar clamped in place so that it cannot move even the slightest little bit is turned over with jig on top. There are two guides bolted to the top with the jig knobs. These plastic sheets are slotted for adjustability. There is also a flat plate with perfectly square sides screwed to the router bottom. I used a cone sander on my table saw to achieve perfect parallel edges on this piece. You can see the guide plate on image 6.
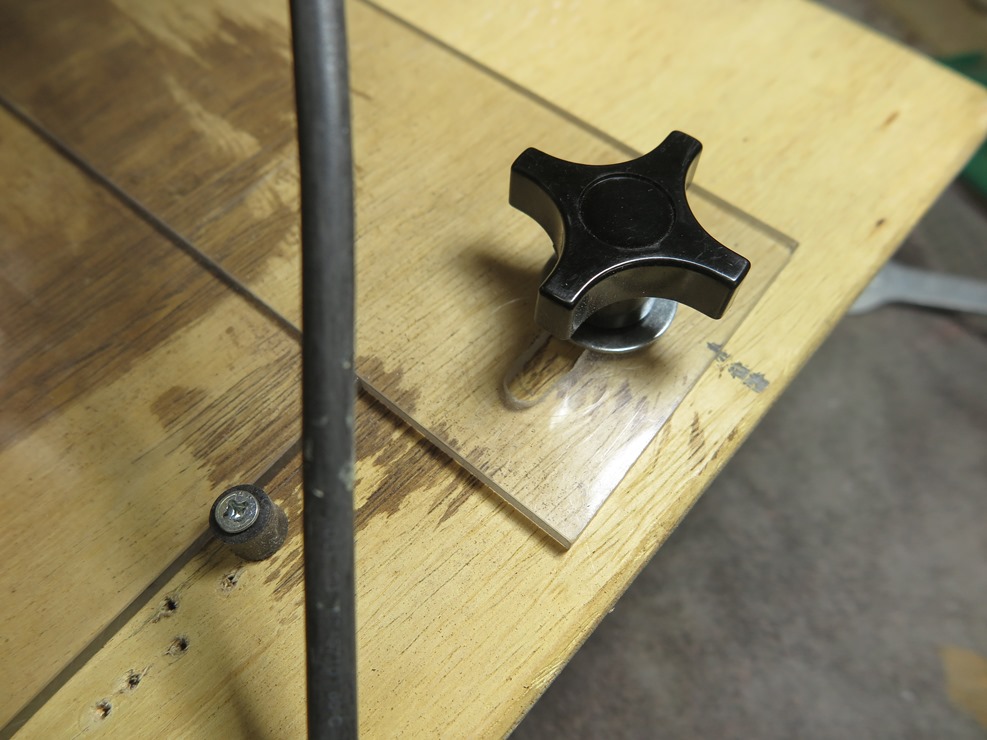
Image #4 shows one of two rubber bumpers positioned to ensure the router can only cut the slot exactly as long required. A tool long slot is a big problem. The guide sheet screwed to the router bottom runs into a bumper on each side.
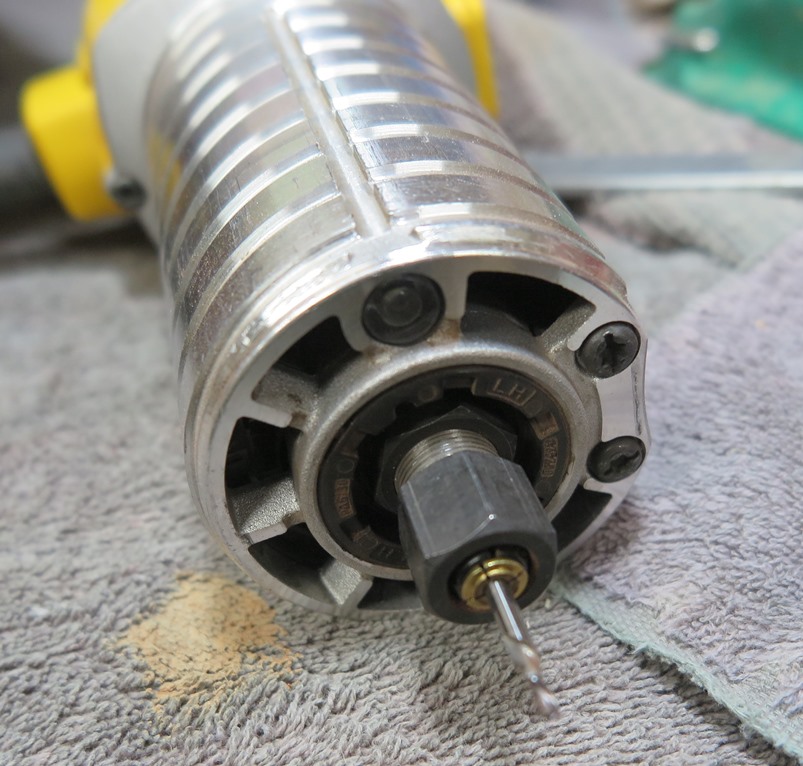
Image #5 shows the 3/32" down cut router bit installed in a 3/32" to 1/4" brass adaptor and then mounted in the router drive shaft. A down cut bit is important because any other bit will chew up the top of the bridge around the slot as the slot is cut.
Triple check the following before routing a new slot:
- Slot location for correct intonation according to scale length
- Slot depth
- String width spacing over the saddle as they align with the fret board.
- Pin spacing according to #3 above and (A) bridge distance from lower bout side of bridge (B) distance from saddle slot. Mid-point of the pins is not necessarily the best location. Pin alignment in a straight line parallel to the saddle slot is best for stability and top strength.
- Desired action settings Make a wooden straight edge just short enough to fit between the nut and the saddle, less 1/2". When the action is correctly set at the bridge surface, the end of this straight edge resting on the tops of the frets will hover 1/16" to 3/32" above the sound hole edge of the bridge.
- Do not attempt to set saddle height until all frets are installed and adjusted. We usually wait until the neck and saddle are on the guitar.
- Start with the saddle too high and adjust downward. Match the arch of the saddle top to the arch of the fret board. However, the saddle arch is not usually parallel with the arch of the fret board. High pitch strings can be set lower than the lower pitch strings.
There is much more to this procedure than can be explained here. Practice makes perfect. Practice on an old junk guitar.
© David Hanna 2017
(1) Body Upside Down On Jig - Lower Bout "Clamp"

(2) Body Upside Down On Jig - Two Upper Bout Clamps. Sometimes Four are required. These clamps can be moved to accommodate any sized guitar.
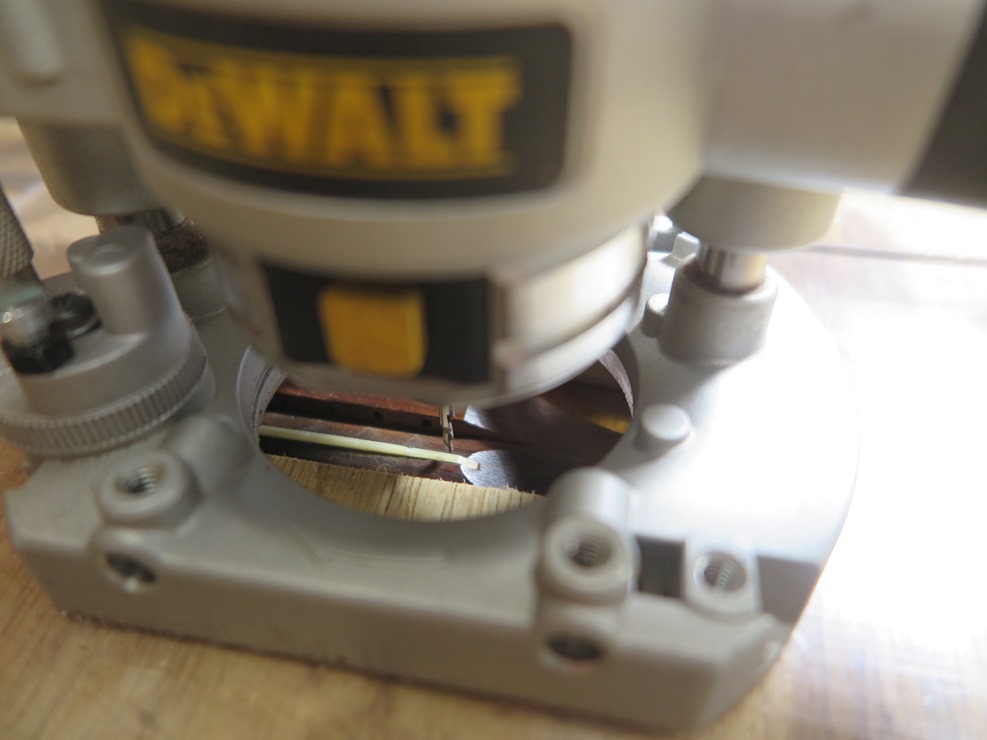
(3) Bridge Peeking Through Plywood Jig With Guitar Underneath
(4) Rubber Bumper Detail (The bumper is just to the left of the black power cord.)
(5) Router Motor With Bit Installed
(6) Router Assembly With Guide Installed. The router is mounted on top of jig with the movable guides ready to force an accurate cut.
(7) Ready To Cut New Saddle Slot. In all cases, the original saddle is routed flush with the top of the bridge before the slot is cut (not shown). A larger straight bit is used for this.
The key component of this jig is the guides. These are 1/4" plexiglass. All edges are made dead straight using a cone sander and the rip fence on a table saw. Can’t do it any other way.