Tape Trick 3
The most difficult task in guitar rebuilding is applying new binding adjacent to finished surfaces. I’d rather do ten resets to one binding job.
You have to work fast with most adhesives. Add glue, press, wipe, and tape, add glue, press, wipe, and tape etc. You will see videos showing repair guys using super glue and other concoctions. These are not such a good idea when working near finished surfaces. Super glue wicks under binding tape and makes a huge mess. Many other glues purported to adhere to plastics will eat guitar binding plastics. They cross link too much and too fast.
We now prefer Bind All sold by Stewmac. The instructions say you have to wipe it off to avoid damaging finished surfaces, but our finding is that we are not able to wipe fast enough to avoid finish damage. Plus, the tape hides the squeeze out such that it cannot be wiped off and therefore damages the finish at that point. So we came up with this technique.
Step 1. (Not shown here.) Apply a three inch wide tape barrier to the guitar sides and back. Assuming new binding all the way around, this continues all around the back and sides.
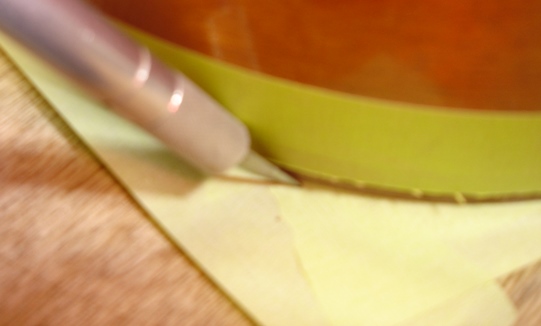
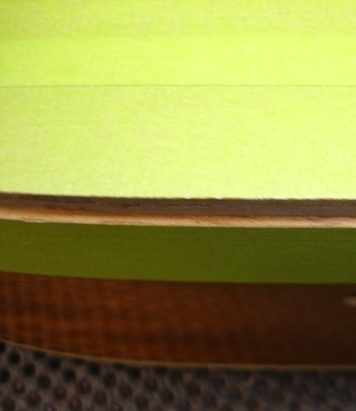
Step 2. Trim away the excess. You want the tape to stop just at the edge of the back.
Ready for binding and adhesive.
If you are concerned about getting glue on other finished surfaces during the high speed and very awkward binding adhesion procedure, add more tape on those surfaces.